How to set up a VPN server on CREODIAS

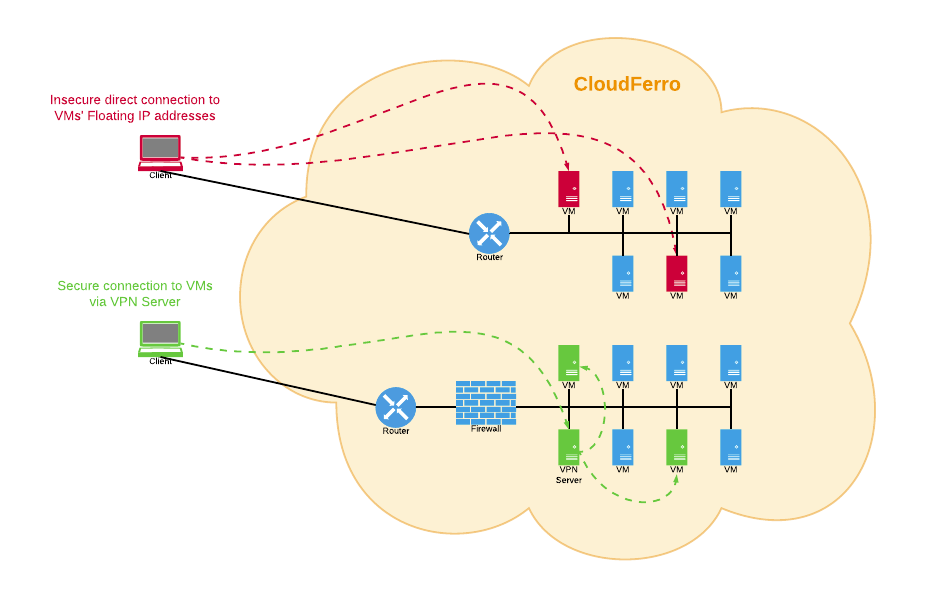
VPN allows connecting to a remote network which is hidden behind firewall and the hosts in the remote network are not accessible directly via Internet. The connection is established over a secure, encrypted tunnel, created between a VPN client running on your desktop PC and the VPN server.
Here we have described a sample and simple scenario of creating a VPN server in CREODIAS infrastructure and setting-up a connection on the client’s side, using OpenVPN.
In order to define a new VPN server for your internal network open your Horizon Dashboard (https://cf2.cloudferro.com).
Note
It is important to write down names or IDs of internal network that should be accessible from VPN (most frequently it is the network with “private_” prefix).
Choose Project → Network from the dropdown menu on the left pane.
In this test case I am looking for private_network_02722.
When the names are written or copied, we can start to prepare a deployment of OpenVPN environment.
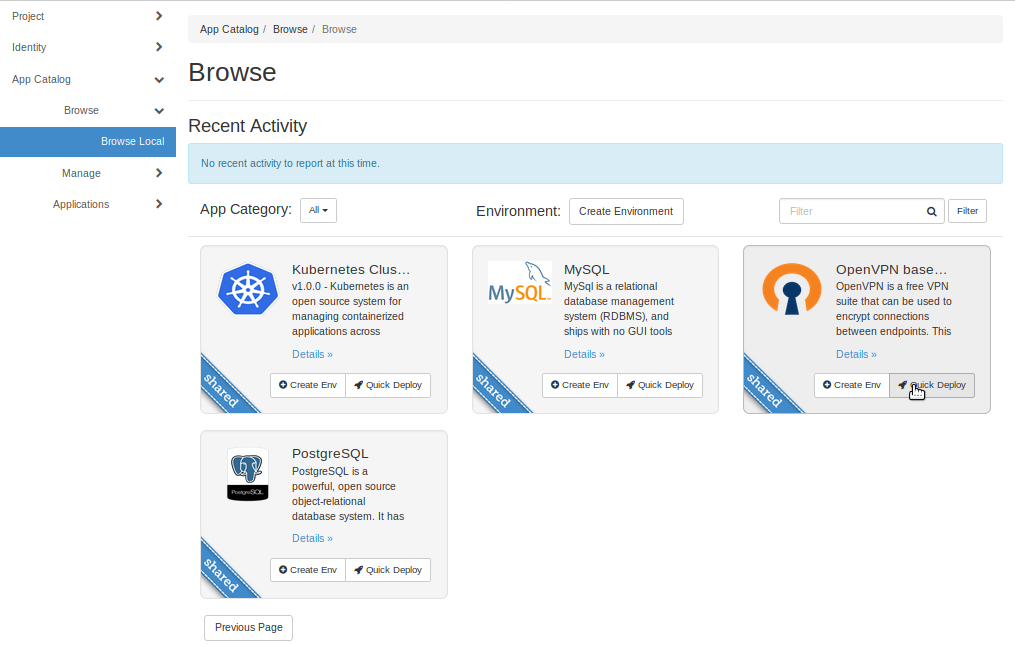
Choose App Catalog → Browse → Browse Local and locate the OpenVPN based Road Warrior VPN pane (usually on the second page)
Click Quick Deploy icon, enter application name that you want to set and click Next.

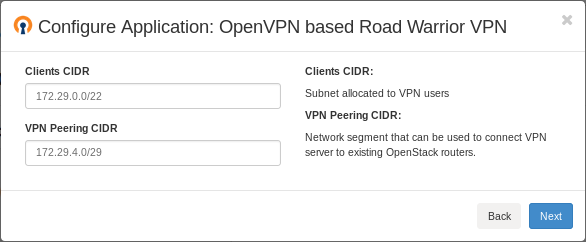
Next, you will be asked for ID or name (name would be sufficient) of network, which I have mentioned at the start of the article.

Attention
Please write down client’s CIDR address, it will be essential during further configuration!
If CIDR address does not collide with rest of your networks, you can leave this fields unchanged.
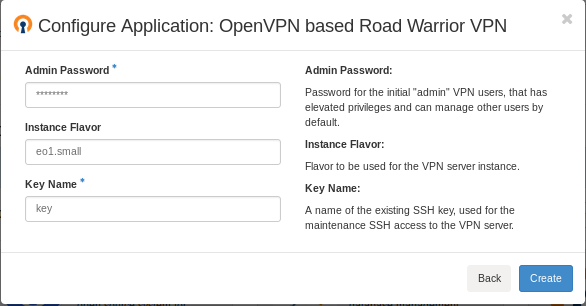
Set up your admin password, and insert SSH key for gaining access to VPN. You can change also flavor of server instance, but eo1.small should be enough to work only as VPN.
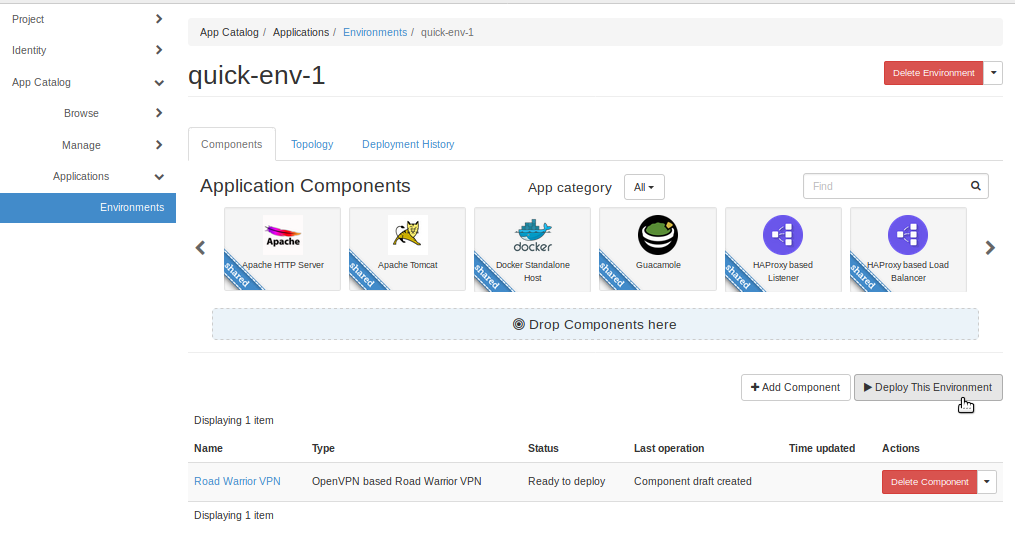
After configuration, click on the Deploy This Environment button.
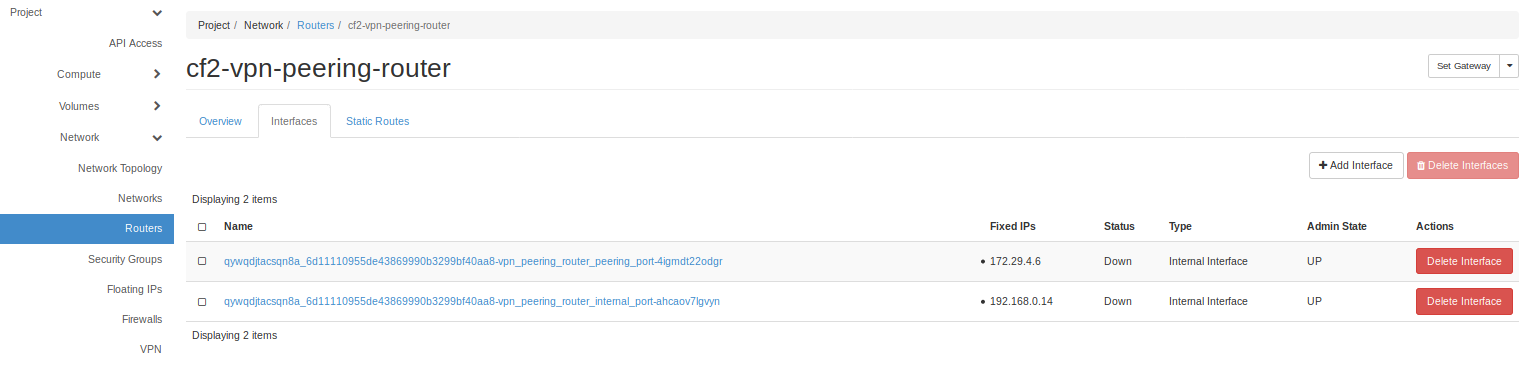
When you will see that “Application deployment has finished”, go to Network → Routers, click on a cf2-vpn-peering router, choose “Interfaces” tab, and write down Fixed IP of interface with “internal_port” in his name.
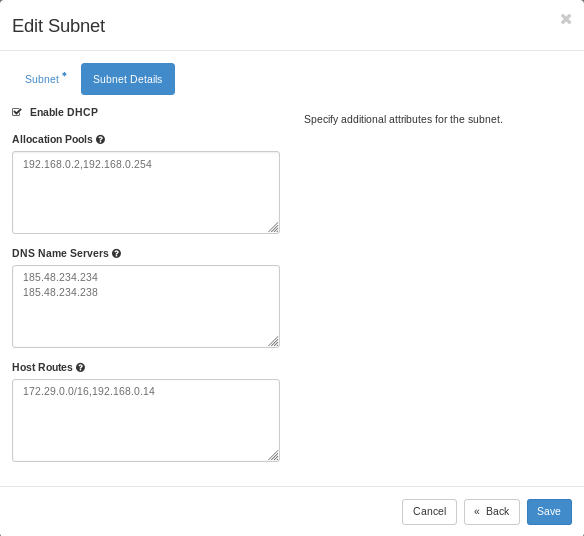
Get back to Network -> Networks and choose network you want to be visible only via vpn. Click on their name, choose Subnets, click on Edit Subnet → Subnet Details. As “Host routes” enter two IP adresses you have written down divided by coma.
Now you can an attach interface with desired networks to VMs you want to be visible only using VPN.
If the machines are running currently, you have to restart network interface cards in order to apply a configuration properly.
Firstly, you have to verify the NIC name that is used in the specified network. You can check it, using this command:
ip a
And then execute this command to turn off the interface and switch it on again: (use particular sufix e.g eth1, ens4, ens6).
sudo ifdown ens3; sudo ifup ens3
After that, proceed to enter:
ip route show
You should see “Clients CIDR address” via “Fixed IP of interface with “internal_port” in his name.”
You can access administration panel. To do so, click on Compute → Instances, paste the floating IP of your VPN server onto your browser adress bar with https protocol.
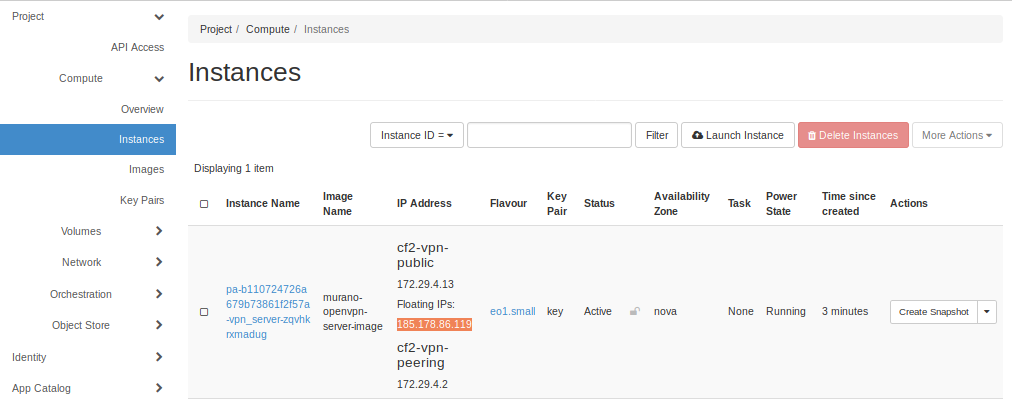
You will be asked by your browser for confirmation of the security exception (for Mozilla Firefox click “Advanced” → “Add Exception…”→ “Confirm Security Exception”)
Administration cockpit login screen will appear. Enter “admin” as your username, and password set during configuration of the environment. Click “LOG IN”
You will be able to change settings of your newly created VPN server.
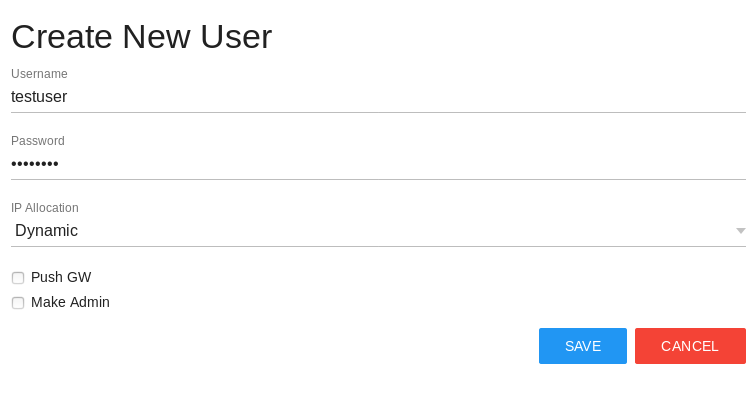
Creating new user
Click Create user button on the top right corner. You will be asked for setting up username and password. You may also set if IP would be allocated static or dynamic.
Important
You have to leave “Push GW” checkbox unchecked. Otherwise, VPN will be set as default gateway and therefore you will be not able to access internet.
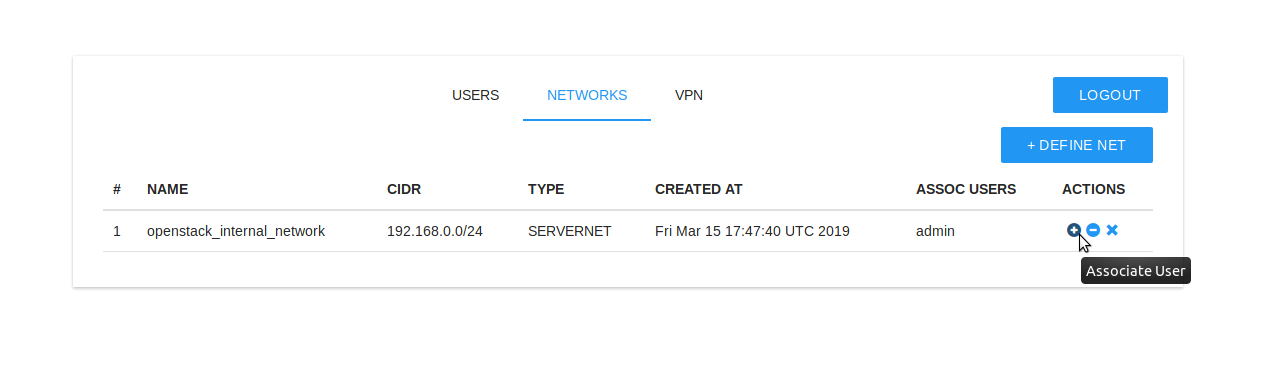
After that, go to Networks, and then click on the “+” icon, choose your profile and save your choice.
Gathering configuration file
Click on diskette icon in order to download .ovpn user profile file necessary for establishing connection with VPN as a client.

Installing OpenVPN client on Windows
Go to OpenVPN Download Site.
Download “Installer, Windows 7 and later” to your Windows PC.
Install the openvpn-install-<version>.exe file. It will install OpenVPN client, OpenVPN GUI and a TAP-windows interface. A restart may be required in order to run OpenVPN on Windows properly.
Once installed, you may import your .ovpn config file to the OpenVPN GUI and open the connection.
You should be connected to your virtual network in CREODIAS cloud environment, able to access your VMs using their private addresses.
OpenVPN client on Linux Ubuntu
Log in to your Linux machine and follow the commands:
sudo -i
apt-get install openvpn
Copy your .ovpn config file to a folder of your choice and start openvpn with the config file as the parameter:
openvpn your_user_name.ovpn
Now you should be connected to your VPN Server.