How to install pipenv and pipenvpipes on Creodias
In Python programming, virtual environments play a significant role. They allow you to separate packages into different spaces. This kind of treatment does not collide with globally installed packages, hence you can experiment with dozen of particular versions and package-dependencies.
pipenv
pipenv is a tool that automatically creates a virtual environment. It is also capable of adding/removing packages from your configuration files.
pipenv-pipes
pipenv-pipes is tool that is being used for switching between environments.
How to install pipenv
Installation will be similar wherever you can install the basic version of Python 3.xx. The following commands are running on WSL, which is a Ubuntu virtual machine running alongside of Windows 10.
Open your terminal and install pipenv and pipenv-pipes using pip3 command.
pip3 install pipenv pipenv-pipes --user
The --user flag informs pip to locate the package installation into your home directory.
Edit profile in order to run pipenv from anywhere. Use nano as editor of choice to both create the file if not existing and open it at the same time:
nano ~/.profile
Add one line at the end of the document
export PATH="$PATH:/home/user-name/.local/bin"
Change user-name to your username.
This is what it will look like in nano:
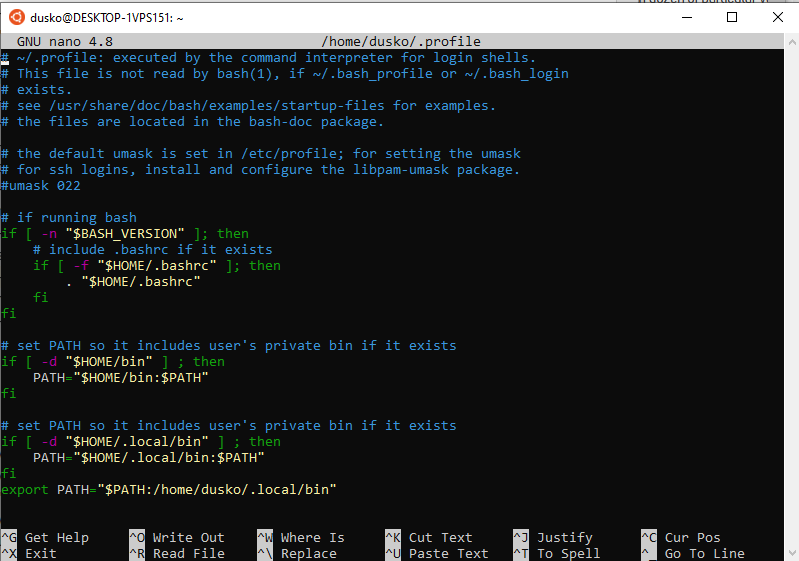
Next, execute the commands in .profile file by entering:
source ~/.profile
Create a virtual environment
To create a virtual environment, first make a directory and enter it:
mkdir environment_for_python_2
cd environment_for_python_2
Run this command in order to create a virtual environment, install flask and its dependencies.
pipenv install flask
After the installation, activate virtual environment by using pipenv shell command:
pipenv shell
You will see that the terminal row now starts with the name of environment:

The name of the environment is actually the name of the folder into which the environment has been installed. Here it is environment_for_python_2.
Using Ubuntu 22.04 system
Here is the entire procedure executed on a Ubuntu 22.04 operating system:
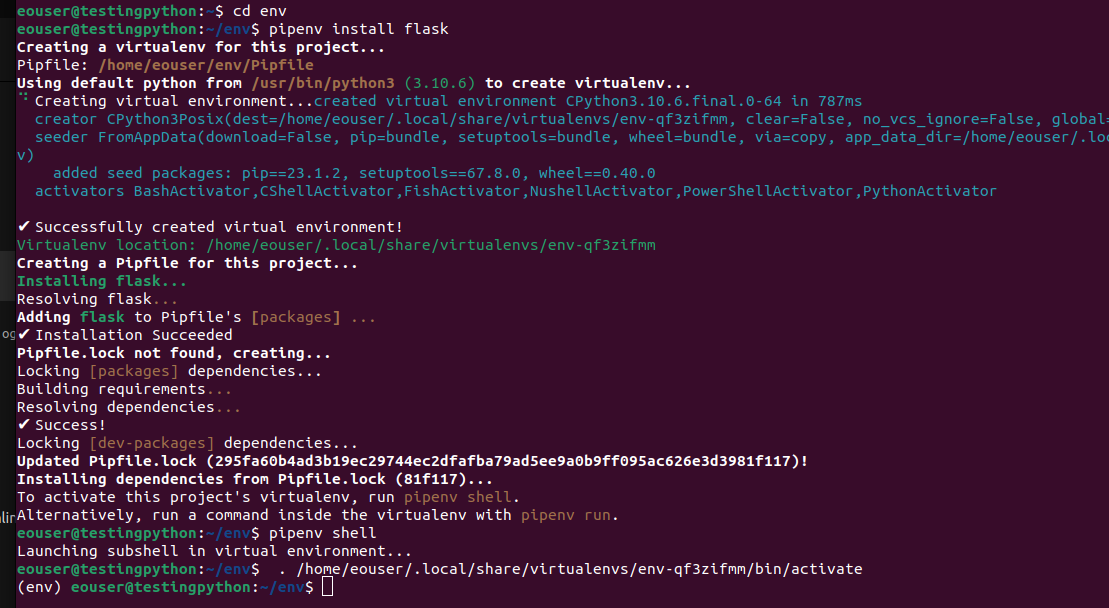
You can exit current environment by typing exit.
Pipfile
Now have a look at the Pipfile, by using the command:
cat Pipfile
When you examine a Pipfile which is automatically generated during environment creation, you can find four different tabs.
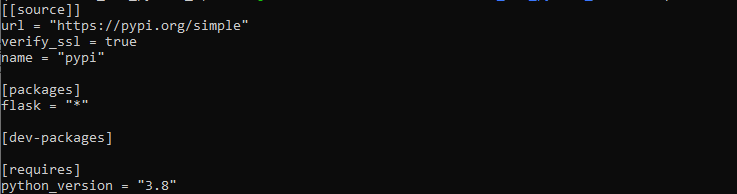
Here is what these tabs in Pipfile mean:
- Source
Define a Python repository location
- dev-packages
Experimental packages installed in virtual environment
- packages
Normal packages that has been demanded to be installed
- requires
Restrictions concerning packages and python versions
Pipfile.lock
In Pipfile.lock you can check checksum such as sha256 or md5 for particular packages.
Attention
It is not intended to be edited by user!
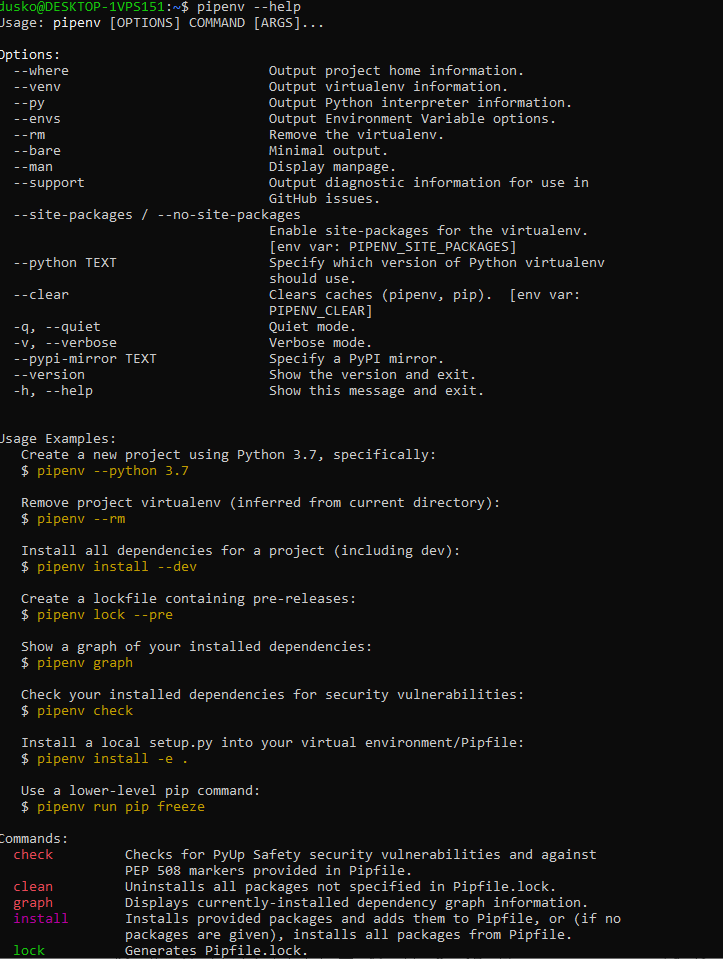
Help
To list all available commands you can just type --help in pipenv or only pipenv without any parameters:
pipenv --help
pipenv
To leave the environment, type exit.
Create another virtual environment
Here are the commands to create another python environment:
cd ..
mkdir env3
cd env3
pipenv install flask
pipenv shell
This is the result – see the environment name, env3, lead the user name in terminal line:

pipes usage
If you create more than one virtual environment, you can switch between them using pipes command. Its output generates an interactive list with all available environments. See the list of parameters with command
pipes --help
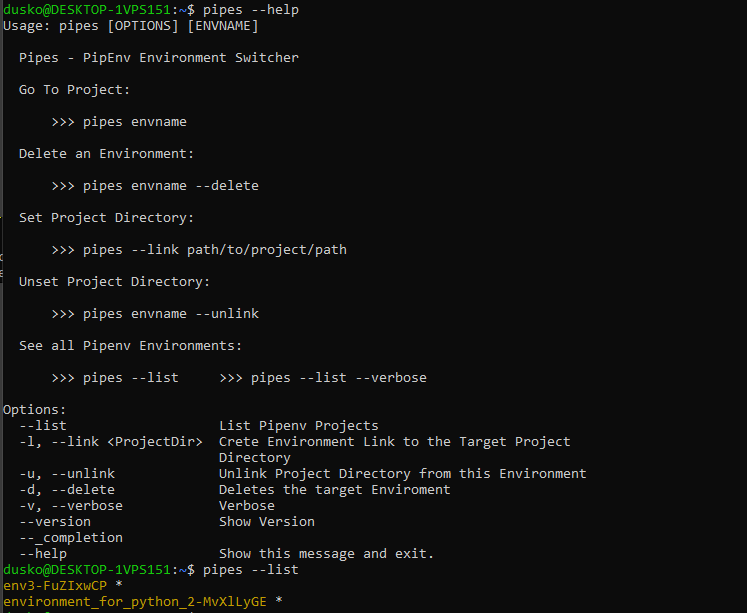
The last two lines in this image show how to list the environments:
pipes --list