How to add Floating IP to VM from external2 pool on CREODIAS

To assign a Floating IP from a specific pool to a VM, a router that supports the private network of that VM must be connected to the same pool.
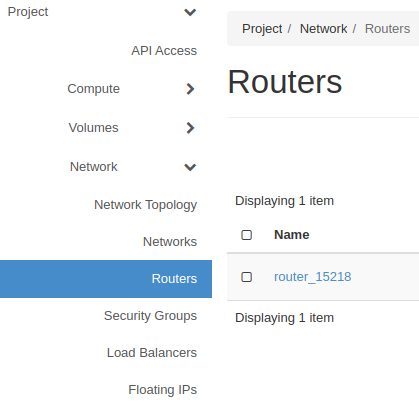
Go to Project → Network → Routers.
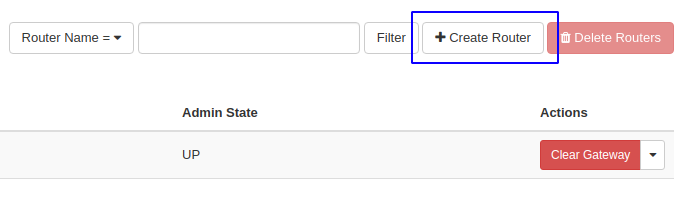
Create a new router by clicking the Create Router button.
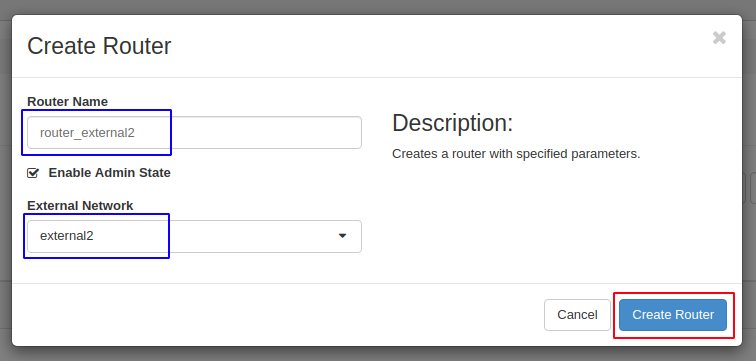
Then complete field name of the router and choose external2 in External Network field. Click the Create Router to confirm.
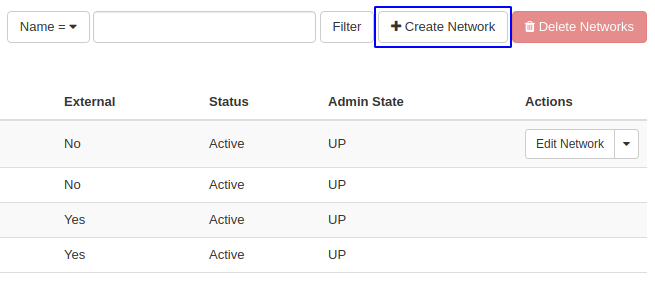
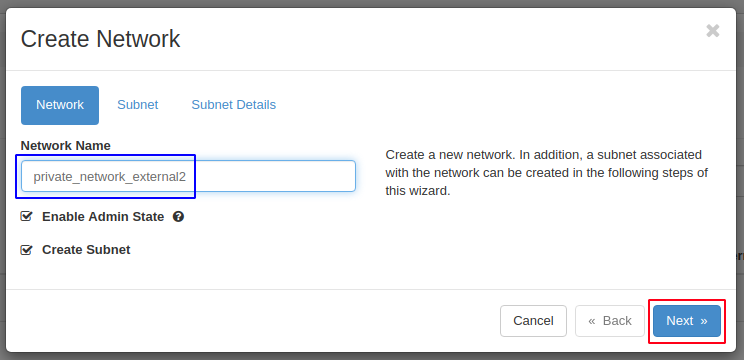
After creating the router, go to Project → Network → Networks and create a new network by clicking the Create Network button.
Choose the name for the new network and click the Next button.
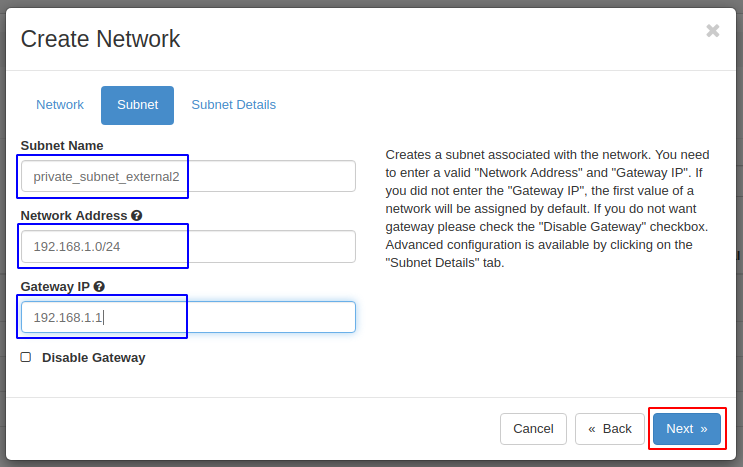
Choose Subnet name and set Network Address and Gateway IP according to the pattern - 192.168.X.X/24 (e.g. Network Address - 192.168.1.0/24, Gateway IP 192.168.1.1) and click the Next button.
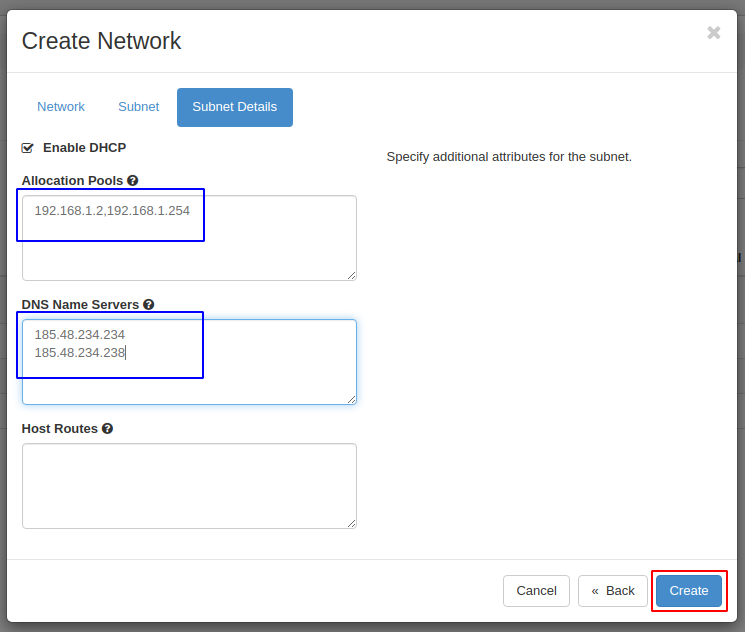
Set a range of allocation pools (e.g. 2 - 254) and set DNS Name Servers:
185.48.234.234
185.48.234.238
and click the Create button.
After the network is created, it will be visible in network menu.

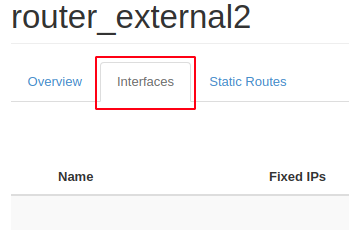
After the network has been created go back to Project → Network → Routers and select new router.

Then choose “Interface” bookmark.
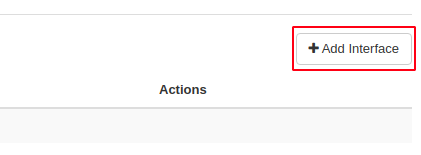
Add a new interface by clicking on the Add Interface button.
Select the newly created Subnet and click the Submit button.
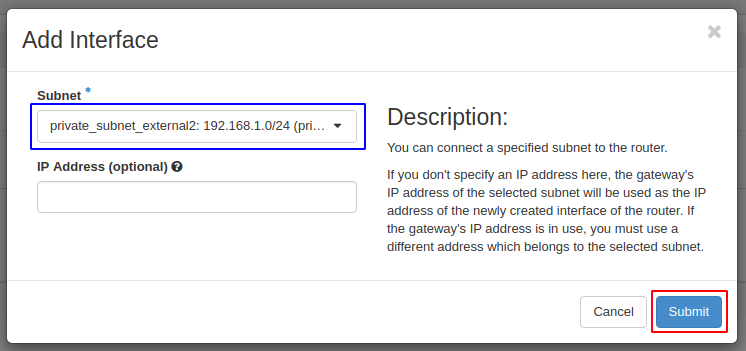
After adding Interface it will be visible in the Interface menu. After this step, you can proceed to create a new VM.

VM Create
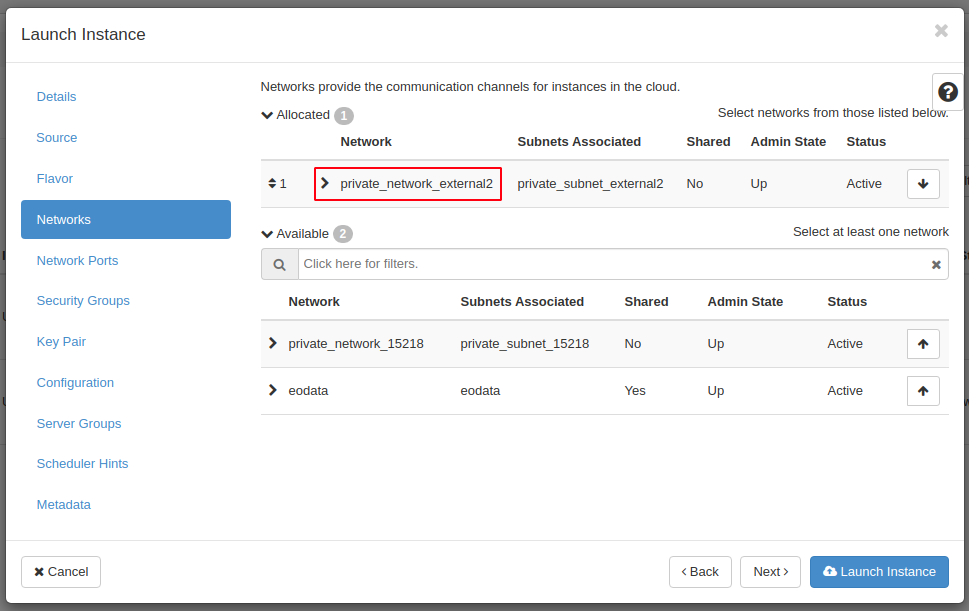
The only difference during creating a new VM is selecting network with external2 pool.
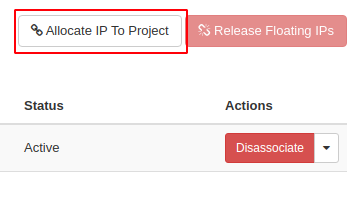
Associate Floating IP
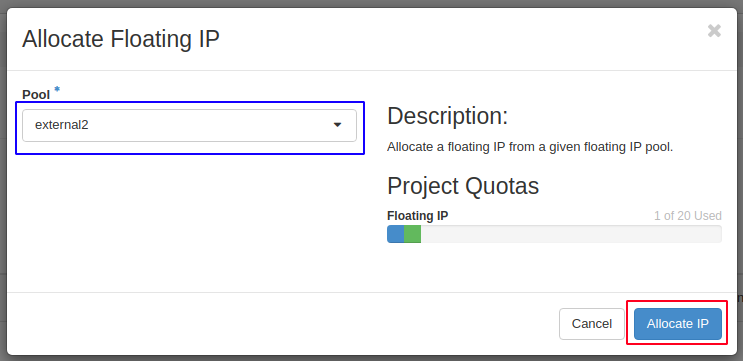
After creating the VM go to Project → Network → Floating IPs and select Allocate IP To Project.
Choose “external2” from Pool field and click Allocate IP.
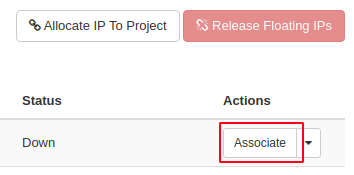
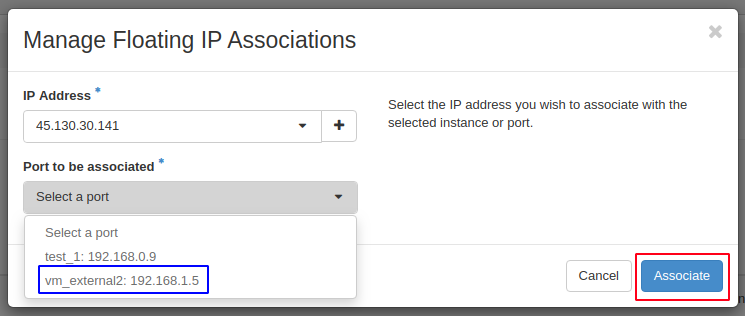
Select IP Address you have just created and click Associate button.
Notice the IP Adress should be associated with local address from “192.168.x.x” subnet. If you have “10.x.x.x” address change it to “192.168.x.x” address.
After selecting IP Address and Port click the Associate button.
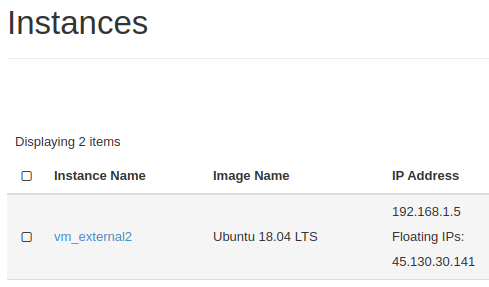
You now have public IP assigned to your instance and visible in Instances menu.