How To Install OpenStack and Magnum Clients for Command Line Interface to Creodias Horizon
How To Issue Commands to the OpenStack and Magnum Servers
There are three ways of working with Kubernetes clusters within Openstack Magnum and Horizon modules:
Horizon Commands
You issue Horizon commands using mouse and keyboard, through predefined screen wizards. It is the easiest way to start but not the most productive in the long run.
Command Line Interface (CLI)
CLI commands are issued from desktop computer or server in the cloud. This approach allows you to save commands as text and repeat them afterwards. This is the preferred way for professionals.
HTTPS Requests to the Magnum Server
Both the Horizon and the CLI use HTTPS requests internally and in an interactive manner. You can, however, write your own software to automate and/or change the state of the server, in real time.
What We Are Going To Cover
How to install the CLI – OpenStack and Magnum clients
How to connect the CLI to the Horizon server
Basic examples of using OpenStack and Magnum clients
Notes On Python Versions and Environments for Installation
OpenStack is written in Python so you need to first install a Python working environment and then install the OpenStack clients. Officially, OpenStack runs only on Python 2.7 but you will most likely only be able to install a version 3.x of Python. During the installation, adjust accordingly the numbers of Python versions mentioned in the documentation.
You will be able to install Python on any of the popular platforms, such as Windows, MacOS, Linux on a desktop computer. Or, supposing you are logged into Horizon interface, you can use commands Compute => Instances to create an instance of a virtual machine. Then install the Python there. Ubuntu 18.04 or 20.04 would serve best in this regard.
Warning
Once you install Kubernetes cluster you will have also have installed instances with Fedora 33 or 35, say, for the master node of the control plane. You can install the Python and OpenStack clients there as well but Ubuntu is much easier to use and is the preferred solution in this case.
You can install the Python and the clients on several environments at once, say, on a desktop computer and on a virtual machine on the server, at the same time. Following the instructions in this tutorial, they will all be connected to one and the same Kubernetes cluster anyway.
Note
If you decide to install Python and the OpenStack clients on a virtual machine, you will need SSH keys in order to be able to enter the working environment. See How to create key pair in OpenStack Dashboard on Creodias.
Prerequisites
No. 1 Hosting
You need a Creodias hosting account with Horizon interface https://horizon.cloudferro.com/auth/login/?next=/.
No. 2 Installation of OpenStack CLI on Ubuntu 20.04 Server
The article How to install OpenStackClient for Linux on Creodias shows how to install OpenStack client on Ubuntu server. That Ubuntu may be the desktop operating system, a virtual machine on some other operating system, or an Ubuntu server in the cloud.
Installation on Mac OS will be similar to the installation on Ubuntu.
No. 3 Installation of OpenStack CLI on Windows
The article How to install OpenStackClient GitBash for Windows on Creodias shows installation on Windows.
No. 4 General Instructions for Installation of OpenStack Clients
There are various ways of installing Python and the required clients. For instance, on MacOS, you can install the clients using Python PIP or install them natively, using homebrew.
The article Install the OpenStack command-line clients will give a systematic introduction to installation of OpenStack family of clients on various operating systems.
Once installed, the CLI commands will be identical across various platforms and operating systems.
No. 5 Connect openstack command to the cloud
After the successful installation of openstack command, it should be connected to the cloud. Follow this article for technical details: How to activate OpenStack CLI access to Creodias cloud using one- or two-factor authentication.
Step 1 Install the CLI for Kubernetes on OpenStack Magnum
In this step, you are going to install clients for commands openstack and coe, from modules OpenStack and Magnum, respectively.
Follow the Prerequisites Nos. 2, 3 or 4 to install the main client for OpenStack. Its name is python-openstackclient and the installation described in those will typically contain a command such as
pip install python-openstackclient
If you have installed OpenStackClient using those prerequisite resources, we shall assume that the openstack is available and connected to the cloud.
At the end of installation from either of the prerequisite articles, install Magnum client by issuing this command:
pip install python-magnumclient
Step 2 How to Use the OpenStack Client
In this step, you are going to start using the OpenStack client you have installed and connected to the cloud.
There are two ways of using the OpenStackClient. If you enter the word openstack at the command prompt of the terminal, you will enter the special command line interface, like this:

The benefit would be that you do not have to type openstack keyword for every command.
Type quit to leave the openstack internal command line prompt.
The preferred way, however, is typing the keyword openstack, followed by parameters and running from terminal command line.
Openstack commands may have dozens of parameters so it is better to compose the command in an independent text editor and then copy and paste it into the terminal.
The Help Command
To learn about the available commands and their parameters, type –help after the command. If applied to the keyword openstack itself, it will write out a very long list of commands, which may come useful as an orientation. It may start out like this:

This is how it ends:
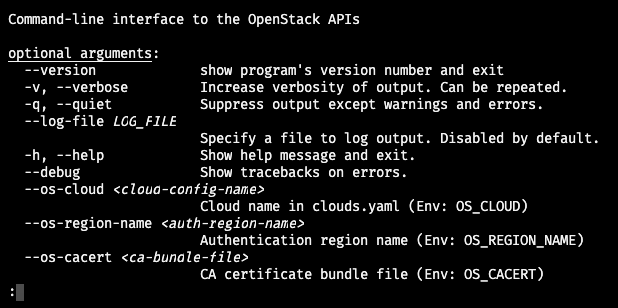
The colon in the last line means that the output is in vi (or vim) editor. To leave it, type letter q and press Enter on the keyboard.
Prerequisites No. 3 and 4 lead to official OpenStack user documentation.
Here is what happens when you enter a wrong parameter, say, networks instead of network:
openstack networks list
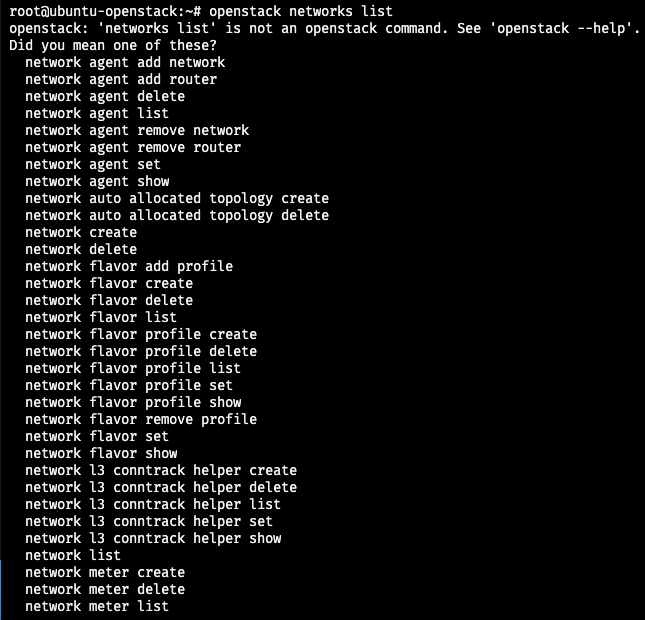
You get a list of commands similar to what you just typed.
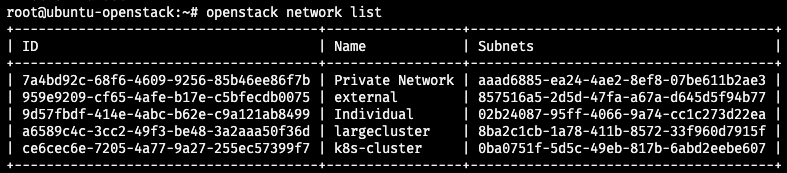
To list networks available in the system, use a singular version of the command:
openstack network list
Step 4 How to Use the Magnum Client
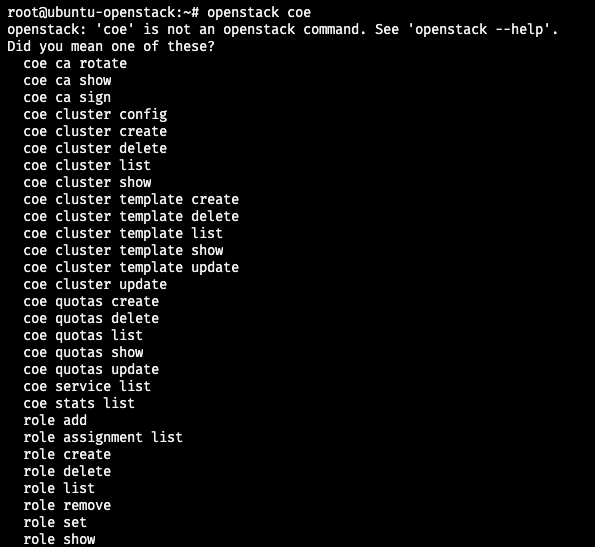
OpensStack command for the server is openstack but for Magnum, the command is not magnum as one would expect, but coe, for container orchestration engine. Therefore, the commands for clusters will always start with openstack coe.
See cluster commands by entering
openstack coe
into the command line:
You can see the existing clusters using the following command:
openstack coe cluster list
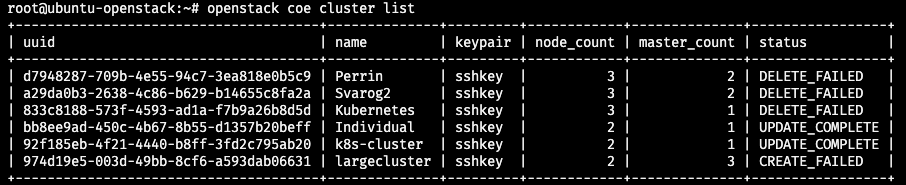
This is more or less the same information that you can get from the Horizon interface:
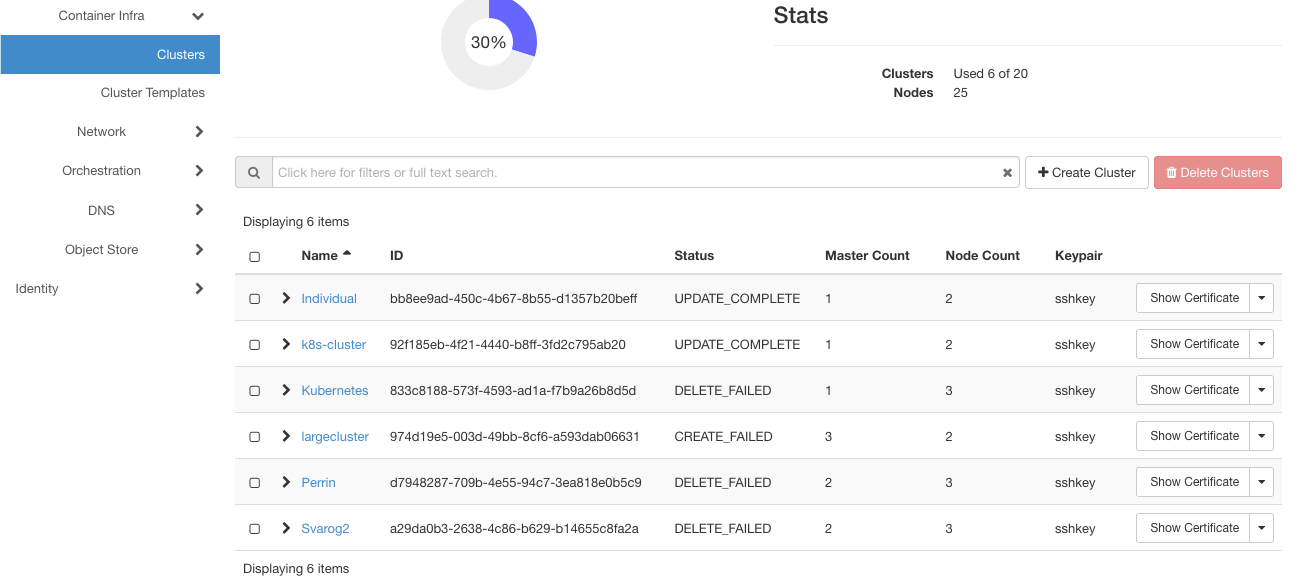
after clicking on Container Infra => Clusters.
Prerequisite No. 5 offers more technical info about the Magnum client.
What To Do Next
In this tutorial you have
installed the OpenStack and Magnum clients
connected them to the server, then used
openstack command to access the server in general and
coe to access the clusters in particular.
the advantages of using the CLI instead of Horizon interface, showing
how to create a cluster template as well as
how to create a new cluster
all via the CLI.