Accessing EODATA as s3fs mounts from Kubernetes pods on Creodias
In related article Accessing EODATA from Kubernetes Pods in Creodias using boto3 we described in more detail EODATA satellite image collections and accessing them from Kubernetes pods using Python’s boto3 library.
This article covers accessing EODATA from Kubernetes using our custom EODATA mounter. This new feature enables convenient access to EODATA from Kubernetes pods, where EODATA collections are abstracted to a filesystem tree.
Prerequisites
No. 1 Account
You need a Creodias hosting account with access to the Horizon interface: https://horizon.cloudferro.com/auth/login/?next=/.
No. 2 Kubernetes cluster with access to EODATA (created as of March 2024)
A Kubernetes cluster on Creodias cloud created with option “EODATA access enabled”. Refer to the knowledge base article How to Create a Kubernetes Cluster Using Creodias OpenStack Magnum.
Important
The mounter described in this article will work only with versions of Kubernetes cluster templates which are less than 1.29.
No. 3 Familiarity with kubectl
For further instructions refer to How To Access Kubernetes Cluster Post Deployment Using Kubectl On Creodias OpenStack Magnum
What We Are Going To Do
Provide background information about EODATA mounter feature
Deploy a Kubernetes pod which uses the EODATA mounter
Verify access to the mount
Background – EODATA mounter feature
EODATA mounter is a feature introduced to Kubernetes as a Service on CloudFerro clouds – WAW4-1, WAW3-2 and FRA1-2. The feature is enabled by default for new clusters created with option “EODATA access enabled” checked during cluster creation time (clusters created as of March 2024).
During cluster creation, a daemonset of the EODATA mounter is deployed in the namespace eodata-mounter. This daemonset is responsible for mounting EODATA with s3fs tool, on all worker nodes where EODATA network access is enabled.
EODATA mounts can be accessible from Kubernetes standalone pods, as well as from other related K8s resources e.g. jobs or deployments. Below we provide an example for a pod, the other resources follow the same principles for enabling EODATA mounter.
We are now going to create a new cluster specifically to demonstrate to what details to pay attention when accessing EODATA through s3fs on a pod.
Step 1. Create a new Kubernetes cluster on WAW4-1, WAW3-2 or FRA1-2 clouds
Be sure to work with either WAW4-1, WAW3-2 or FRA1-2 clouds:
Select cloud region to work with*
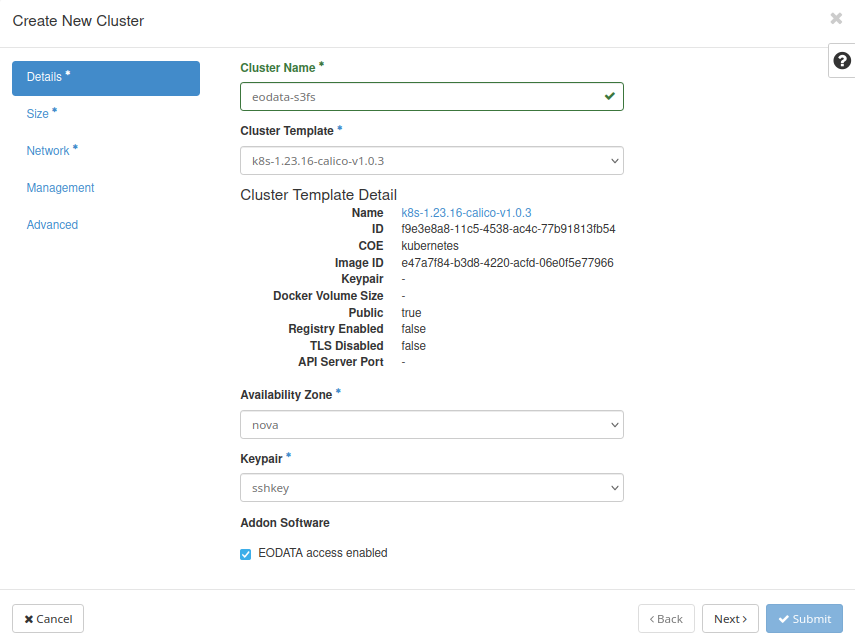
Follow the Prerequisite No. 2 and pay attention to window Details:
Select cluster template to create a new Kubernetes cluster
As noted in Prerequisite No. 2, select only cluster templates with version number < 1.29:
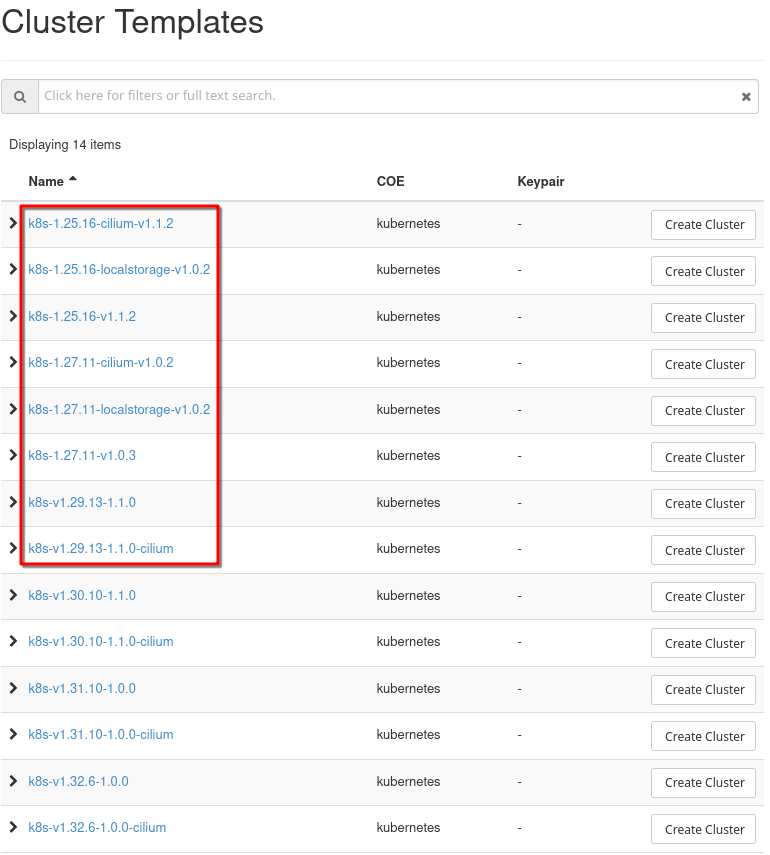
Select only version number < 1.29
Check box EODATA access enabled and create the cluster per further instructions in Prerequisite No. 2.
Step 2. Deploy Kubernetes pod which uses the EODATA mounter
In order to utilize the EODATA s3fs mounts provided by EODATA mounter, the pod should use a volume of type hostPath, pointing to the mounted EODATA directory on the host in location /mnt/eodata. An example of instruction for such volume is:
- name: my-volume
  hostPath:
    path: /mnt/eodata
Another precondition is to provide nodeSelector in the pod spec, which ensures that the pod runs only on nodes where EODATA is enabled. Here is how to apply one such nodeSelector to pod’s spec:
nodeSelector:
  magnum.openstack.org/worker-eodata: enabled
Now follows a complete example of deploying an nginx pod with EODATA mounted in the container. The EODATA in the container will be available in path /eodata, which is specified in the volumeMounts directive. In order to apply this example, create a file called eodata_mount.yaml with the following contents:
eodata_mount.yaml
apiVersion: v1
kind: Pod
metadata:
  name: myapp-test
  namespace: default
spec:
  nodeSelector:
    magnum.openstack.org/worker-eodata: enabled
  containers:
  - name: my-app
    image: nginx
    ports:
    - containerPort: 8080
    volumeMounts:
    - name: my-volume
      mountPath: /eodata
      readOnly: true
  volumes:
  - name: my-volume
    hostPath:
      path: /mnt/eodata
Then, enter the following command to deploy the pod on the cluster:
kubectl apply -f eodata_mount.yaml
Step 3. Verify access to the mount
To verify that EODATA is properly mounted, access the application container in the pod with this command:
kubectl exec -it myapp-test -- sh
A row starting with # will show on screen. It is command line mode for myapp-test and you can list eodata with the following listing command:
ls /eodata
The result will be similar to the screen below:

You can explore EODATA collections deeper in the tree. Once you are familiar with EODATA structure you can use these collections for real-life applications, jobs and workflows.