Deploy Keycloak on Kubernetes with a sample app on Creodias
Keycloak is a large Open-Source Identity Management suite capable of handling a wide range of identity-related use cases.
Using Keycloak, it is straightforward to deploy a robust authentication/authorization solution for your applications. After the initial deployment, you can easily configure it to meet new identity-related requirements, e.g. multi-factor authentication, federation to social-providers, custom password policies, and many others.
What We Are Going To Do
Deploy Keycloak on a Kubernetes cluster
Configure Keycloak: create a realm, client and a user
Deploy a sample Python web application using Keycloak for authentication
Prerequisites
No. 1 Hosting
You need a Creodias hosting account with Horizon interface https://horizon.cloudferro.com/auth/login/?next=/.
No. 2 A running Kubernetes cluster and kubectl activated
A Kubernetes cluster, to create one refer to: How to Create a Kubernetes Cluster Using Creodias OpenStack Magnum. To activate kubectl, see How To Access Kubernetes Cluster Post Deployment Using Kubectl On Creodias OpenStack Magnum.
No. 3 Basic knowledge of Python and pip package management
Basic knowledge of Python and pip package management is expected. Python 3 and pip should be already installed and available on your local machine.
No. 4 Familiarity with OpenID Connect (OIDC) terminology
Certain familiarity with OpenID Connect (OIDC) terminology is required. Some key terms will be briefly explained in this article.
Step 1 Deploy Keycloak on Kubernetes
Let’s first create a dedicated Kubernetes namespace for Keycloak. This is optional, but good practice:
kubectl create namespace keycloak
Then deploy Keycloak into this namespace:
kubectl create -f https://raw.githubusercontent.com/keycloak/keycloak-quickstarts/latest/kubernetes-examples/keycloak.yaml -n keycloak
Keycloak, by default, gets exposed as a Kubernetes service of a type LoadBalancer, on port 8080. You need to find out the service public IP with the following command (note it might take a couple minutes to populate):
kubectl get services -n keycloak
NAME          TYPE           CLUSTER-IP      EXTERNAL-IP      PORT(S)          AGE
keycloak      LoadBalancer   10.254.8.94     64.225.128.216   8080:31228/TCP   23h
Note
In our case, the external IP address is 64.225.128.216 so that is what we are going to use in this article. Be sure to replace it with the IP address of your own.
So, enter http://64.225.128.216:8080/ to browser to access Keycloak:
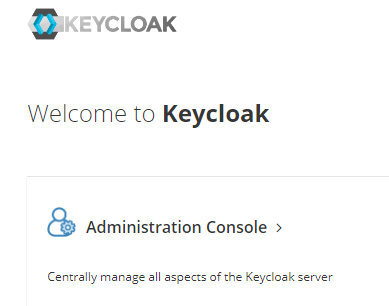
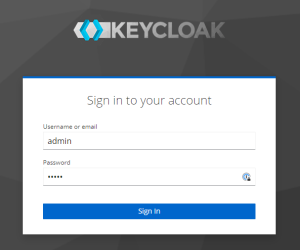
Next, click on Administration Console and you will get redirected to the login screen, where you can sign-in as an admin (login/password admin/admin )
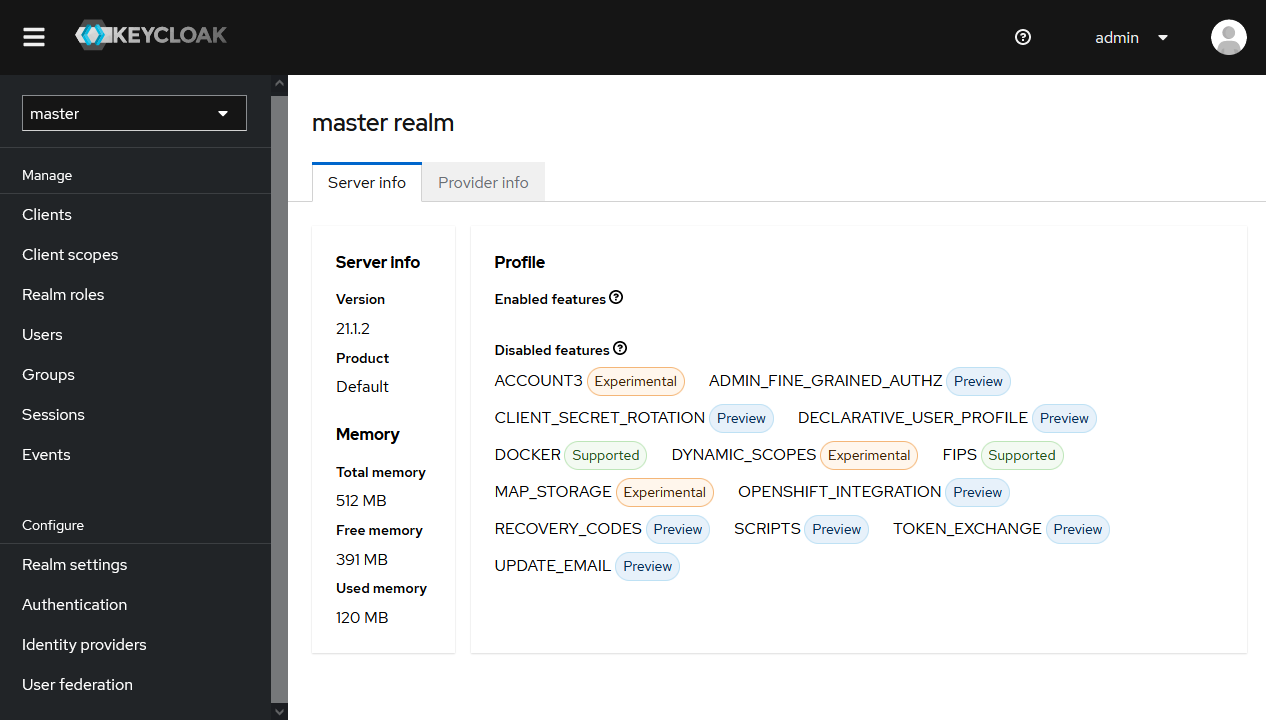
This is full screen view of the Keycloak window:
Step 2 Create Keycloak realm
In Keycloak terminology, a realm is a dedicated space for managing an isolated subset of users, roles and other related entities. Keycloak has initially a master realm used for administration of Keycloak itself.
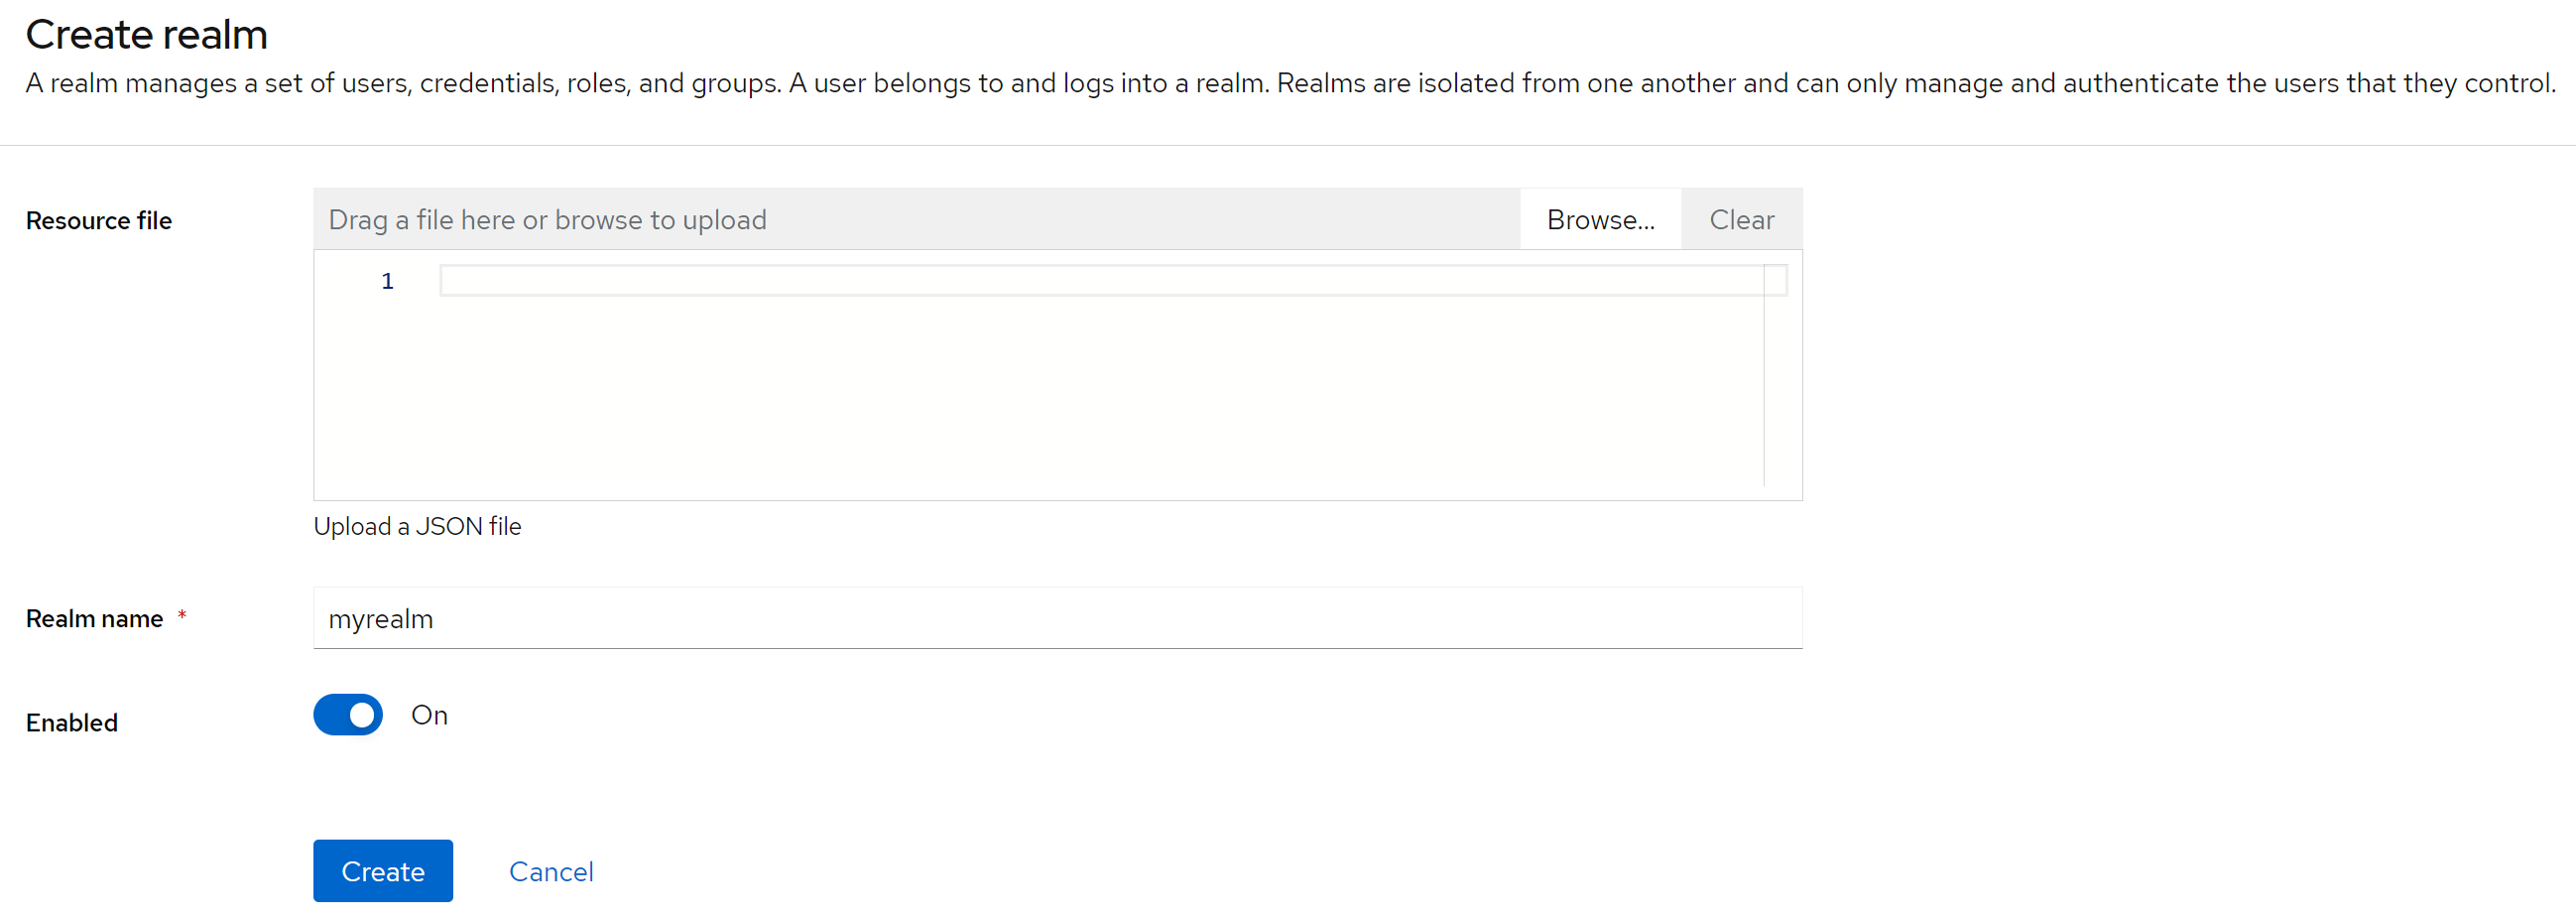
Our next step is to create our own realm and start operating within its context. To create it, click first on master field in the upper left corner, then click on Create Realm.
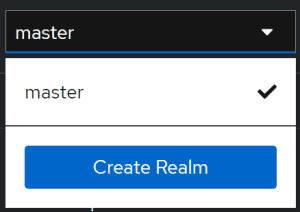
We will just enter the realm name myrealm, leaving the rest unchanged:
When the realm is created (and selected), we operate within this realm:
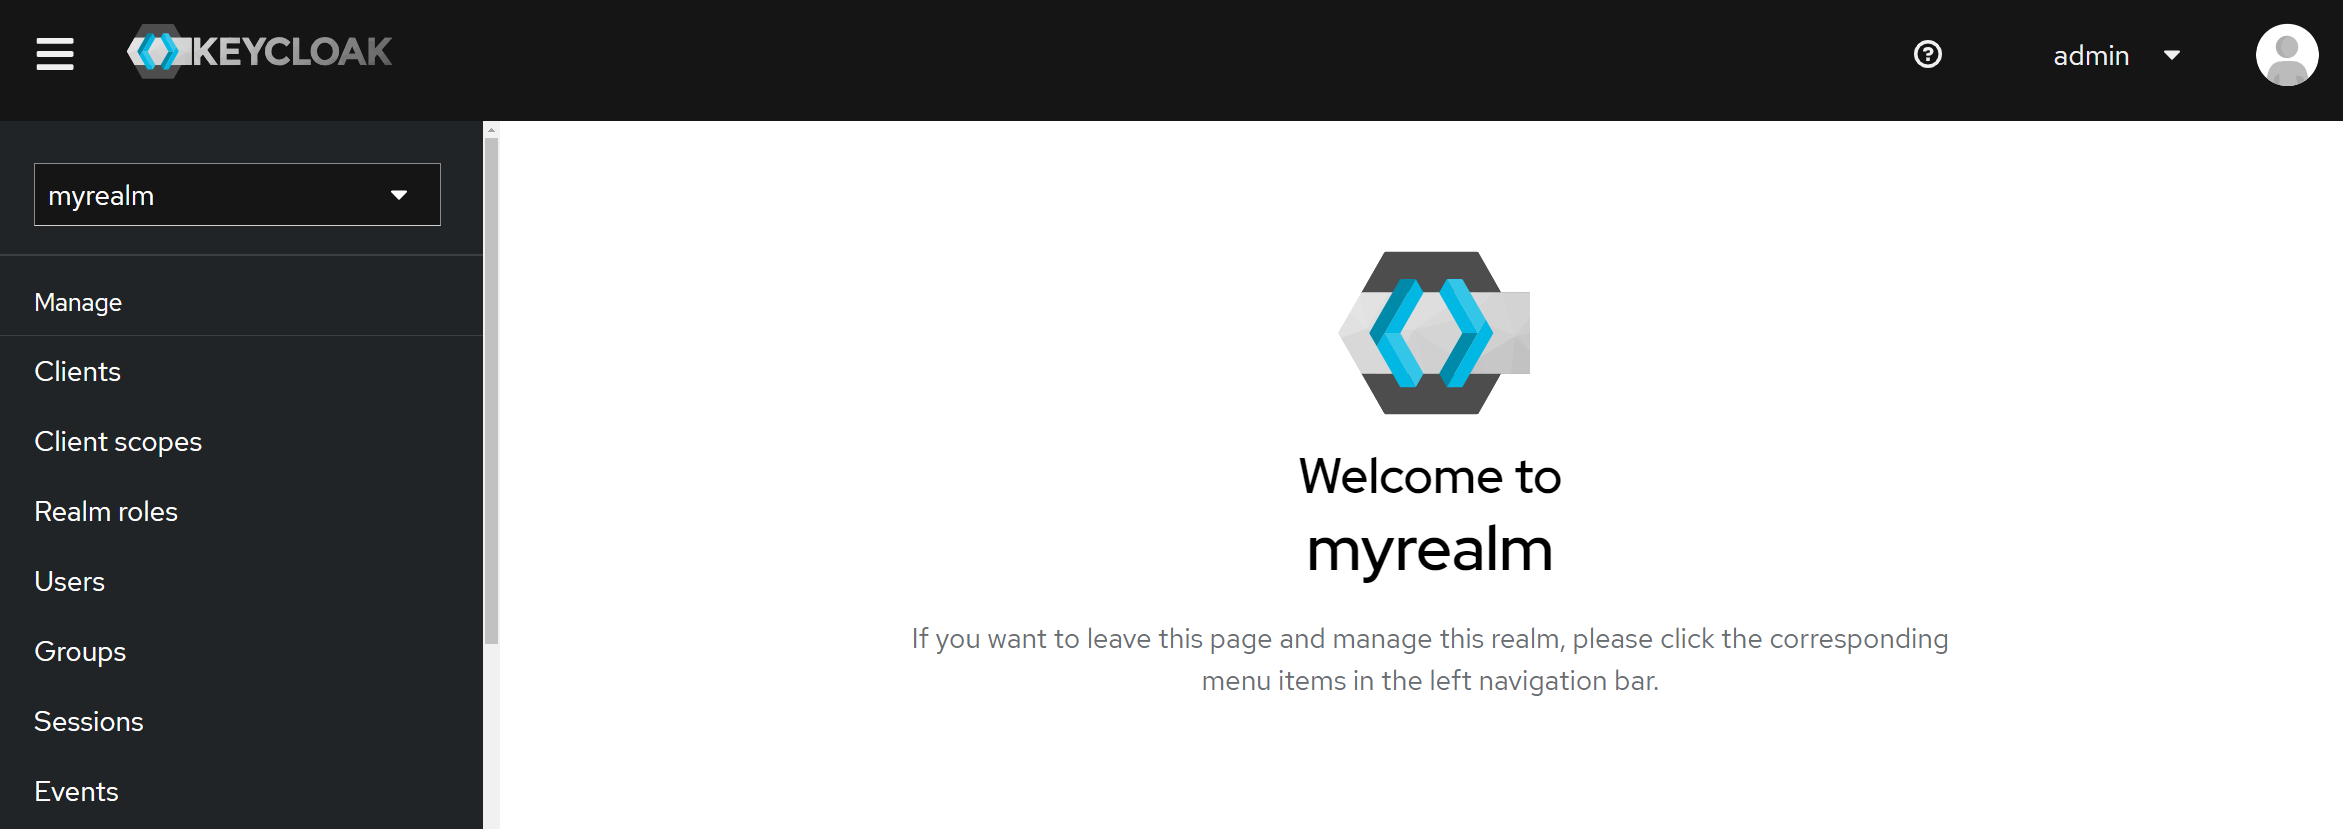
In the left upper corner, instead of master now is the name of the selected realm, myrealm.
Step 3 Create and configure Keycloak client
Clients are entities in Keycloak that can request Keycloak to authenticate users. In practical terms, they can be thought of as representation of individual applications that want to utilize Keycloak-managed authentication/authorization.
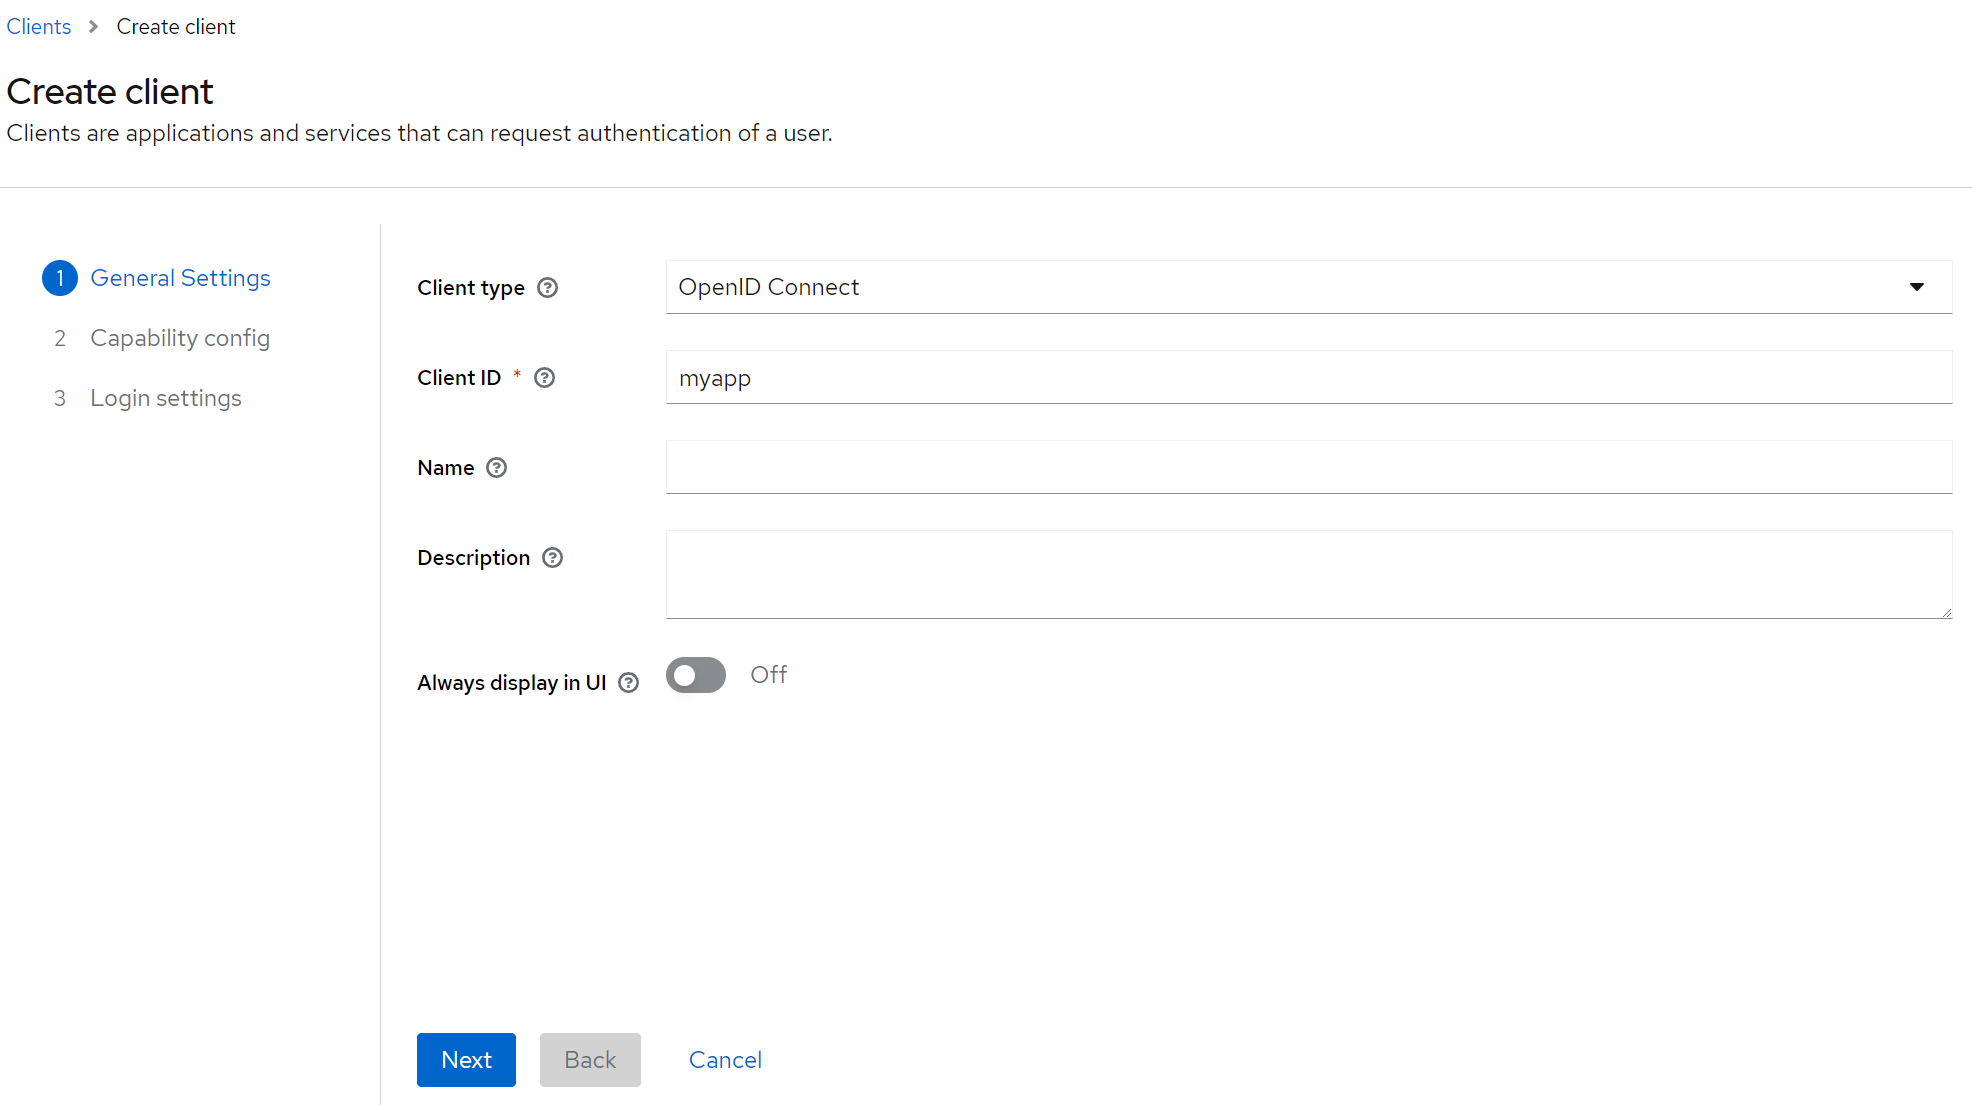
Within the myrealm realm, we will now create a client myapp that will represent the web application which we will create in one of the further steps. To create one such client, click on the Clients panel on the left menu, and then on Create Client button.
You will enter a wizard consisting of 3 steps. In the first step we just enter the ID of the client (which, in our case, is myapp), leaving other settings unchanged:
The next screen involves selecting some crucial settings relating to the authentication/authorization requirements of your specific application.
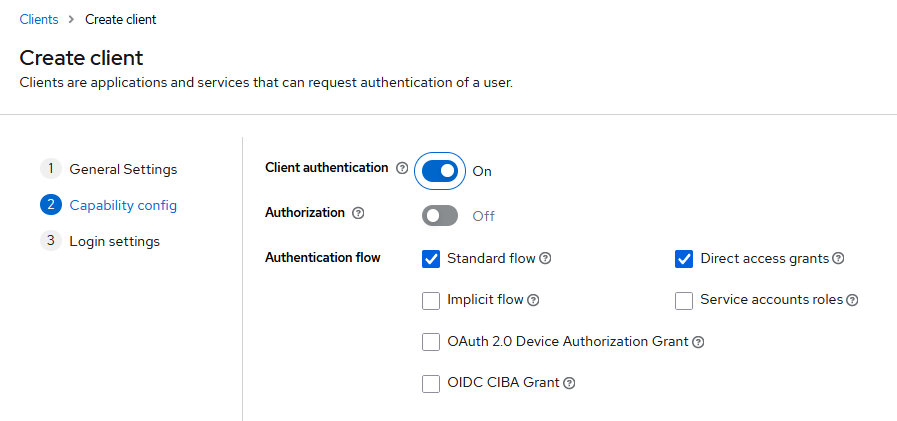
The options you choose will depend on your particular scenario:
- Scenario 1 Traditional server applications
For the purpose of this article and our demo app, we use a traditional client server application. We then need to turn on the “Client Authentication” toggle.
- Scenario 2 SPA
For single page applications, you can stay with the default where “Client Authentication” toggle is off.
For our demo app, we will require authentication via secret, so be sure to activate option Client Authentication. Once it is turned on, we will be able to the obtain the value of secret later on, in Step 5.
The last step of the Wizard involves setting some key coordinates of our client application. The ones we modify involve:
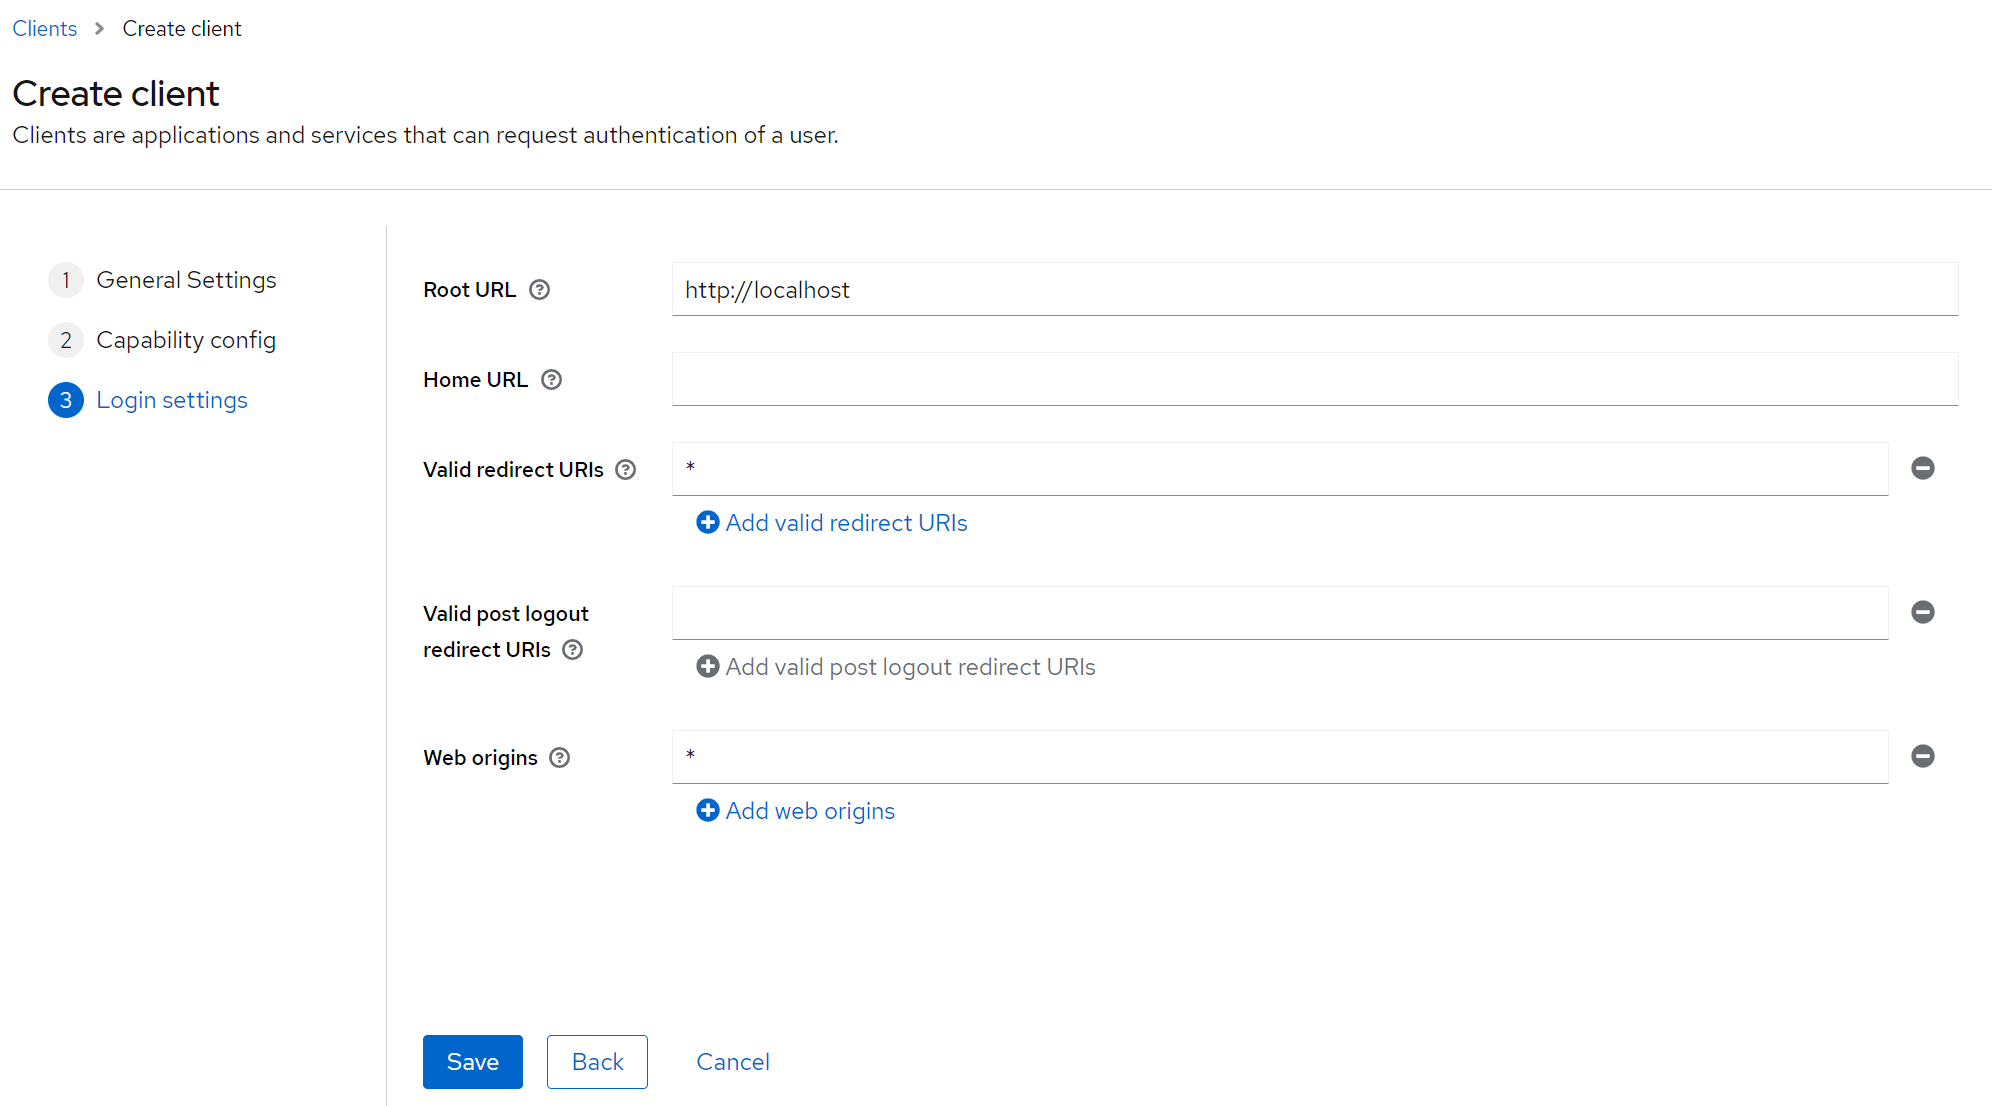
- root URL
In our case, we want to deploy the app locally so we set up the root as http://localhost . You will need to change this if your app will be exposed as a public service.
- Valid redirect URIs
This setting represents a route in our app, to which a user will be redirected after a successful login from Keycloak. In our case, we leave this setting very permissive with a “*”, allowing redirect to any path in our application. For production, you should make this more explicit, using a dedicated route, say, /callback, for this purpose.
- Web origins
This setting specifies hosts that can send requests to Keycloak. Requests from other hosts will not pass the cross-origin check and will be rejected. Also here we are very permissive by setting a “*”. Similarly as above, strongly consider changing this setting for production, and limit to trusted sources only.
After hitting Save, your client is created. You can then modify the previously selected settings of the created client, and add new, more specific ones. There are vast possibilities for further customization depending on your app specifics, this is however beyond the scope of this article.
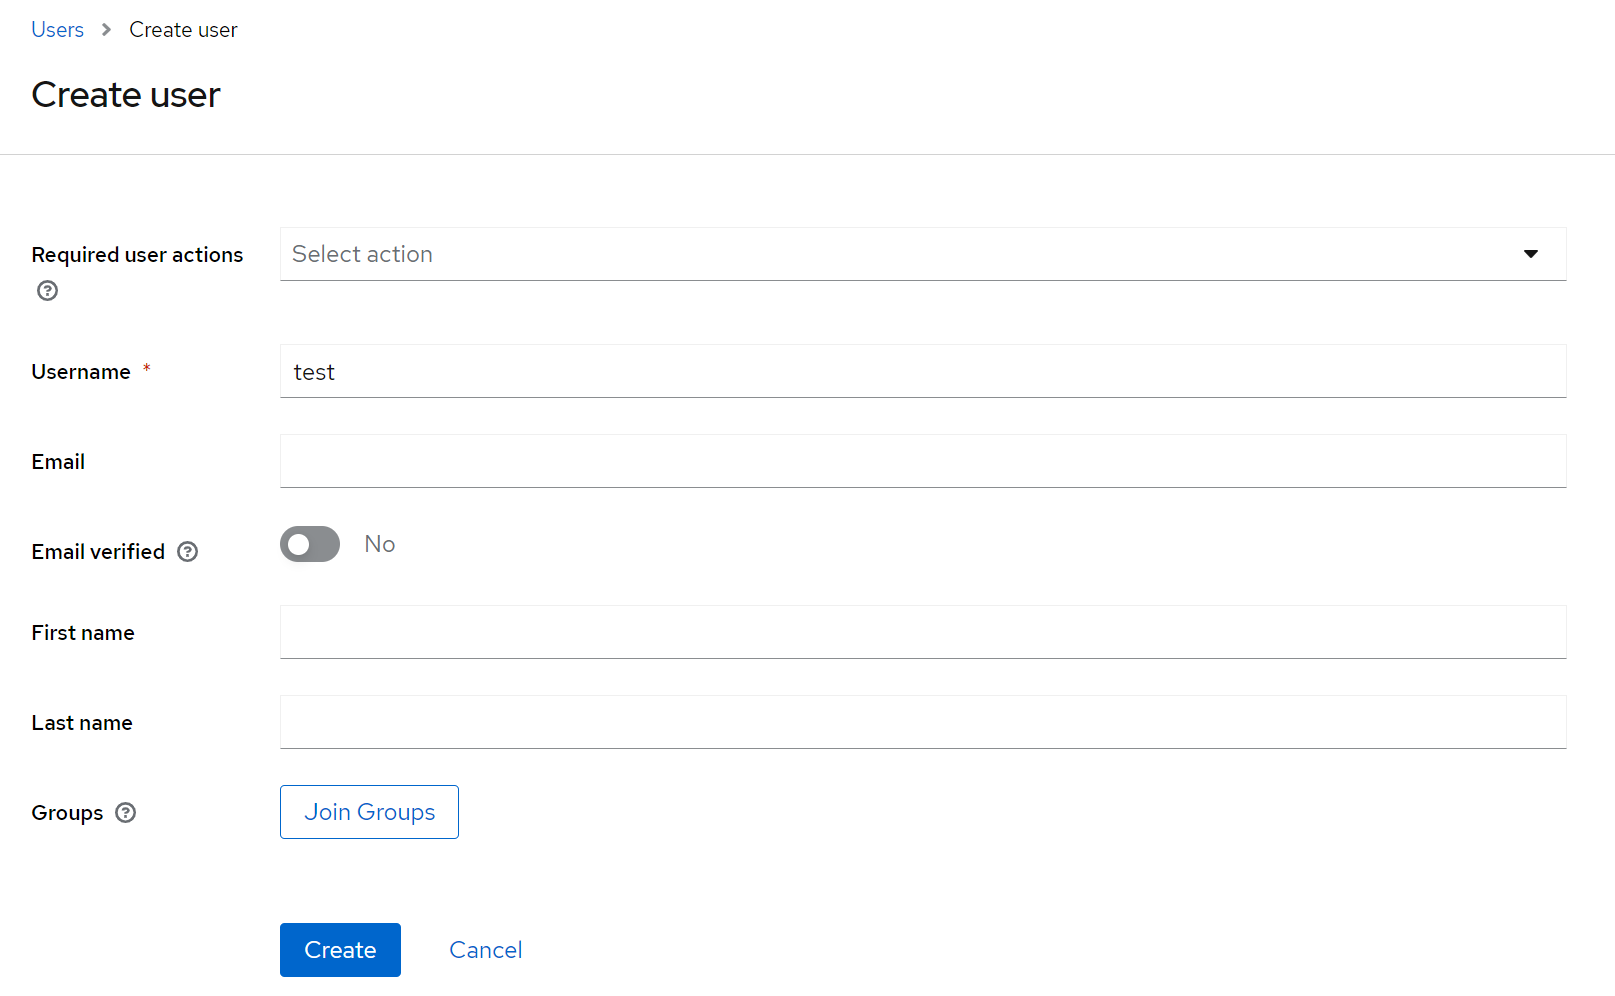
Step 4 Create a User in Keycloak
After creating the Client, we will proceed to creating our first User in Keycloak. In order to do so, click on the Users tab on the left and then Create New User:
We will again be very selective and only choose test as the username, leaving other options intact:
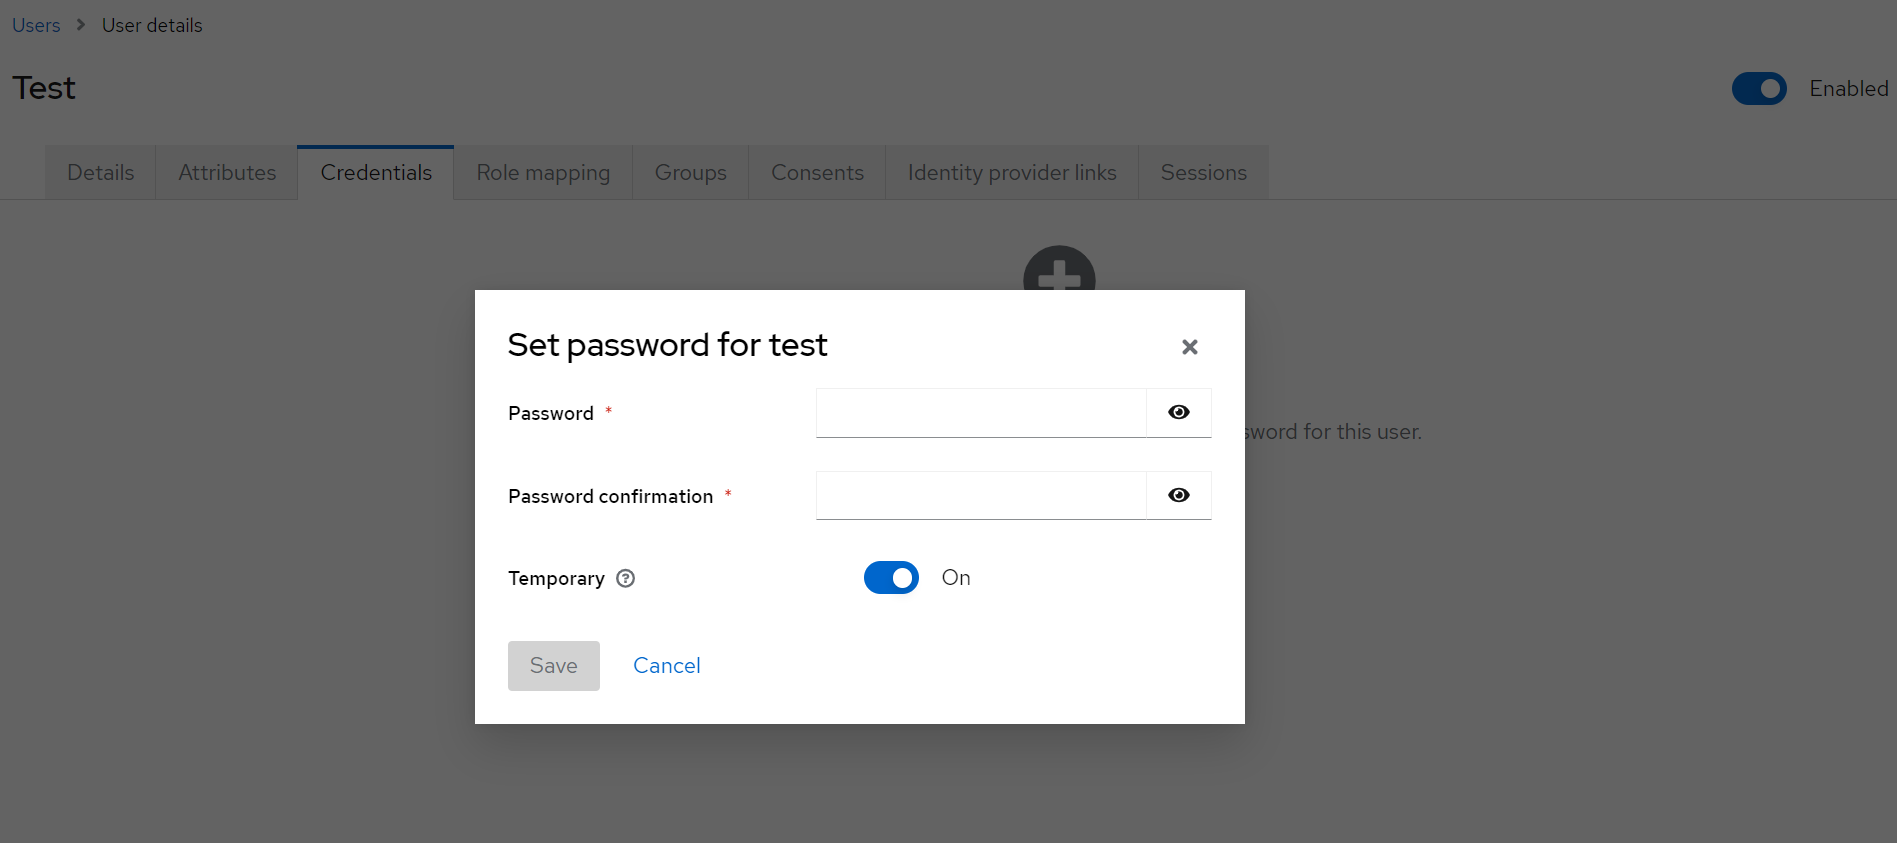
Next, we will set up password credentials for the newly created user. Select Credentials tab and then Set password, type in the password with confirmation in the form and hit Save:
Step 5 Retrieve client secret from Keycloak
Once we have the Keycloak set up, we will need to extract the client secret, so that Keycloak establishes trust with our application.
The client_secret can be extracted by going into myrealm realm, selecting myapp as the client and then taking the client secret with the following chain of commands:
Clients –> Client detail –> Credentials
Once in tab Credentials, the secret will become accessible through field Client secret:
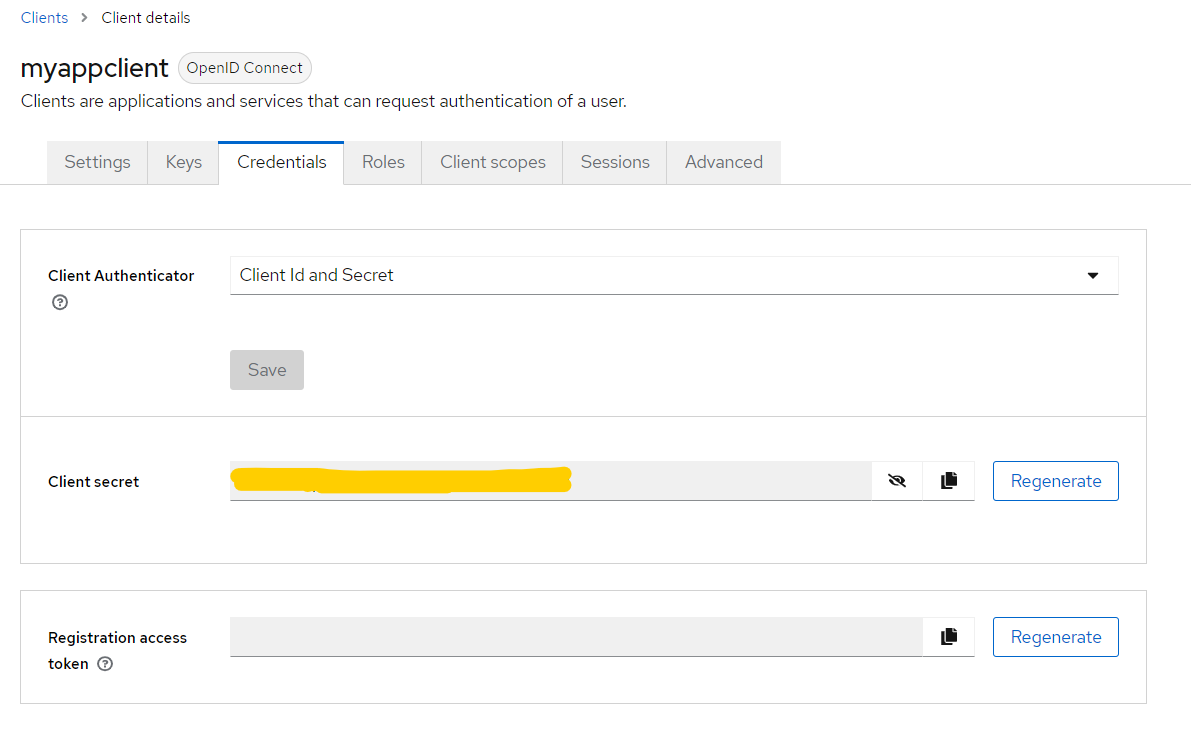
For privacy reasons, in the screeshot above, it is painted yellow. In your case, take note of its value, as in the next step you will need to paste it into the application code.
Step 6 Create a Flask web app utilizing Keycloak authentication
To build the app, we will use Flask, which is a lightweight Python-based web framework. Keycloak supports wide range of other technologies as well. We will use Flask-OIDC library, which expands Flask with capability to run OpenID Connect authentication/authorization scenarios.
As a prerequisite, you need to install the following pip packages to cover the dependency chain. Best run the commands from an already preinstalled Python virtual environment:
pip install Werkzeug==2.3.8
pip install Flask==2.0.1
pip install wheel==0.40.0
pip install flask-oidc==1.4.0
pip install itsdangerous==2.0.1
Then you will need to create 2 files: app.py and keycloak.json. You will need the following changes in these files:
- Replace the IP address
In keycloak.json, replace 64.225.128.216 with your own external IP from Step 1.
- Replace client_secret
Again in keycloak.json, replace value of variable client_secret with the secret from Step 5.
- Replace client_secret
In file app.py, replace value of SECRET_KEY with the same secret from Step 5.
Create a new file called app.py and paste in the following contents:
from flask import Flask, g
from flask_oidc import OpenIDConnect
import json

app = Flask(__name__)

app.config.update(
        SECRET_KEY='XXXXXX',
        OIDC_CLIENT_SECRETS='keycloak.json',
        OIDC_INTROSPECTION_AUTH_METHOD='client_secret_post',
        OIDC_TOKEN_TYPE_HINT='access_token',
        OIDC_SCOPES=['openid','email','profile'],
        OIDC_OPENID_REALM='myrealm'
    )

oidc = OpenIDConnect(app)

@app.route('/')
def index():
    if oidc.user_loggedin:
        info = oidc.user_getinfo(["preferred_username", "email", "sub"])
        return 'Welcome %s' % info.get("preferred_username")
    else:
        return '<h1>Not logged in</h1>'

@app.route('/login')
@oidc.require_login
def login():
    token = oidc.get_access_token()
    info = oidc.user_getinfo(["preferred_username", "email", "sub"])
    username = info.get("preferred_username")
    return "Token: " + token + "<br/><br/>  Username: " + username

@app.route('/logout')
def logout():
    oidc.logout()
    return '<h2>Hi, you have been logged out! <a href="/">Return</a></h2>'
The application code bootstraps the Flask application and provides the configurations necessary for flask_oidc. We need to configure the
name of our realm, the
client secret_key and the
additional settings that reflect our specific sample flow.
Also, this configuration points to another configuration file, keycloak.json, which reflects further settings of our Keycloak realm. Specifically, in it you will find the client ID and the secret, as well as the endpoints where Keycloak makes available further information about the realm settings.
Create the required file keycloak.json, in the same working folder as the app.py file:
{
"web": {
    "client_id": "myapp",
    "client_secret": "XXXXXX",
    "auth_uri": "http://64.225.128.216:8080/realms/myrealm/protocol/openid-connect/auth",
    "token_uri": "http://64.225.128.216:8080/realms/myrealm/protocol/openid-connect/token",
    "issuer": "http://64.225.128.216:8080/realms/myrealm",
    "userinfo_uri": "http://64.225.128.216:8080/realms/myrealm/protocol/openid-connect/userinfo",
    "token_introspection_uri": "http://64.225.128.216:8080/realms/myrealm/protocol/openid-connect/token/introspect",
    "redirect_uris": [
      "http://localhost:5000/*"
    ]
  }
}
Note that app.py creates 3 routes:
- /
In this route, a page is served that provides the name of a logged in user. Alternatively, if the user is not logged in yet, it prompts to do so.
- /login
This route redirects the user to the Keycloak login page and upon successful authentication provides user name and token
- /logout
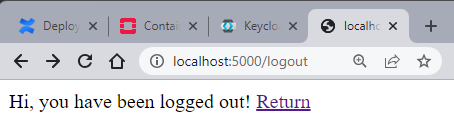
Entering this route logs the user out.
Step 7 Test the application
To test the application, execute the following command from the working directory in which file app.py is placed:
flask run
This is the result, in a CLI window:
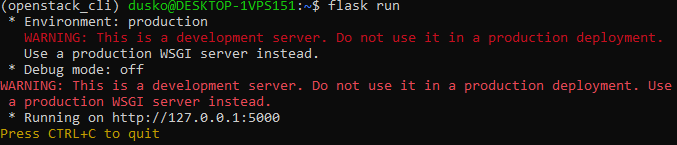
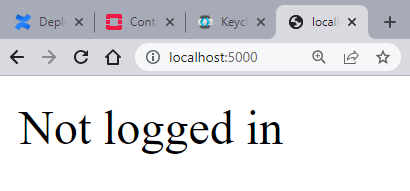
We now know that the localhost is running flask server on port 5000. Enter localhost:5000 into the browser address bar and it will display the site served on the base route: / . We have not logged in our user yet, hence the respective message:
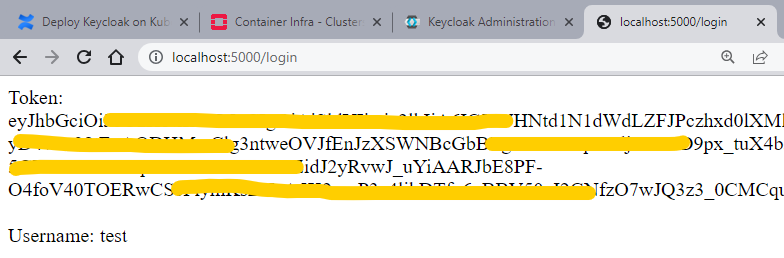
The next step is to enter the /login route. Enter localhost:5000/login into the browser address bar. Doing so, redirects to Keycloak prompting to log in to myapp:
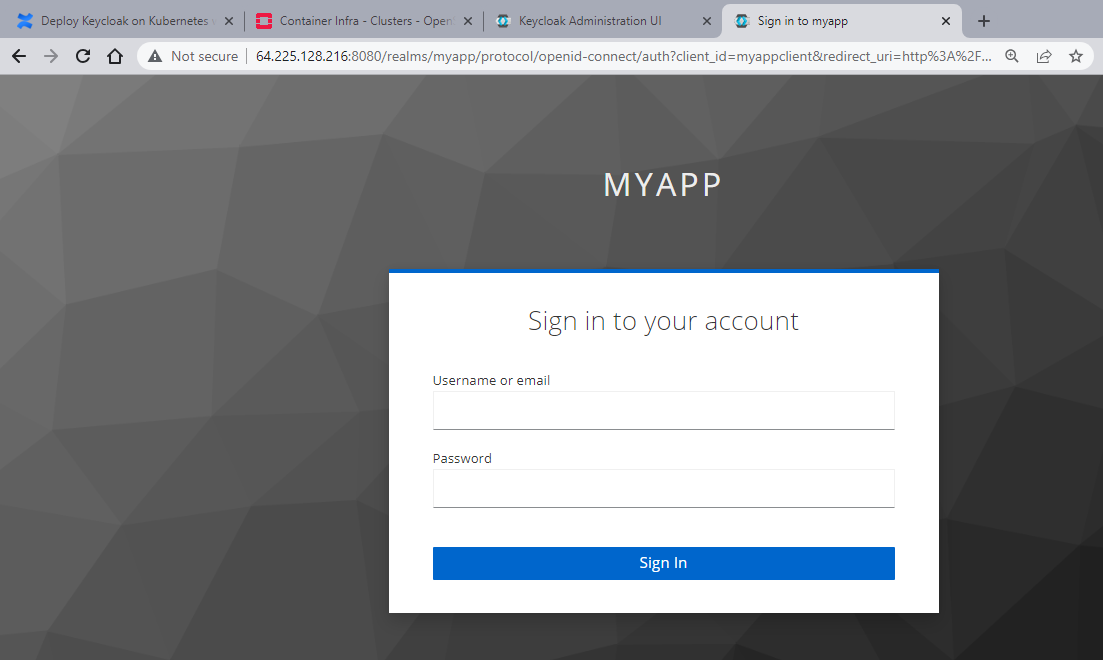
To authenticate, enter the username of the user we created in step 3 (username: test), and the password you used to create this user. With default settings, you might be asked to change the password after first login, then just proceed accordingly. After logging in, our username and token get displayed (for security reasons, parts of the token are painted in yellow):
The last route to test is /logout . When entering localhost:5000/logout to the browser, we can see the screen below. Entering this route calls the flask-oidc method that logs the user out, also clearing the session cookie under the hood.