Enable Kubeapps app launcher on Creodias Magnum Kubernetes cluster
Kubeapps app-launcher enables quick deployments of applications on your Kubernetes cluster, with convenient graphical user interface. In this article we provide guidelines for creating Kubernetes cluster with Kubeapps feature enabled, and deploying sample applications.
What We Are Going To Cover
Brief background - deploying applications on Kubernetes
Create a cluster with Kubeapps quick-launcher enabled
Access Kubeapps service locally from browser
Launch sample application from Kubeapps
Current limitations
Prerequisites
No. 1 Hosting
You need a Creodias hosting account with Horizon interface https://horizon.cloudferro.com/auth/login/?next=/.
The resources that you require and use will reflect on the state of your account wallet. Check your account statistics at https://new.cloudferro.com/.
No. 2 Create Kubernetes cluster from Horizon GUI
Know how to create a Kubernetes cluster from Horizon GUI, as described in article How to Create a Kubernetes Cluster Using Creodias OpenStack Magnum
No. 3 How to Access Kubernetes cluster post-deployment
Access to Linux command line and ability to access cluster, as described in article How To Access Kubernetes Cluster Post Deployment Using Kubectl On Creodias OpenStack Magnum
No. 4 Handling Helm
Some familiarity with Helm, to customize app deployments with Kubeapps. See Deploying Helm Charts on Magnum Kubernetes Clusters on Creodias .
No. 5 Access to CloudFerro clouds
Kubeapps is available on one of the clouds: WAW3-2, FRA1-2, WAW3-1.
Background
Deploying complex applications on Kubernetes becomes notably more efficient and convenient with Helm. Adding to this convenience, Kubeapps, an app-launcher with Graphical User Interface (GUI), provides a user-friendly starting point for application management. This GUI allows to deploy and manage applications on your K8s cluster, limiting the need for deep command-line expertise.
Kubeapps app-launcher can be enabled during cluster creation time. It will run as a local service, accessible from browser.
Create Kubernetes cluster with Kubeapps quick-launcher enabled
Creating Kubernetes cluster with Kubeapps enabled, follows the generic guideline described in Prerequisite No. 2.
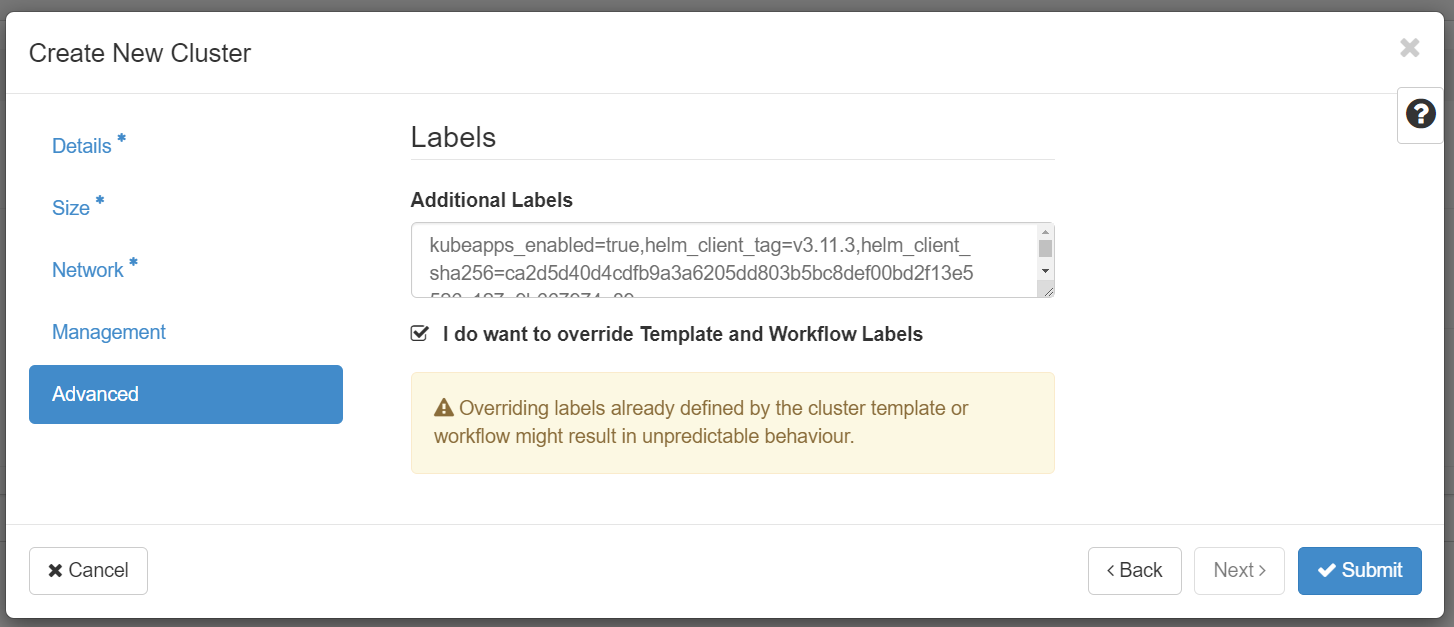
When creating the cluster in Horizon according to this guideline:
insert three labels with below values in the “Advanced” tab and
choose to override the labels.
kubeapps_enabled=true,helm_client_tag=v3.11.3,helm_client_sha256=ca2d5d40d4cdfb9a3a6205dd803b5bc8def00bd2f13e5526c127e9b667974a89
Important
There may be no spaces between label values.
Inserting these labels is shown in the image below:
Access Kubeapps service locally from your browser
Once the cluster is created, access the Linux console. You should have kubectl command line tool available, as specified in Prerequisite No. 3.
Kubeapps service is enabled for the kubeapps-operator service account. We need to obtain the token that authenticates this service account with the cluster.
To print the token, run the following command:
kubectl get secret $(kubectl get serviceaccount kubeapps-operator -o jsonpath='{.secrets[].name}') -o go-template='{{.data.token | base64decode}}' && echo
As result, a long token will be printed, similar to the following:

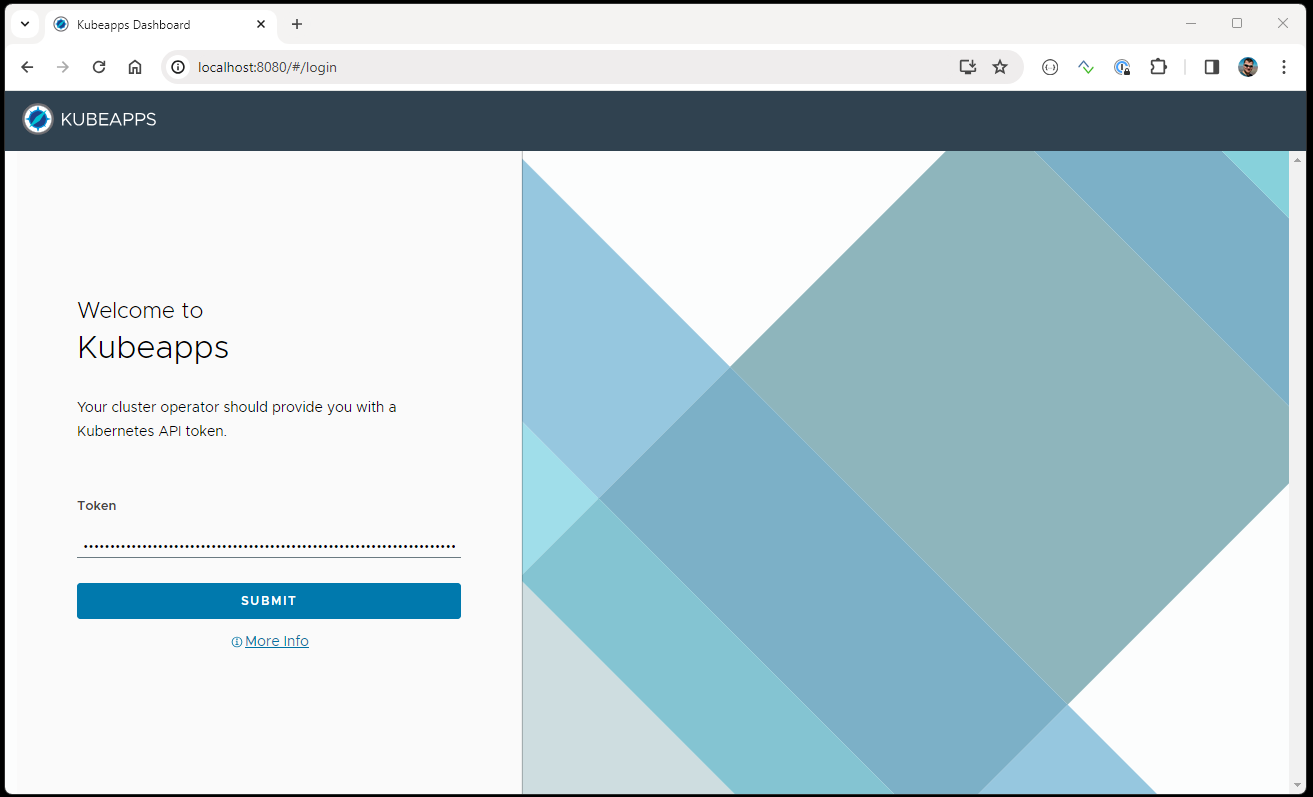
Copy the token. Then run the following command to tunnel the traffic between your local machine and the Kubeapps service:
kubectl port-forward -n kube-system svc/magnum-apps-kubeapps 8080:80
Type localhost:8080 in your browser to access Kubeapps, paste the token copied earlier and click Submit:
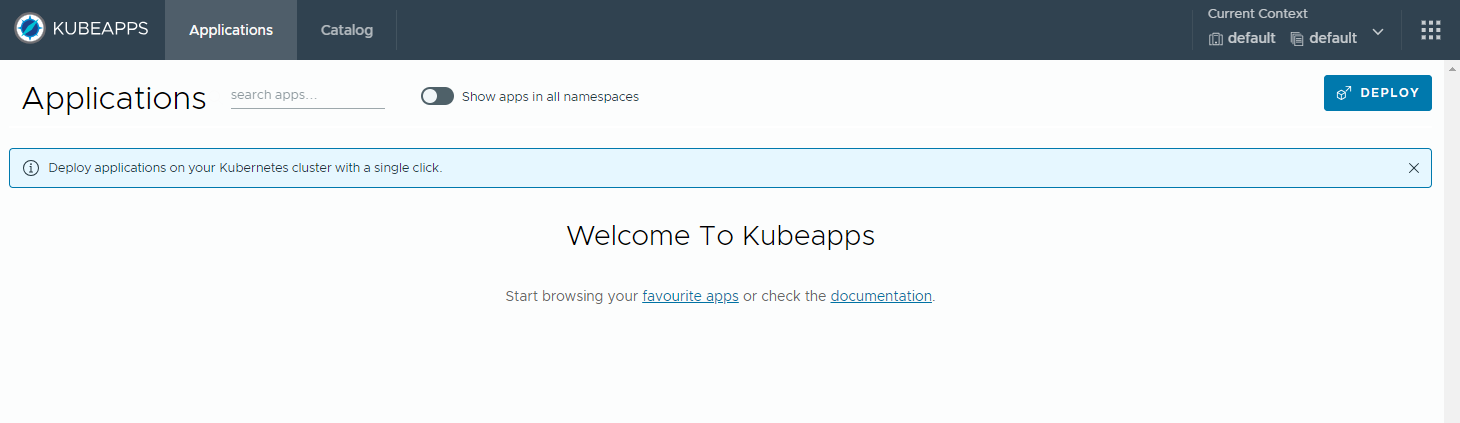
You can now operate Kubeapps:
Launch sample application from Kubeapps
Clicking on “Catalog” exposes a long list of applications available for downloads from Kubeapps app-store.
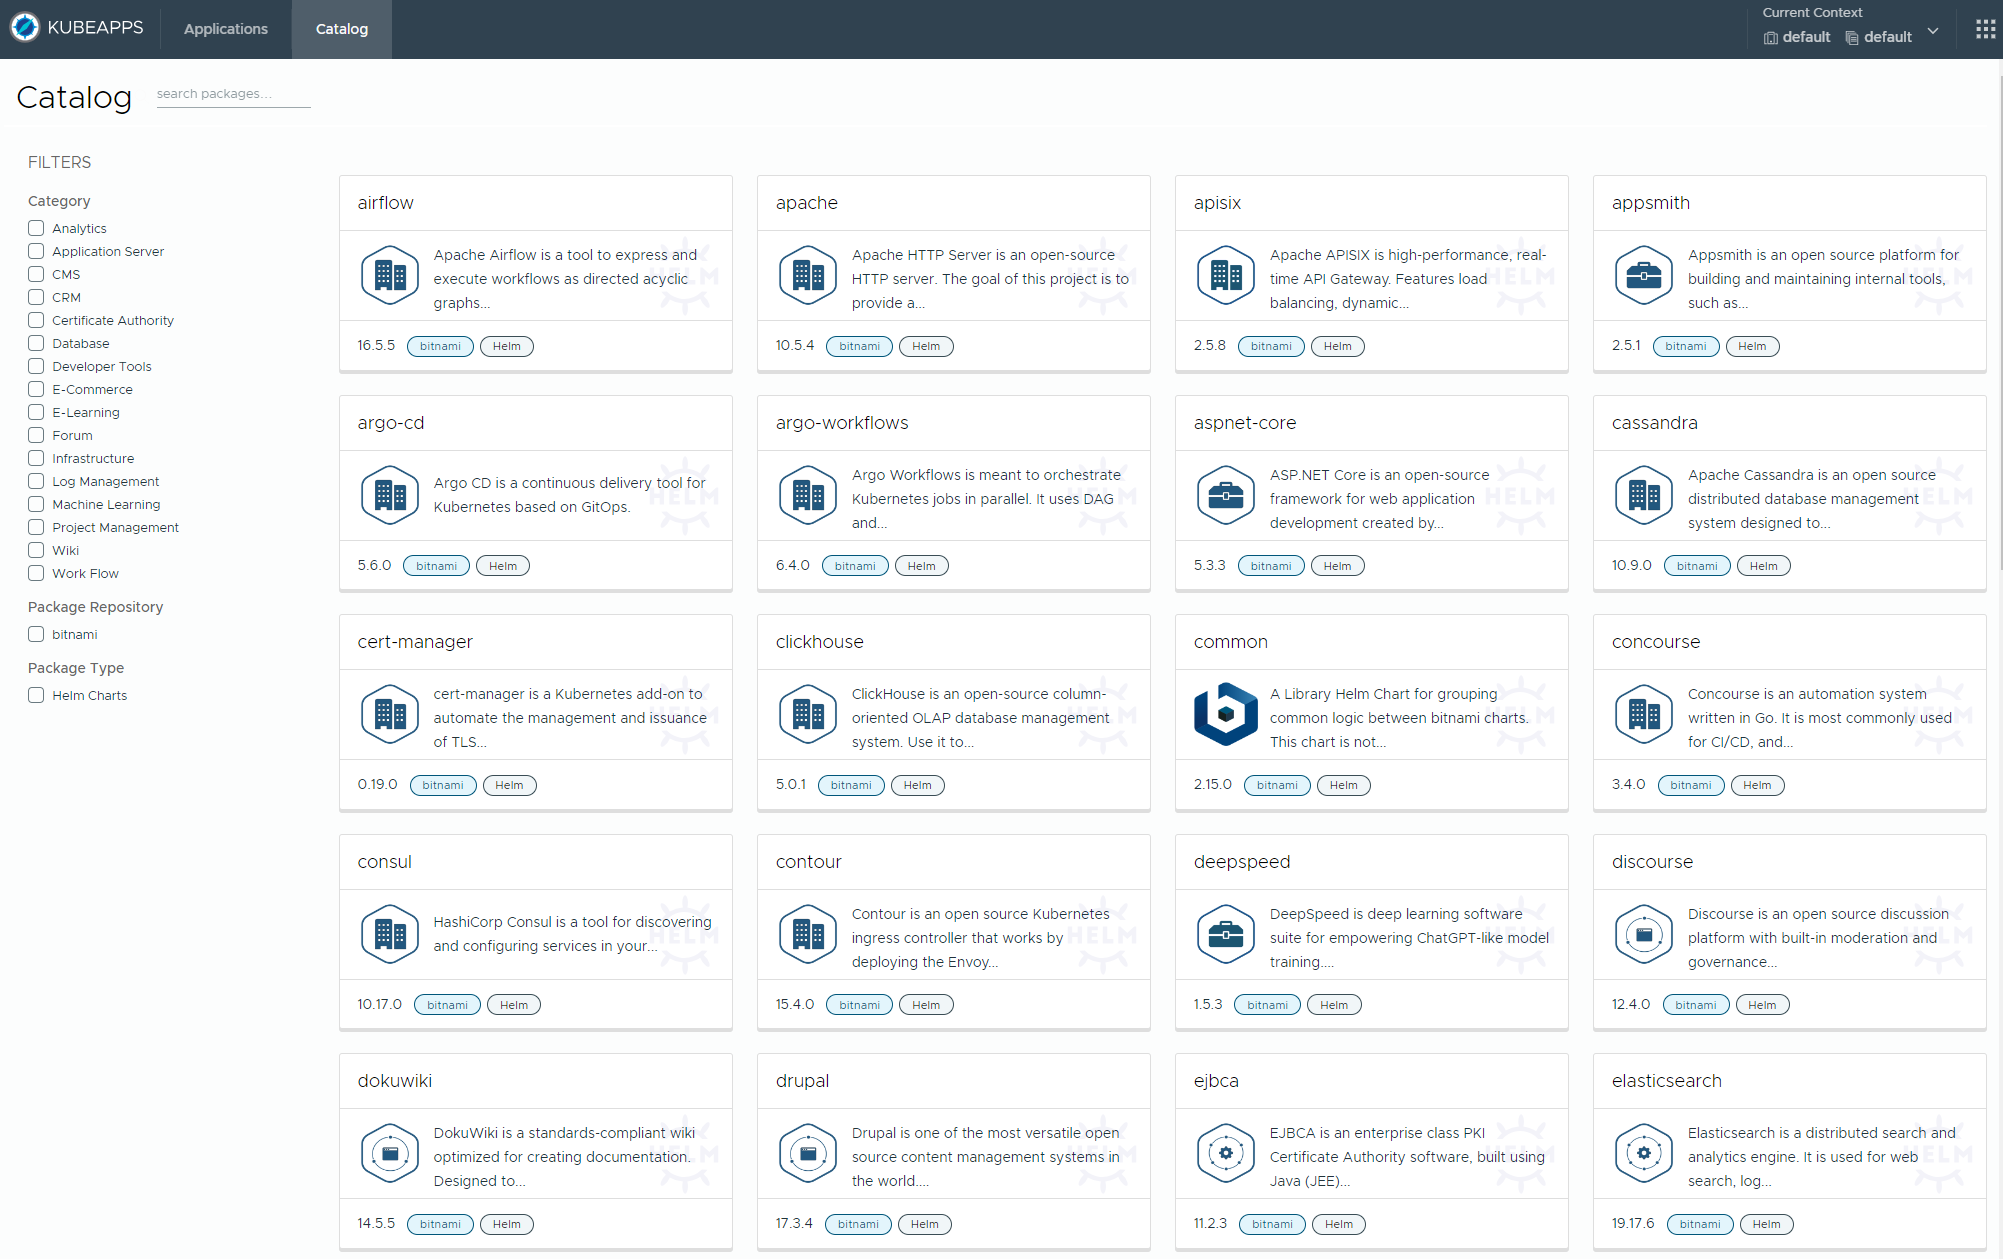
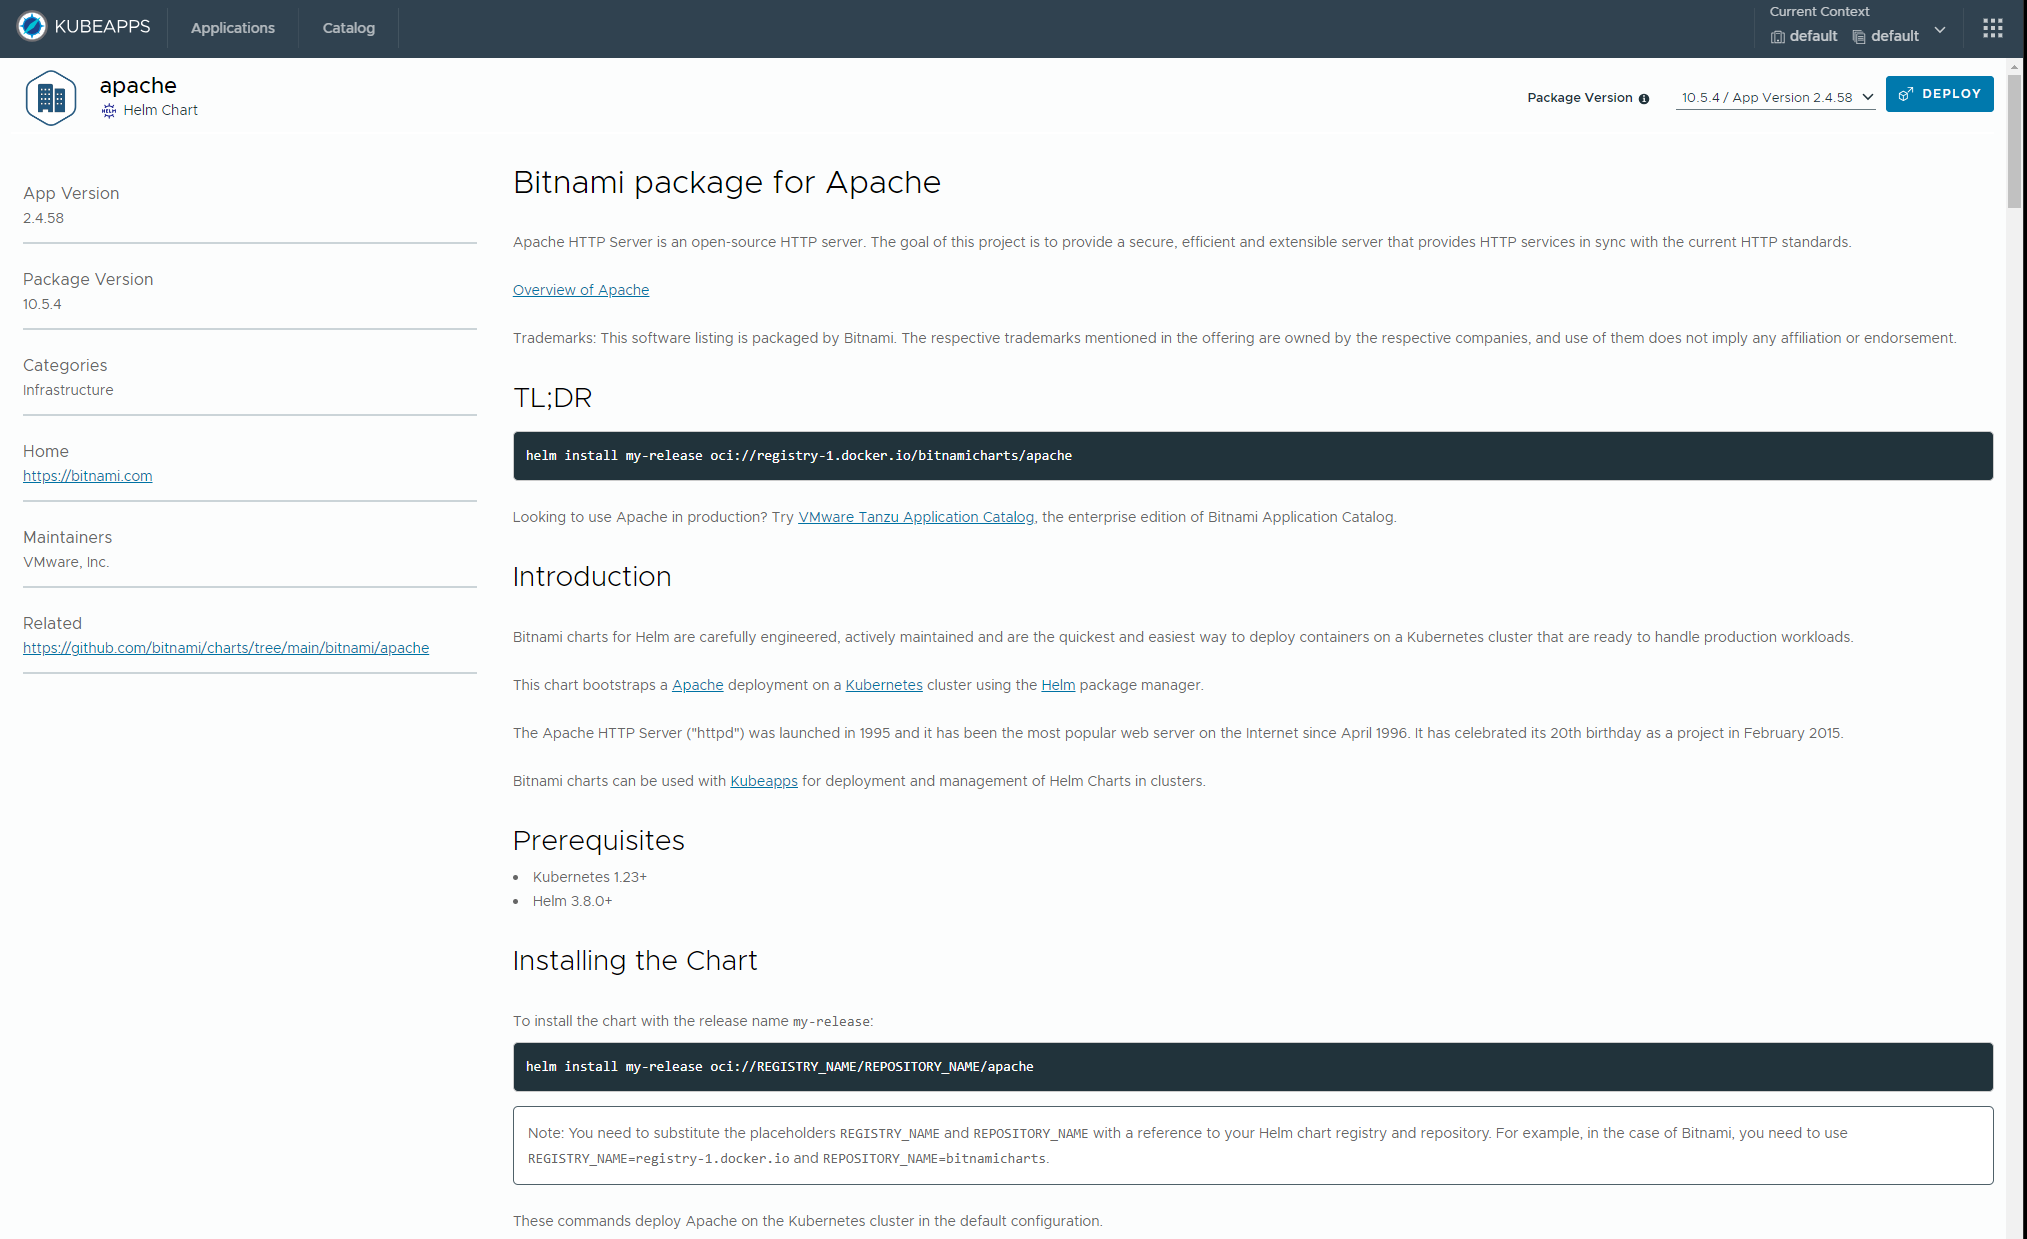
As an example, we will install the Apache webserver and in order to do so, click on the “Apache” box. Note that Kubeapps interface is the graphical shortcut, which behind the scenes installs Helm chart on the cluster.
Once you familiarize yourself with prerequisites and additional information about this chart, click Deploy in the top right corner:
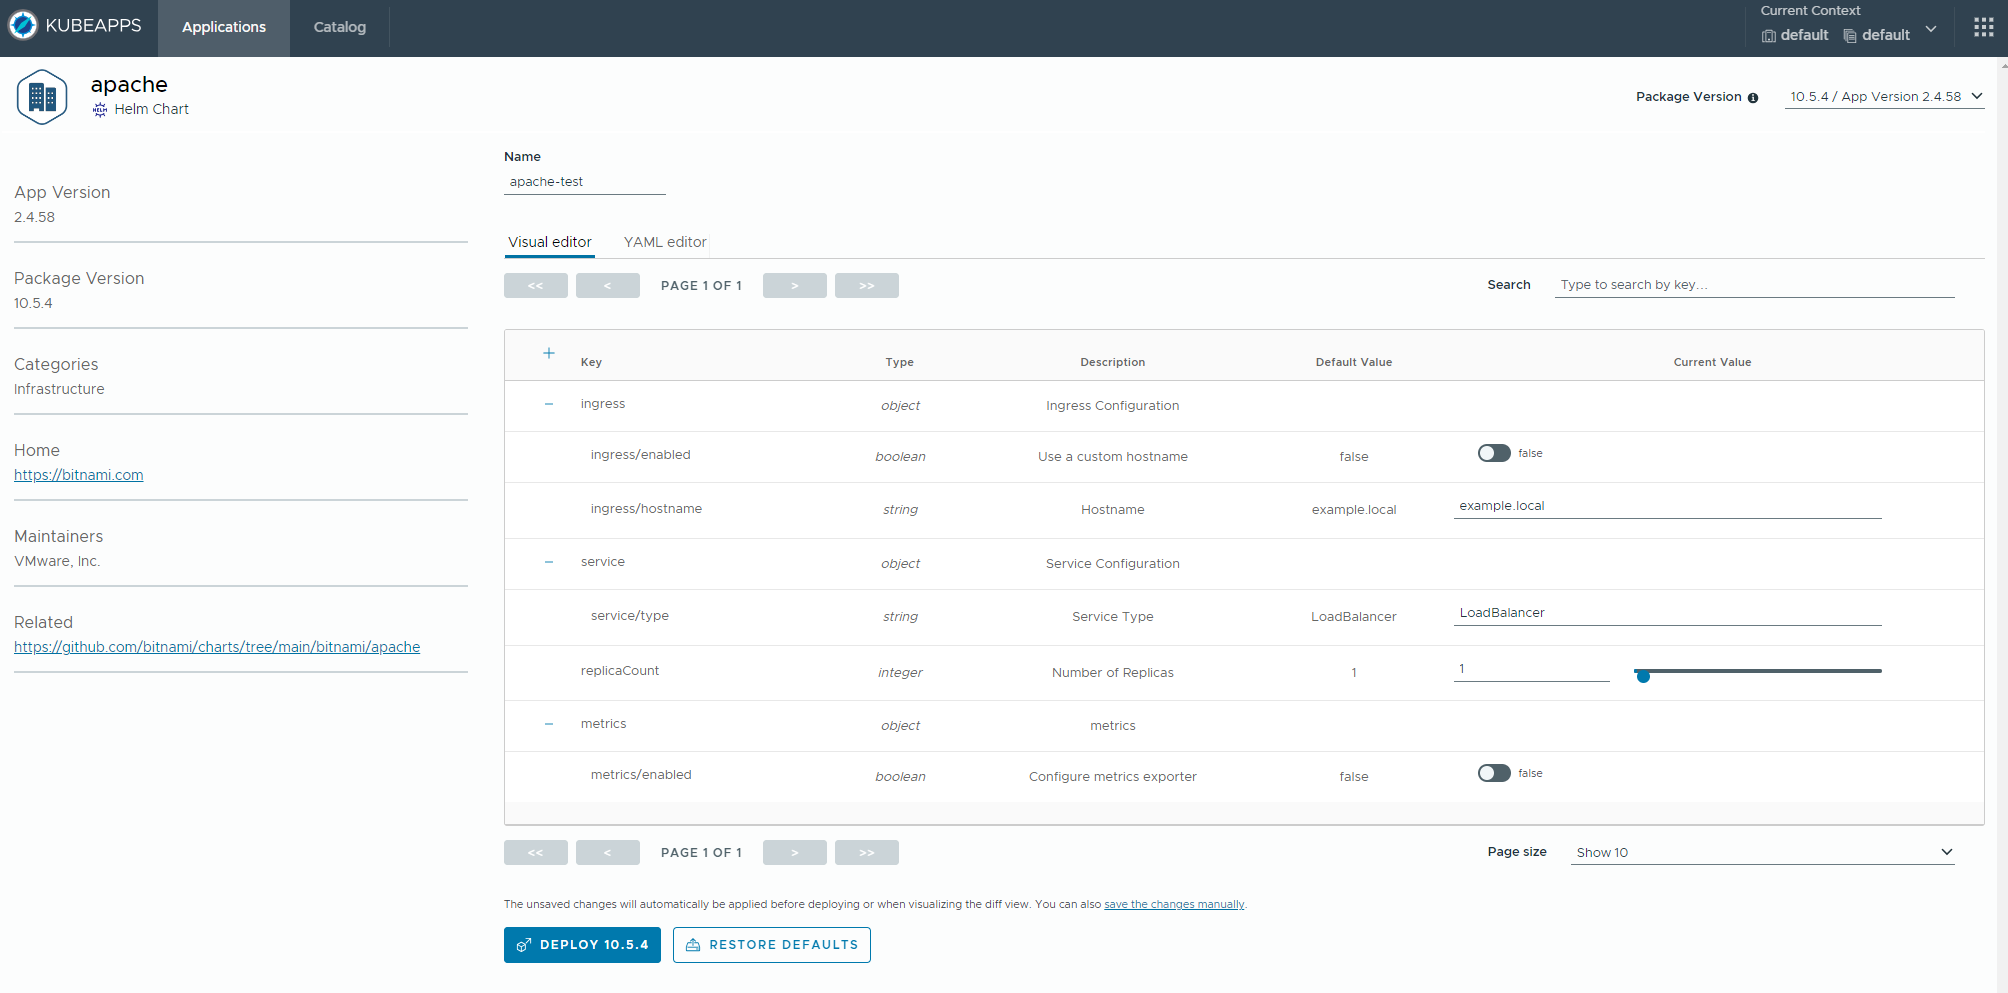
The next screen with the default “Visual Editor” tab enabled, allows to define a few major adjustments to how the service is deployed e.g. specifying the service type or replica count. Access to more detailed configurations (reflecting Helm chart’s values.yaml configuration file) is also available in the “YAML editor” GUI tab.
To follow with the article do not change the defaults, only enter the Name of deployment (in our case apache-test) and hit Deploy with the available version:
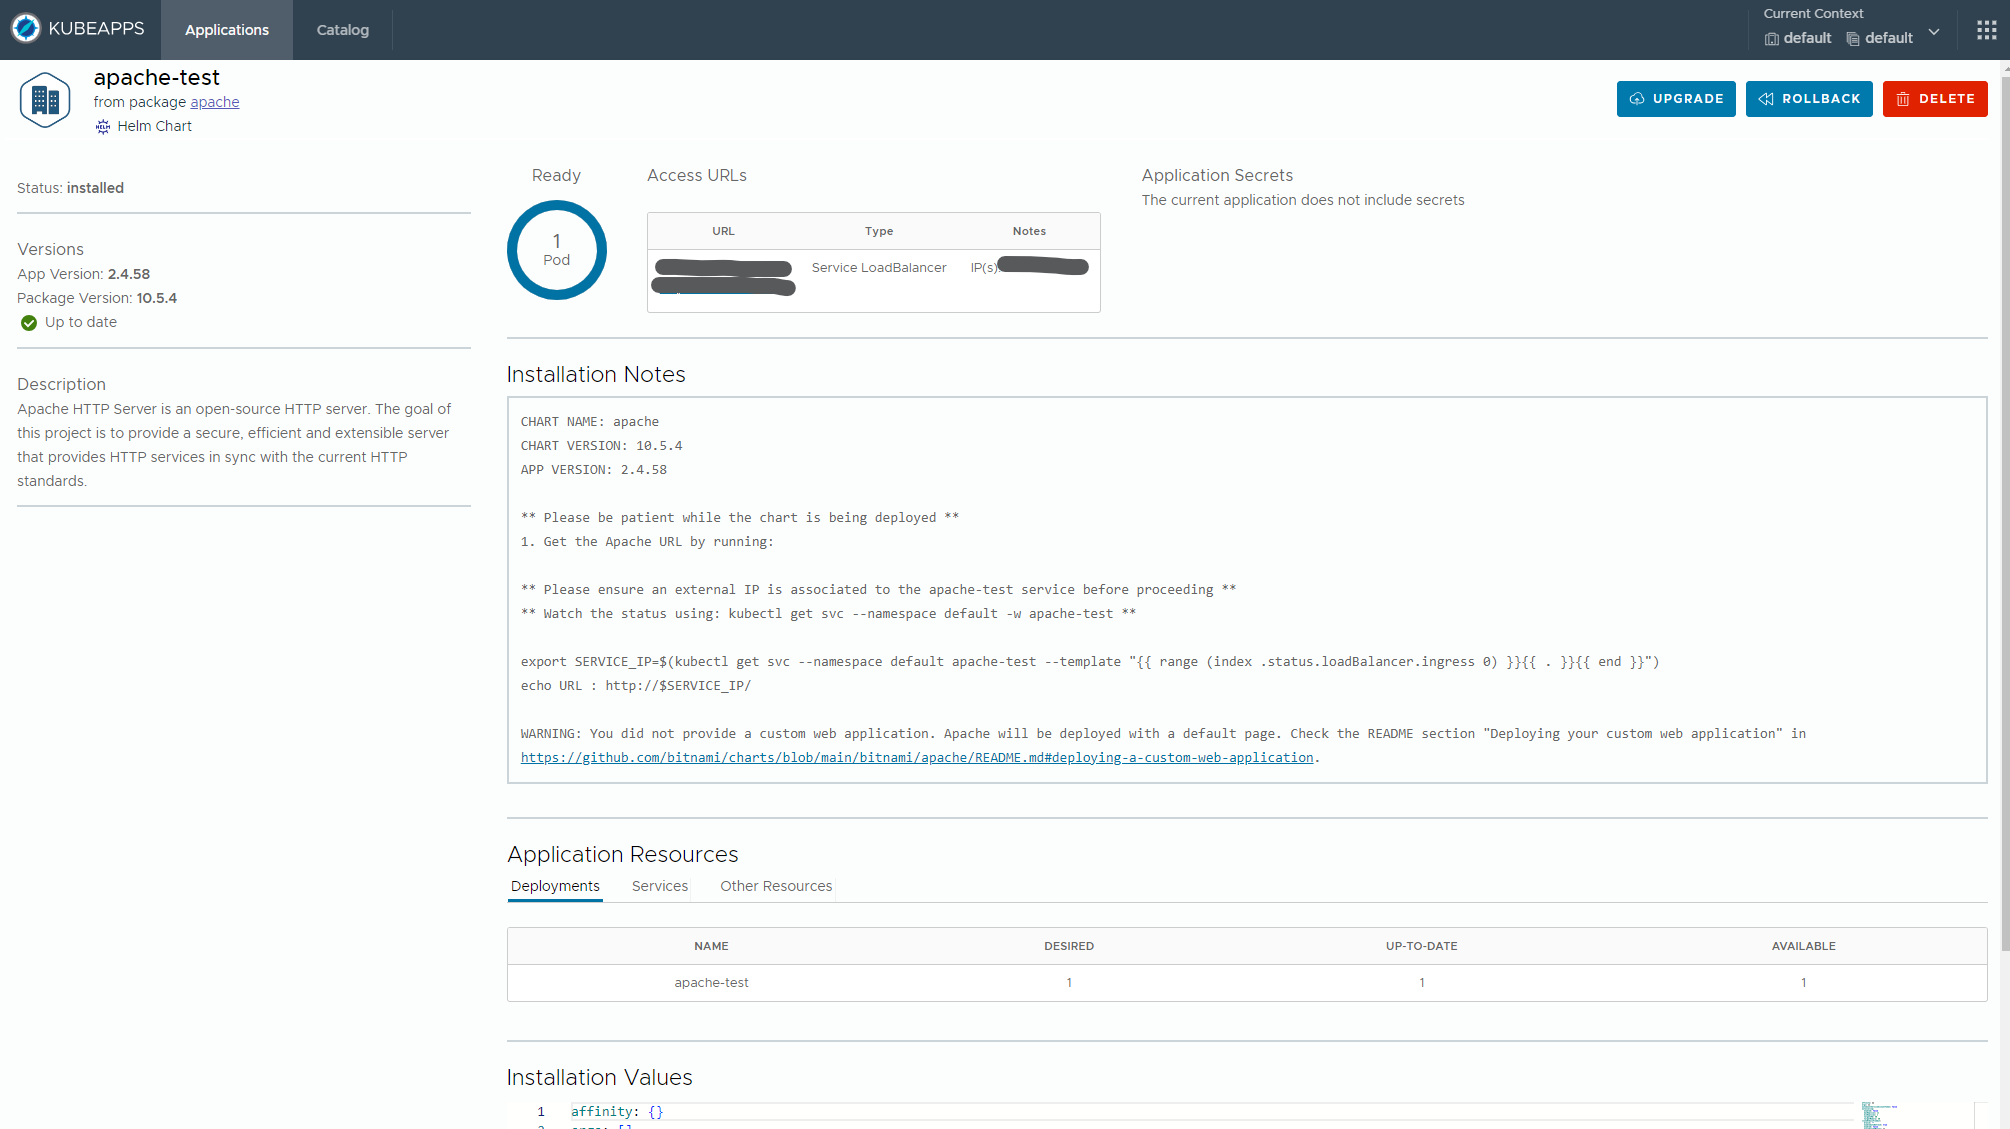
Since we deployed a service of type LoadBalancer, we need to wait a few minutes for it to be deployed on the cloud. After this completes, we can see the screen confirming the deployment is complete:
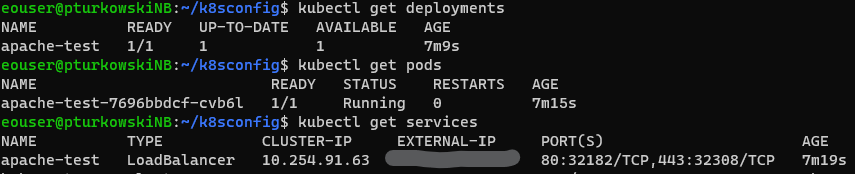
Also, in the console, we can double-check that the Apache service, along with the deployment and pod, were properly deployed. Execute the following commands:
kubectl get deployments
kubectl get pods
kubectl get services
The results will be similar to this:
Current limitations
Both Kubeapps and Helm charts deployed by this launcher are open-source projects, which are continuously evolving. The versions installed on Creodias cloud provide a snapshot of this development, as a convenience feature.
It is expected that not all applications can be installed with one-click and additional configuration will be needed in each particular case.
One known limitation is that certain charts will require RWM (ReadWriteMany) persistent volume claims to properly operate. Currently, RWM persistent volumes are not natively available on Creodias cloud. A workaround could be installing NFS server and deploying a StorageClass with RWM-supportive provisioner e.g. using nfs-subdir-external-provisioner project from GitHub.
For NFS on Kubernetes cluster, see Create and access NFS server from Kubernetes on Creodias.