HTTP Request-based Autoscaling on K8S using Prometheus and Keda on Creodias
Kubernetes pod autoscaler (HPA) natively utilizes CPU and RAM metrics as the default triggers for increasing or decreasing number of pods. While this is often sufficient, there can be use cases where scaling on custom metrics is preferred.
KEDA is a tool for autoscaling based on events/metrics provided from popular sources/technologies such as Prometheus, Kafka, Postgres and multiple others.
With this article we will deploy a sample app on Creodias . We will collect HTTP requests from NGINX Ingress on our Kubernetes cluster and, using Keda with Prometheus scaler, apply custom HTTP request-based scaling.
Note
We will use NGINX web server to demonstrate the app, and NGINX ingress to deploy it and collect metrics. Note that NGINX web server and NGINX ingress are two separate pieces of software, with two different purposes.
What We Are Going To Cover
Install NGINX ingress on Magnum cluster
Install Prometheus
Install Keda
Deploy a sample app
Deploy our app ingress
Access Prometheus dashboard
Deploy KEDA ScaledObject
Test with Locust
Prerequisites
- No. 1 Account
You need a Creodias hosting account with access to the Horizon interface: https://horizon.cloudferro.com/auth/login/?next=/.
No. 2 Create a new Kubernetes cluster without Magnum NGINX preinstalled from Horizon UI
The default NGINX ingress deployed from Magnum from Horizon UI does not yet implement Prometheus metrics export. Instead of trying to configure Magnum ingress for this use case, we will rather install a new NGINX ingress. To avoid conflicts, best to follow the below instruction on a Kubernetes cluster without Magnum NGINX preinstalled from Horizon UI.
No. 3 kubectl pointed to the Kubernetes cluster
The following article gives options for creating a new cluster and activating the kubectl command:
How To Access Kubernetes Cluster Post Deployment Using Kubectl On Creodias OpenStack Magnum.
As mentioned, create the cluster without installing the NGINX ingress option.
No. 4 Familiarity with deploying Helm charts
This article will introduce you to Helm charts on Kubernetes:
Deploying Helm Charts on Magnum Kubernetes Clusters on Creodias
Install NGINX ingress on Magnum cluster
Please type in the following commands to download the ingress-nginx Helm repo and then install the chart. Note we are using a custom namespace ingress-nginx as well as setting the options to enable Prometheus metrics.
helm repo add ingress-nginx https://kubernetes.github.io/ingress-nginx
helm repo update

kubectl create namespace ingress-nginx

helm install ingress-nginx ingress-nginx/ingress-nginx \
--namespace ingress-nginx \
--set controller.metrics.enabled=true \
--set-string controller.podAnnotations."prometheus\.io/scrape"="true" \
--set-string controller.podAnnotations."prometheus\.io/port"="10254"
Now run the following command to get the external IP address of the ingress controller, which will be used by ingress resources created in the further steps of this article.
$ kubectl get services -n ingress-nginx
NAME                      TYPE           CLUSTER-IP       EXTERNAL-IP     PORT(S)                      AGE
ingress-nginx-controller  LoadBalancer   10.254.118.18    64.225.135.67   80:31573/TCP,443:30786/TCP   26h
We get 64.225.135.67. Instead of that value, use the EXTERNAL-IP value you get in your terminal after running the above command.
Install Prometheus
In order to install Prometheus, please apply the following command on your cluster:
kubectl apply --kustomize github.com/kubernetes/ingress-nginx/deploy/prometheus/
Note that this is Prometheus installation customized for NGINX Ingress and already installs to the ingress-nginx namespace by default, so no need to provide the namespace flag or create one.
Install Keda
With below steps, create a separate namespace for Keda artifacts, download the repo and install the Keda-Core chart:
kubectl create namespace keda

helm repo add kedacore https://kedacore.github.io/charts
helm repo update

helm install keda kedacore/keda --version 2.3.0 --namespace keda
Deploy a sample app
With the above steps completed, we can deploy a simple application. It will be an NGINX web server, serving a simple “Welcome to nginx!” page. Note, we create a deployment and then expose this deployment as a service of type ClusterIP. Create a file app-deployment.yaml in your favorite editor:
app-deployment.yaml
apiVersion: apps/v1
kind: Deployment
metadata:
  name: nginx
spec:
  selector:
    matchLabels:
      app: nginx
  replicas: 1
  template:
    metadata:
      labels:
        app: nginx
    spec:
      containers:
      - name: nginx
        image: nginx
---
apiVersion: v1
kind: Service
metadata:
  name: nginx
spec:
  selector:
    app: nginx
  type: ClusterIP
  ports:
    - protocol: TCP
      port: 80
      targetPort: 80
Then apply with the below command:
kubectl apply -f app-deployment.yaml -n ingress-nginx
We are deploying this application into the ingress-nginx namespace where also the ingress installation and Prometheus is hosted. For production scenarios, you might want to have better isolation of application vs. infrastructure, this is however beyond the scope of this article.
Deploy our app ingress
Our application is already running and exposed in our cluster, but we want to also expose it publicly. For this purpose we will use NGINX ingress, which will also act as a proxy to register the request metrics. Create a file app-ingress.yaml with the following contents:
app-ingress.yaml
apiVersion: networking.k8s.io/v1
kind: Ingress
metadata:
  name: app-ingress
  annotations:
    nginx.ingress.kubernetes.io/rewrite-target: /
spec:
  ingressClassName: nginx
  rules:
  - host: "64.225.135.67.nip.io"
    http:
      paths:
      - backend:
          service:
            name: nginx
            port:
              number: 80
        path: /app
        pathType: Prefix
Then apply with:
kubectl apply -f app-ingress.yaml -n ingress-nginx
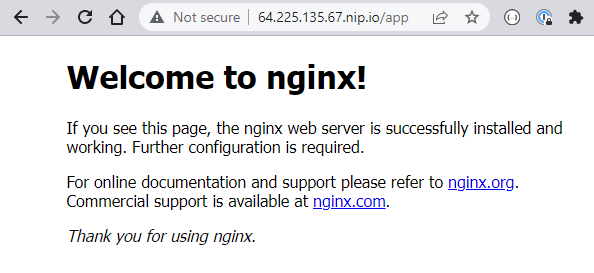
After a while, you can get a public IP address where the app is available:
$ kubectl get ingress -n ingress-nginx
NAME           CLASS   HOSTS                  ADDRESS         PORTS   AGE
app-ingress    nginx   64.225.135.67.nip.io   64.225.135.67   80      18h
After typing the IP address with the prefix (replace with your own floating IP with /app suffix), we can see the app exposed. We are using the nip.io service, which works as a DNS resolver, so there is no need to set up DNS records for the purpose of the demo.
Access Prometheus dashboard
To access Prometheus dashboard we can port-forward the running prometheus-server to our localhost. This could be useful for troubleshooting. We have the prometheus-server running as a NodePort service, which can be verified per below:
$ kubectl get services -n ingress-nginx
NAME                                 TYPE           CLUSTER-IP       EXTERNAL-IP     PORT(S)                      AGE
ingress-nginx-controller             LoadBalancer   10.254.3.172     64.225.135.67   80:30881/TCP,443:30942/TCP   26h
ingress-nginx-controller-admission   ClusterIP      10.254.51.201    <none>          443/TCP                      26h
ingress-nginx-controller-metrics     ClusterIP      10.254.15.196    <none>          10254/TCP                    26h
nginx                                ClusterIP      10.254.160.207   <none>          80/TCP                       25h
prometheus-server                    NodePort       10.254.24.85     <none>          9090:32051/TCP               26h
We will port-forward to the localhost in the following command:
kubectl port-forward deployment/prometheus-server 9090:9090 -n ingress-nginx
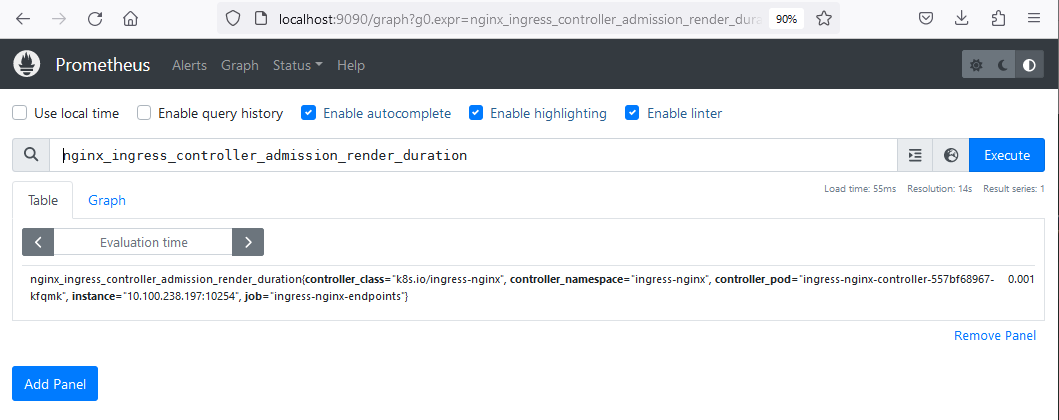
Then enter localhost:9090 in your browser, you will see the Prometheus dashboard. In this view we will be able to see various metrics exposed by nginx-ingress. This can be verified by starting to type “nginx-ingress” to search bar, then various related metrics will start to show up.
Deploy KEDA ScaledObject
Keda ScaledObject is a custom resource which will enable scaling our application based on custom metrics. In the YAML manifest we define what will be scaled (the nginx deployment), what are the conditions for scaling, and the definition and configuration of the trigger, in this case Prometheus. Prepare a file scaled-object.yaml with the following contents:
scaled-object.yaml
apiVersion: keda.sh/v1alpha1
kind: ScaledObject
metadata:
  name: prometheus-scaledobject
  namespace: ingress-nginx
  labels:
    deploymentName: nginx
spec:
  scaleTargetRef:
    kind: Deployment
    name: nginx # name of the deployment, must be in the same namespace as ScaledObject
  minReplicaCount: 1
  pollingInterval: 15
  triggers:
  - type: prometheus
    metadata:
      serverAddress: http://prometheus-server.ingress-nginx.svc.cluster.local:9090
      metricName: nginx_ingress_controller_requests
      threshold: '100'
      query: sum(rate(nginx_ingress_controller_requests[1m]))
For detailed definition of ScaledObject, refer to Keda documentation. In this example, we are leaving out a lot of default settings, most notable of which is called coolDownPeriod. Being not explicitly assigned a value, its default value of 300 seconds will be in effect, however, see below how you can change that value to something else.
We are using here the nginx-ingress-controller-requests metric for scaling. This metric will only populate in the Prometheus dashboard once the requests start hitting our app service. We are setting the threshold for 100 and the time to 1 minute, so in case there is more requests than 100 per pod in a minute, this will trigger scale up.
kubectl apply -f scaled-object.yaml -n ingress-nginx
Test with Locust
We can now test whether the scaling works as expected. We will use Locust for this, which is a load testing tool. To quickly deploy Locust as LoadBalancer service type, enter the following commands:
kubectl create deployment locust --image paultur/locustproject:latest
kubectl expose deployment locust --type LoadBalancer --port 80 --target-port 8089
After a couple of minutes the LoadBalancer is created and Locust is exposed:
$ kubectl get services
NAME         TYPE           CLUSTER-IP     EXTERNAL-IP      PORT(S)        AGE
kubernetes   ClusterIP      10.254.0.1     <none>           443/TCP        28h
locust       LoadBalancer   10.254.88.89   64.225.132.243   80:31287/TCP   4m19s
Enter Locust UI in the browser using the EXTERNAL-IP. It can be only 64.225.132.243 or 64.225.132.243.nip.io, one of these values is sure to work. Then hit “Start Swarming” to initiate mock requests on our app’s public endpoint:
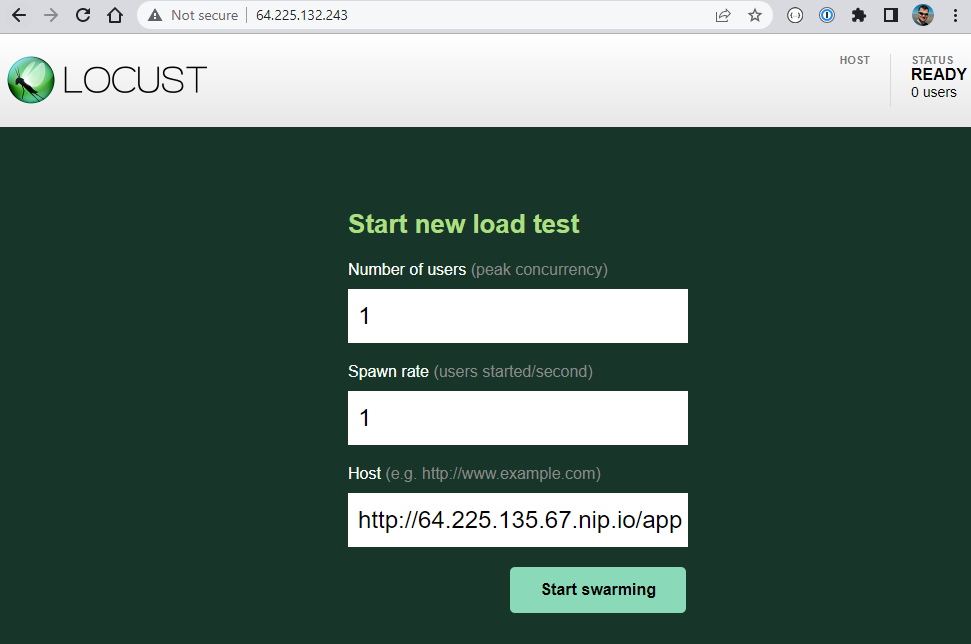
With the default setting and even single user, Locust will start swarming hundreds of requests immediately. Tuning Locust is not in scope of this article, but we can quickly see the effect. The additional pod replicas are generated:
$ kubectl get pods -n ingress-nginx
NAME                                        READY   STATUS              RESTARTS   AGE
ingress-nginx-controller-557bf68967-h9zf5   1/1     Running             0          27h
nginx-85b98978db-2kjx6                      1/1     Running             0          30s
nginx-85b98978db-2kxzz                      1/1     Running             0          61s
nginx-85b98978db-2t42c                      1/1     Running             0          31s
nginx-85b98978db-2xdzw                      0/1     ContainerCreating   0          16s
nginx-85b98978db-2zdjm                      1/1     Running             0          30s
nginx-85b98978db-4btfm                      1/1     Running             0          30s
nginx-85b98978db-4mmlz                      0/1     ContainerCreating   0          16s
nginx-85b98978db-4n5bk                      1/1     Running             0          46s
nginx-85b98978db-525mq                      1/1     Running             0          30s
nginx-85b98978db-5czdf                      1/1     Running             0          46s
nginx-85b98978db-5kkgq                      0/1     ContainerCreating   0          16s
nginx-85b98978db-5rt54                      1/1     Running             0          30s
nginx-85b98978db-5wmdk                      1/1     Running             0          46s
nginx-85b98978db-6tc6p                      1/1     Running             0          77s
nginx-85b98978db-6zcdw                      1/1     Running             0          61s
...
Cooling down
After hitting “Stop” in Locust, the pods will scale down to one replica, in line with the value of coolDownPeriod parameter, which is defined in the Keda ScaledObject. Its default value is 300 seconds. If you want to change it, use command
kubectl edit scaledobject prometheus-scaledobject -n ingress-nginx