How to Create a Kubernetes Cluster Using Creodias OpenStack Magnum
In this tutorial, you will start with an empty Horizon screen and end up running a full Kubernetes cluster.
What we are going to cover
Prerequisites
No. 1 Hosting
You need a Creodias hosting account with Horizon interface https://horizon.cloudferro.com/auth/login/?next=/.
The resources you require will directly affect your account wallet balance. Check your account statistics at https://new.cloudferro.com/ and if you are not going to use the cluster any more, remove them altogether to save resources costs.
It’s good practice to create a dedicated service account for each Kubernetes cluster. In essence, devote one account to one Kubernetes cluster, nothing more and nothing less.
No. 2 Private and public keys
An SSH key-pair created in OpenStack dashboard. To create it, follow this article How to create key pair in OpenStack Dashboard on Creodias.
The key pair created in that article is called “sshkey”. You will use it as one of the parameters for creation of the Kubernetes cluster.
No. 3 Creating a node to be GPU-ready
If you want to deploy vGPU workloads on Creodias Kubernetes cluster, be aware that picking a GPU flavor worker node does not automatically mean it is GPU-ready. See article Deploying vGPU workloads on Creodias Kubernetes.
No. 4 Using applications credentials
The most obvious way to authenticate to the cloud is to use RC files, as described in article
How to activate OpenStack CLI access to Creodias cloud using one- or two-factor authentication
If you are authenticating with application credentials, as described in How to generate or use Application Credentials via CLI on Creodias, then be sure to use parameter --unrestricted. With that, you will be able to create Kubernetes clusters when using application credentials for authentication.
No. 5 Select the proper type of cluster template
Here is a list of cluster templates to select from Default Magnum cluster templates on Creodias.
Step 1 Create New Cluster Screen
Click on Container Infra, then click Clusters.
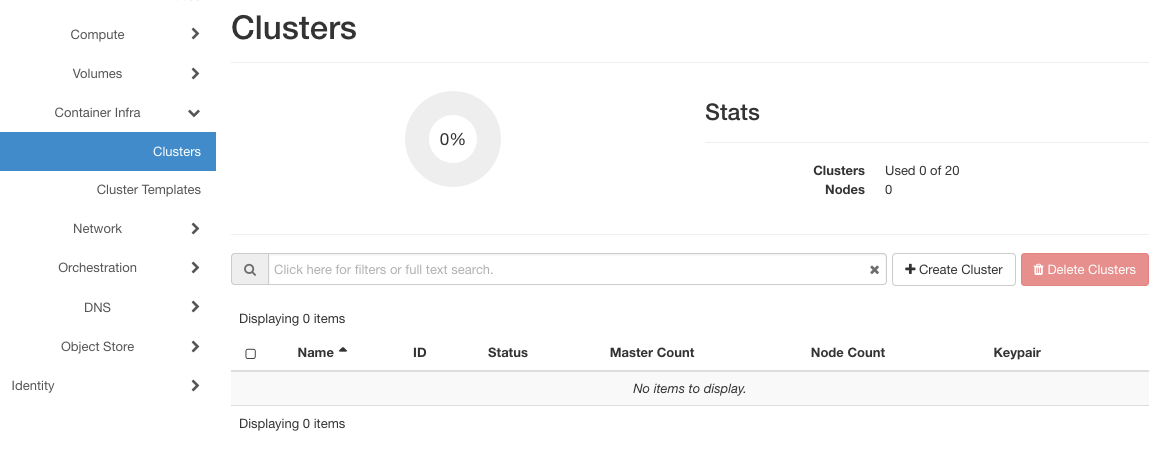
There are no clusters yet so click on button + Create Cluster on the right side of the screen.
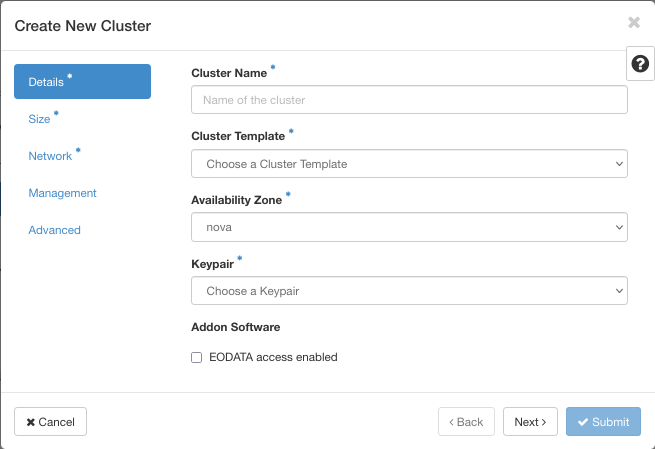
On the left side and in blue color are the main options – screens into which you will enter data for the cluster. The three with the asterisks, Details, Size, and Network are mandatory; you must visit them and either enter new values or confirm the offered default values within each screen. When all the values are entered, the Submit button in the lower right corner will become active.
Cluster Name
This is your first cluster, name it just Kubernetes.

Cluster name cannot contain spaces.
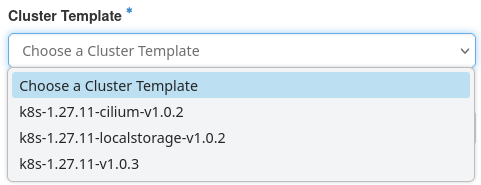
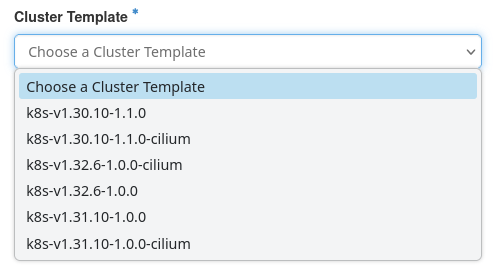
Cluster Template
Cluster template is a blueprint for base configuration of the cluster, where the version number reflects the Kubernetes version used. Click on field Cluster Template and select one of the offered templates. See Prerequisite No. 5 for more details.
FRA1-2, WAW3-1, WAW3-2
WAW4-1
You immediately see how the cluster template is applied:
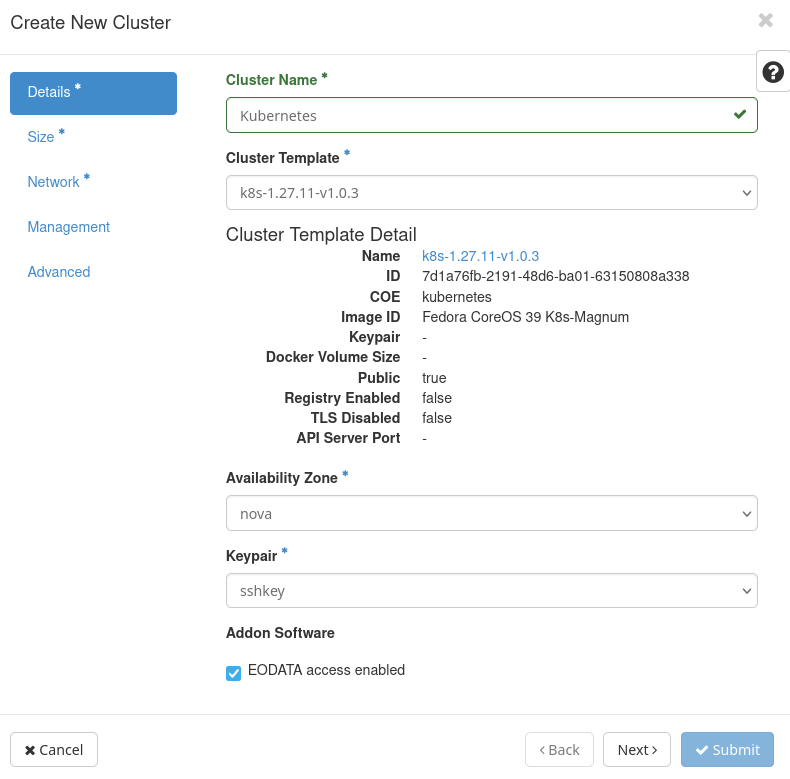
Availability Zone
nova is the name of the related module in OpenStack and is the only option offered here.
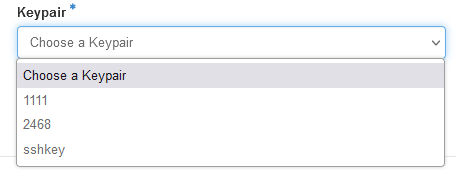
Keypair
Assuming you have used Prerequisite No. 2, choose sshkey.
Addon Software - EODATA access enabled
This field is specific to OpenStack systems that are developed by Cloudferro hosting company. EODATA here means Earth Observation Data and refers to data gained from scientific satelites monitoring the Earth.

Checking this field on, will install a network which will have access to the downloaded satellite data.
If you are just trying to learn about Kubernetes on OpenStack, leave this option unchecked. And vice versa: if you want to go into production and use satellite data, turn it on.
Note
There is cluster template label called eodata_access_enabled=true which – if turned on – will have the same effect of creating a network for connecting to the EODATA.
This is what the screen looks like when all the data have been entered:
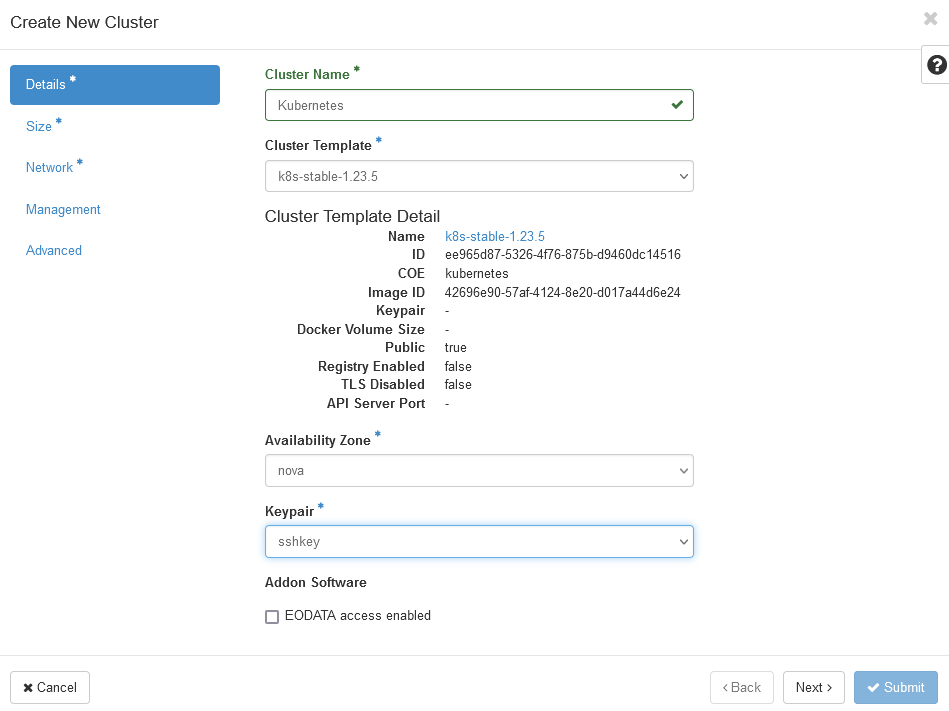
Click on lower right button Next or on option Size from the left main menu of the screen to proceed to the next step of defining a Kubernetes cluster.
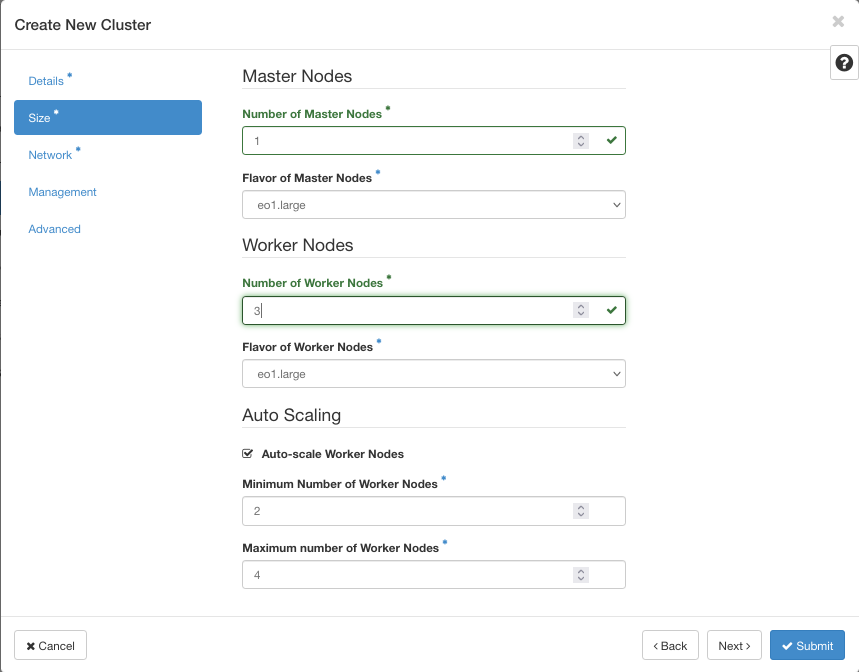
Step 2 Define Master and Worker Nodes
In general terms, master nodes are used to host the internal infrastructure of the cluster, while the worker nodes are used to host the K8s applications.
This is how this window looks before entering the data:
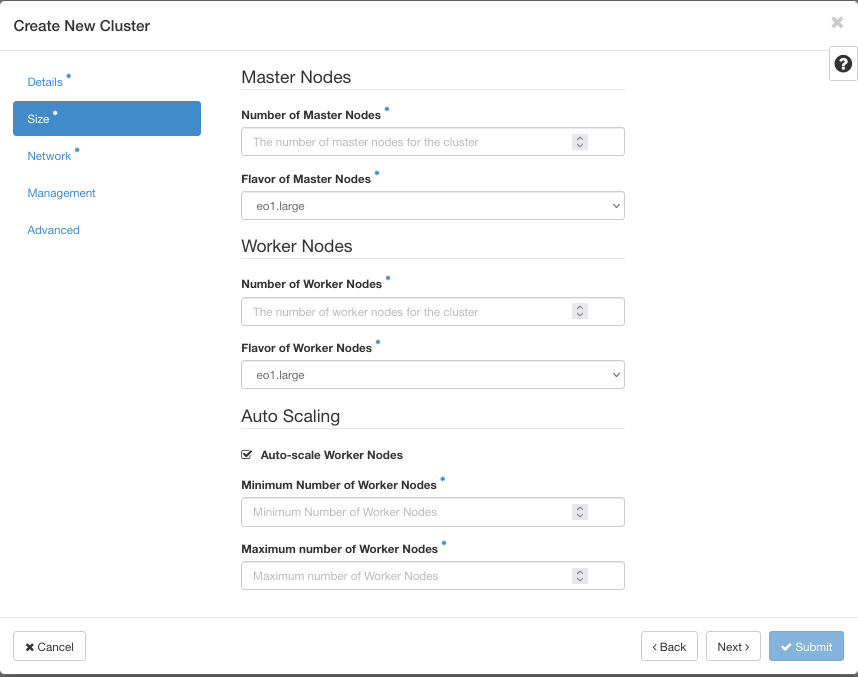
If there are any fields with default values, such as Flavor of Master Nodes and Flavor of Worker Nodes, these values were predefined in the cluster template.
Number of Master Nodes

Kubernetes cluster has master and worker nodes. In real applications, a typical setup would be running 3 master nodes to ensure High Availability of the cluster’s infrastructure. Here, you want to create your first cluster in a new environment so settle for just 1 master node.
Note
Ensure You Use an Odd Number of Master Nodes
Due to the requirements of the distributed consensus algorithm, an even number of master nodes is not supported. In versions 1.29 and later, attempting to configure an even number of master nodes will result in an immediate error. In earlier versions, any nodes beyond the nearest lower odd number will not be utilized.
Flavor of Master Nodes
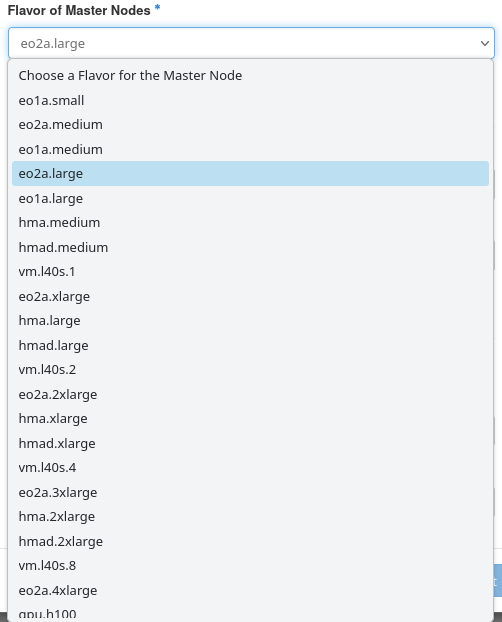
Note
Flavors marked with GPU card names: e.g. L40s or A6000 are GPU ready. However, picking one such flavor for your worker nodes does NOT automatically mean that the cluster is GPU-ready. See Prerequisite No. 3.
If you are creating your first cluster, select eo1a.large for master node flavor.
Number of Worker Nodes
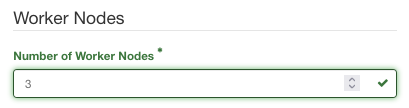
Enter 3. This is for introductory purposes only, in real life the cluster can consist of multiple worker nodes. The cluster sizing guidelines are beyond the scope of this article.
Flavor of Worker Nodes
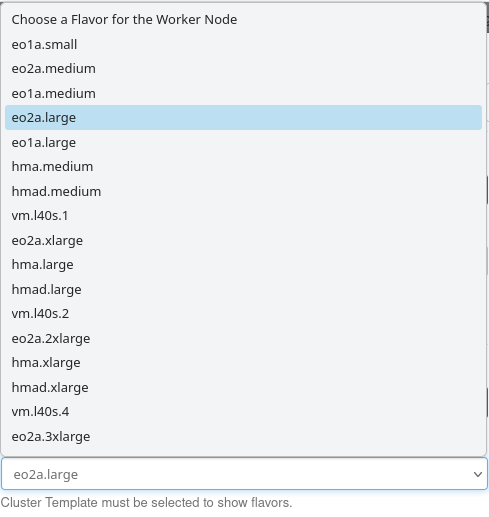
Again, choose eo1a.large.
Auto Scaling
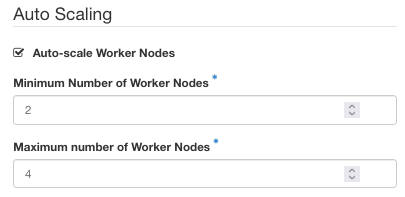
When demand for workers’ services increases, Kubernetes can scale by adding more worker nodes. Our sample setting is minimum 2 and maximum 4 worker nodes. With this setting the number of nodes will be dynamically adjusted between these values, based on the ongoing load (number and resource requests of pods running K8S applications on the cluster).
Here is what the screen Size looks like when all the data are entered:
To proceed, click on lower right button Next or on option Network from the left main menu.
Step 3 Defining Network and LoadBalancer
This is the last of mandatory screens and the blue Submit button in the lower right corner is now active. (If it is not, use screen button Back to fix values in previous screens.)
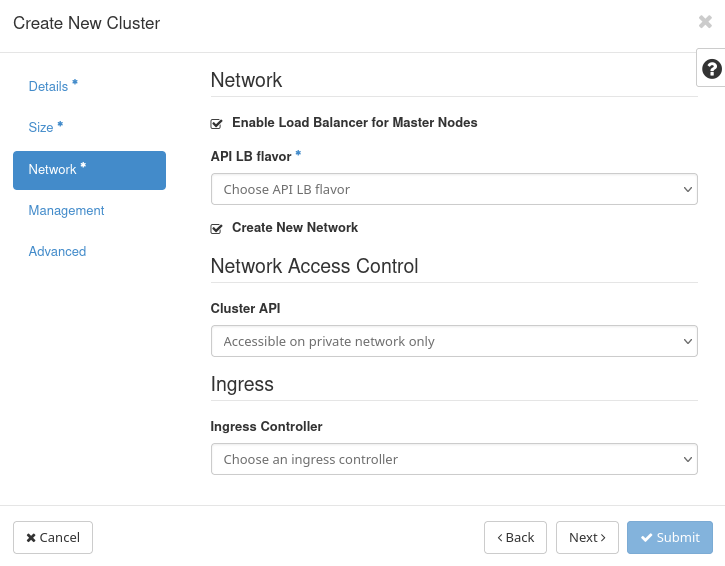
Enable Load Balancer for Master Nodes
This option will be automatically checked, when you selected more than one master node. Using multiple master nodes ensures High Availability of the cluster infrastructure, and in such case the Load Balancer will be then necessary to distribute the traffic between masters.
If you selected only one master node, which might be relevant in non-production scenarios e.g. testing, you will still have an option to either add or skip the Load Balancer. Note that using a LoadBalancer with one master node is still a relevant option, as this option will allow to access the cluster from outside of the cluster network. With no such option selected you will need to rely on SSH access to the master.
Select API LB flavor
When options Enable Load Balancer for Master Nodes is selected, either automatically because the number of master nodes is greater than one or because you have selected it manually, a new option will appear, to choose the flavor for the load balancer.
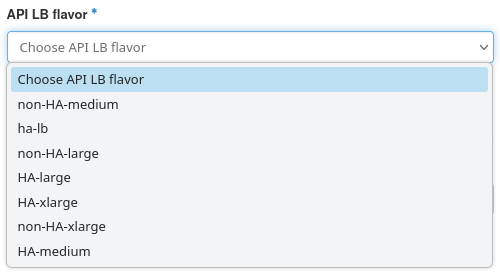
Flavors containing HA in their titles are for High Availability clusters. Just to keep on going, select HA-medium.
Create New Network
This box comes turned on, meaning that the system will create a network just for this cluster. Since Kubernetes clusters need subnets for inter-communications, a related subnetwork will be firstly created and then used further down the road.
It is strongly recommended to use automatic creation of network when creating a new cluster.
However, turning the checkbox off discloses an option to use an existing network as well.
Use an Existing Network
Using an existing network is a more advanced option. You would need to first create a network dedicated to this cluster in OpenStack along with the necessary adjustments. Creation of such a custom network is beyond the scope of this article. Note you should not use the network of another cluster, project network or EODATA network.
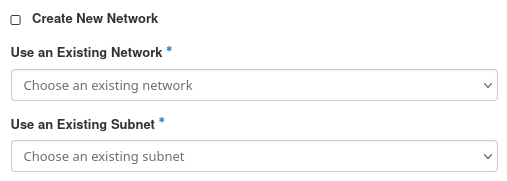
If you have an existing network and you would like to proceed, you will need to choose the network and the subnet from the dropdown below:
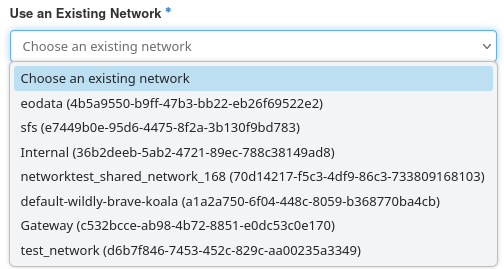
Fields Use an Existing Network and Use an Existing Subnet have an asterisk behind them, meaning you must specify a concrete value in each of them.
Cluster API
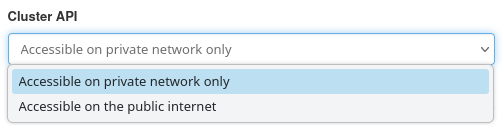
The setting of “Available on public internet” implies that floating IPs will be assigned to both master and worker nodes. This option is usually redundant and has security concerns. Unless you have a specific requirement, leave this option on “private” setting. Then you can always assign floating IPs to required nodes from the “Compute” section in Horizon.
Ingress Controller
Use of ingress is a more advanced feature, related to load balancing the traffic to the Kubernetes applications.
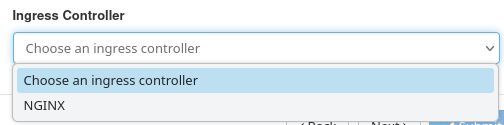
If you are just starting with Kubernetes, you will rather not require this feature immediately, so you could leave this option out. To set it up, choose NGINX.
Step 4 Advanced options
Option Management
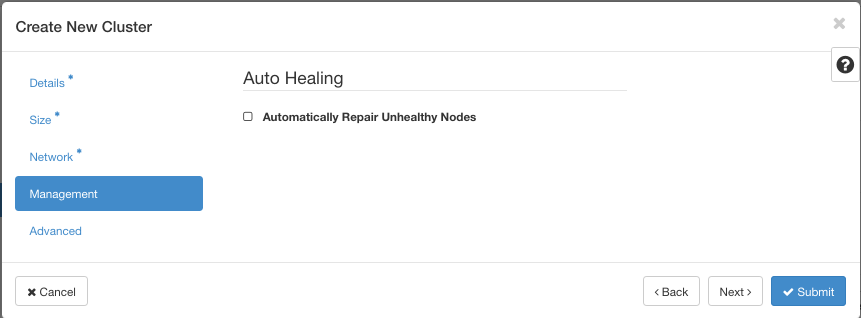
There is just one option in this window, Auto Healing and its field Automatically Repair Unhealthy Nodes.
Node is a basic unit of Kubernetes cluster and the Kubernetes systems software will automatically poll the state of each cluster; if not ready or not available, the system will replace the unhealthy node with a healthy one – provided, of course, that this field is checked on.
If this is your first time trying out the formation of Kubernetes clusters, auto healing may not be of interest to you. In production, however, auto healing should always be on.
Option Advanced
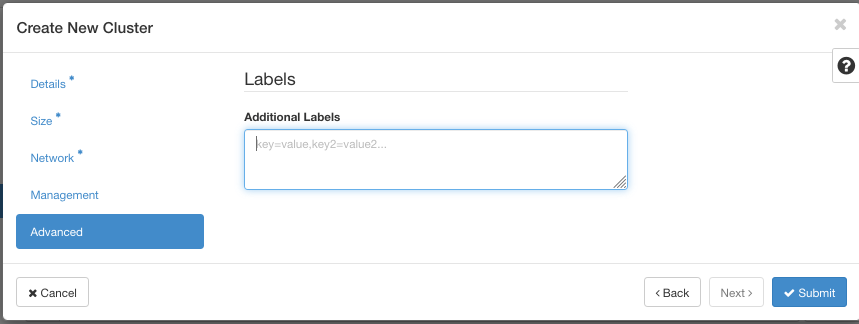
Option Advanced allows for entering of so-called labels, which are named parameters for the Kubernetes system. Normally, you don’t have to enter anything here.
Labels can change how the cluster creation is performed. There is a set of labels, called the Template and Workflow Labels, that the system sets up by default. If this check box is left as is, that is, unchecked, the default labels will be used unchanged. That guarantees that the cluster will be formed with all of the essential parameters in order. Even if you add your own labels, as shown in the image above, everything will still function.
If you turn on the field I do want to override Template and Workflow Labels and if you use any of the Template and Workflow Labels by name, they will be set up the way you specified. Use this option very rarely, if at all, and only if you are sure of what you are doing.
Step 5 Forming of the Cluster
Once you click on Submit button, OpenStack will start creating the Kubernetes cluster for you. It will show a cloud message with green background in the upper right corner of the windows, stating that the creation of the cluster has been started.
Cluster generation usually takes from 10 to 15 minutes. It will be automatically abandoned if duration time is longer than 60 minutes.
If there is any problem with creation of the cluster, the system will signal it in various ways. You may see a message in the upper right corner, with a red background, like this:
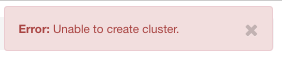
Just repeat the process and in most cases you will proceed to the following screen:
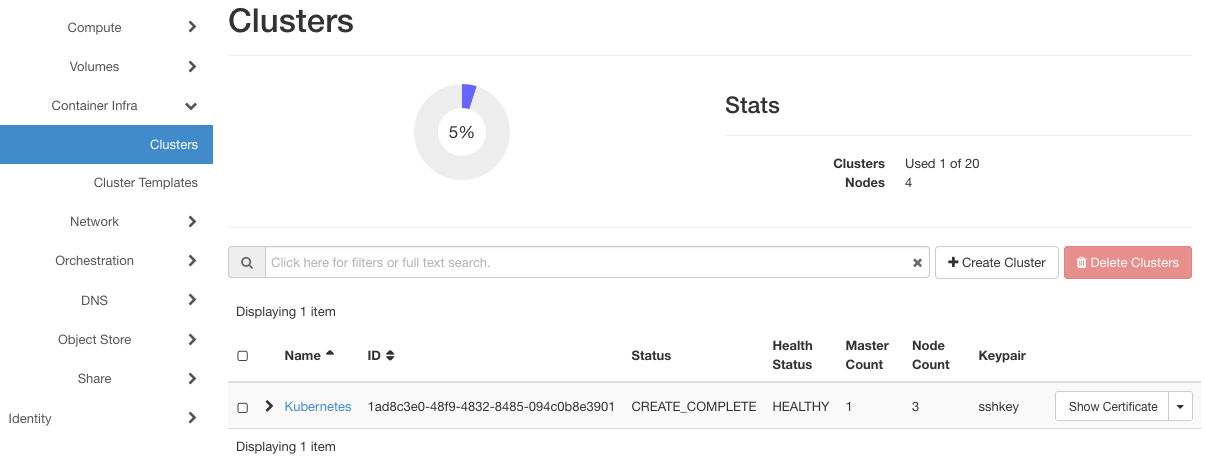
Click on the name of the cluster, Kubernetes, and see what it will look like if everything went well.
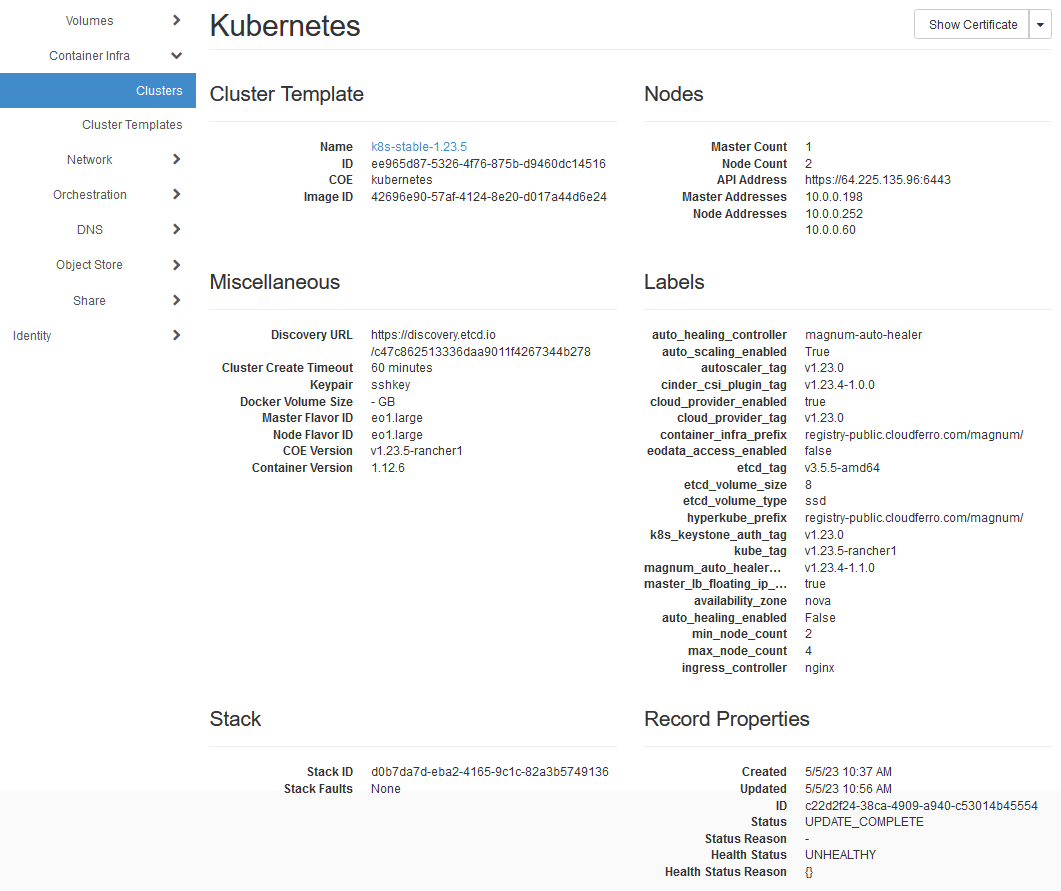
Step 6 Review cluster state
Here is what OpenStack Magnum created for you as the result of filling in the data in those three screens:
A new network called Kubernetes, complete with subnet, is ready to connect further.
New instances – virtual machines that serve as nodes.
A new external router.
New security groups, and of course
A fully functioning Kubernetes cluster on top of all these other elements.
You can observe that the number of nodes in the cluster was initially 3, but after a while the cluster auto-scaled itself to 2. This is expected and is the result of autoscaler, which detected that our cluster is mostly still idle in terms of application load.
There is another way which we can view our cluster setup and inspect any deviations from required state. Click on Network in the main menu and then on Network Topology. You will see a real time graphical representation of the network. As soon as the one of the cluster elements is added, it will be shown on screen.
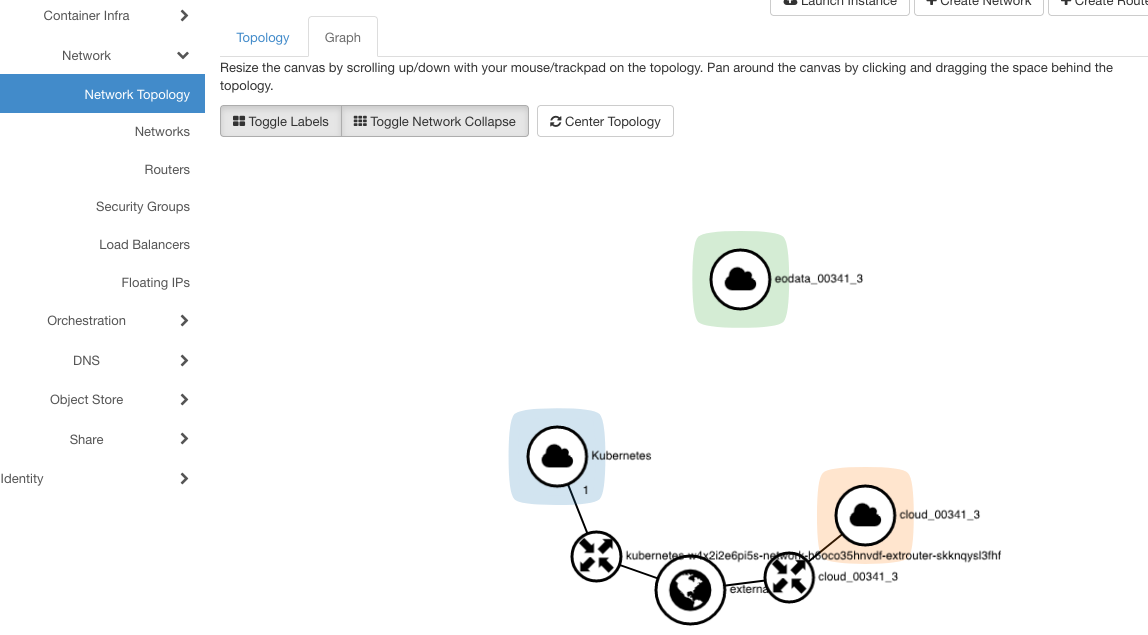
Also in the Horizon’s “Compute” panel you can see the virtual machines which were created for master and worker nodes:
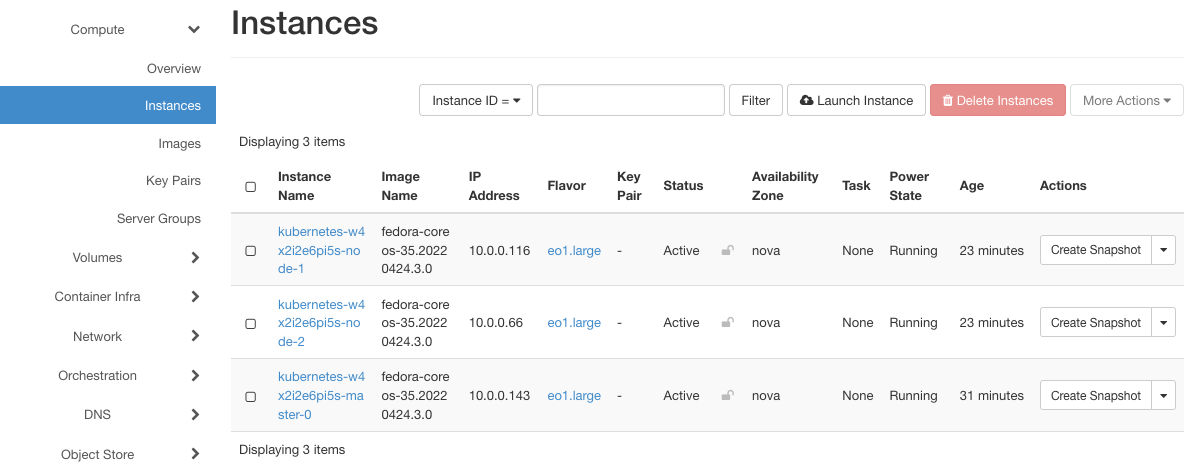
Node names start with kubernetes because that is the name of the cluster in lower case.
Resources tied up from one attempt of creating a cluster are not automatically reclaimed when you again attempt to create a new cluster. Therefore, several attempts in a row will lead to a stalemate situation, in which no cluster will be formed until all of the tied up resources are freed up.
How to delete a cluster
To delete a Kubernetes cluster in Horizon:
Go to Container Infra → Clusters.
Locate the cluster you want to delete and click on its name.
Open the three-dot action menu and select Delete.
Confirm the deletion action.
After you confirm, Horizon will initiate the cleanup and decommissioning process. If the cluster was in a healthy state before deletion, the operation will take a few minutes and should complete automatically. All associated resources will be deleted.
Note
Magnum 1.29+ Cluster Cleanup Before Deletion
Before deleting a Kubernetes cluster in Magnum 1.29 or newer (via Horizon or CLI), you must manually clean up the following cloud resources using kubectl:
PVCs (Persistent Volume Claims)
Services of type Load Balancer
These resources are not automatically decommissioned by Magnum. You must delete them explicitly using kubectl. Doing so will ensure that associated volumes and load balancers are removed from OpenStack.
If they are not cleaned up, the cluster deletion process will be blocked.
If the cluster is in a failed or inconsistent state, some resources might not be cleaned up automatically and you may need to remove them manually from the OpenStack dashboard or via CLI tools.
Cluster Deletion Statuses in Magnum
As the deletion process progresses, Magnum updates the cluster status field to reflect the current state:
Status |
Description |
|---|---|
|
The cluster is currently being deleted. Magnum is decommissioning all associated cloud resources. |
|
The deletion process failed. Some resources may still remain and require manual cleanup in OpenStack. |
|
The cluster has been successfully deleted. Note that this status may not appear in Horizon because the record is removed after successful deletion. |
What To Do Next
You now have a fully operational Kubernetes cluster. You can
use ready-made Docker images to automate installation of apps,
activate the Kubernetes dashboard and watch the state of the cluster online,
access EODATA through a cluster
and so on.
Here are some relevant articles:
Read more about ingress here: Using Kubernetes Ingress on Creodias OpenStack Magnum
Article How To Use Command Line Interface for Kubernetes Clusters On Creodias OpenStack Magnum shows how to use command line interface to create Kubernetes clusters.
To access your newly created cluster from command line, see article How To Access Kubernetes Cluster Post Deployment Using Kubectl On Creodias OpenStack Magnum.
To work with EODATA from a Kubernetes cluster, see article Accessing EODATA from Kubernetes Pods in Creodias using boto3.
You can also create Kubernetes cluster using only command line interface. See: How To Install OpenStack and Magnum Clients for Command Line Interface to Creodias Horizon