How to mount EODATA as a filesystem using Goofys in Linux on Creodias
EODATA repository contains dozens of petabytes of Earth observation data from missions such as Sentinel-2A or Sentinel-5P. Transferring that amount of data is not feasible in most cases, but on Creodias it is possible to access and process the data directly from the cloud, without downloading the full datasets.
The idea is to:
create a virtual machine in the cloud,
install software such as goofys to mount S3 buckets as a filesystem,
mount the bucket containing the EODATA repository on your Linux VM.
The result is that EODATA becomes visible as ordinary Linux directories. You can then browse the repository and access files by using standard Linux commands and tools.
Note
On Creodias, virtual machines may already provide access to the EODATA repository through a preconfigured s3fs mount. See: How to mount eodata using s3fs in Linux on Creodias.
This article is intended for users who specifically want to mount EODATA using goofys.
Goofys and s3fs compared
Both goofys and s3fs can mount an S3 bucket as a filesystem, but they are optimized for different use cases.
goofys
goofys is lightweight and often faster for object-storage access patterns. It is useful when you mainly need to browse, list, and read data from large repositories such as EODATA.
Choose goofys when the workload is mostly read-heavy and does not require full POSIX filesystem compatibility.
s3fs
s3fs behaves more like a traditional filesystem mount. It is usually the safer choice when applications expect filesystem-like behaviour.
Choose s3fs when compatibility is more important than speed, or when the mounted bucket must behave more like a regular Linux filesystem.
In short, goofys is a good choice for fast access to large object-storage repositories. s3fs is a better choice when applications need behaviour closer to a conventional filesystem.
Prerequisites
No. 1 Account
You need a Creodias hosting account with access to the Horizon interface: https://horizon.cloudferro.com/auth/login/?next=/.
No. 2 Linux VM
You need a Linux VM on the Creodias cloud with access to the EODATA network. You can create it by following one of these articles:
This article was tested on Ubuntu 24.04. If you are using a different Linux distribution, adjust the commands accordingly.
No. 3 Basic knowledge of Linux command line
Basic knowledge of the Linux command line is required.
No. 4 Credentials
You need credentials for accessing the EODATA S3 service. To obtain them, follow this article: How to get credentials used for accessing EODATA on a cloud VM on Creodias.
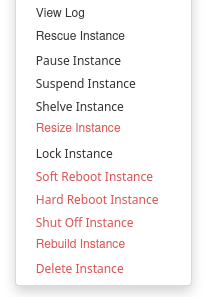
No. 5 Access to instance actions in Horizon
You may need to reboot, rescue, or unrescue the VM while testing automatic mounting. In Horizon, open Project -> Compute -> Instances, then use the drop-down menu on the right side of the target instance. The lower part of the menu contains actions such as Soft Reboot Instance, Hard Reboot Instance, Rescue Instance, and Unrescue Instance, depending on the current state of the VM.
When setting up permanent access to goofys folder, you can use Horizon commands too.
What you will do
In this article, you will:
install goofys,
provide credentials for goofys,
mount the EODATA repository manually,
configure automatic mounting of EODATA,
verify that the automatic mount works before rebooting,
stop the automatic mounting if you no longer need it.
Step 1: Install goofys
Log in to the eouser account of your virtual machine using SSH.
Install wget so that you can download the goofys binary directly to your virtual machine:
sudo apt update && sudo apt upgrade && sudo apt install wget
Make sure that FUSE support is available on the VM:
lsmod | grep fuse
If the command returns no output, install the required FUSE package for your distribution.
Navigate to your home directory:
cd
Use wget to download the goofys binary:
wget https://github.com/kahing/goofys/releases/latest/download/goofys
Make the goofys binary executable:
chmod +x goofys
Verify that the binary exists and is executable:
ls -l ~/goofys
You should see executable permissions in the output, for example -rwxrwxr-x.
Step 2: Provide credentials to configure goofys
Use Prerequisite No. 4 to obtain credentials for the cloud you are using. A credentials pair has this general form:
Q6ORITBEDIYQ1PPPPPPP:eeeeeeeeeeeegggggggggqjfkSDHGtqLGb0nYkpJ
Note
These values are examples only. Obtain your own credentials and use them in the rest of this article.
Create a directory for your credentials:
mkdir -p ~/.aws/
Create the file ~/.aws/credentials using your preferred text editor, for example nano or vim:
nano ~/.aws/credentials
Add your credentials in the following format:
[s3]
aws_access_key_id=Q6ORITBEDIYQ1PPPPPPP
aws_secret_access_key=eeeeeeeeeeeegggggggggqjfkSDHGtqLGb0nYkpJ
Save the file and exit the text editor.
Verify that the credentials file contains the [s3] profile:
grep '^\[s3\]' ~/.aws/credentials
Step 3: Mount EODATA manually
Create the directory that will be used as the mount point for EODATA:
mkdir -p ~/eo
Mount EODATA using the command for your cloud region.
./goofys --region RegionOne --profile s3 \
--endpoint http://data.cloudferro.com eodata ~/eo
./goofys --region RegionOne --profile s3 \
--endpoint https://eodata.cloudferro.com eodata ~/eo
In this command:
./goofys is the location of the goofys binary you downloaded,
~/eo is the directory where you want to mount the EODATA filesystem,
eodata is the name of the bucket that contains the EODATA repository.
You can replace the first two values if you installed goofys or created the mount point in another location.
Verify that the mount was successful:
mount | grep /home/eouser/eo
ls ~/eo
You should see EODATA directories in the output, for example Sentinel-1, Sentinel-2, Sentinel-3, Landsat-8, and other collections.
Note
Some terminals may display the listed directories with a green background or other highlighted colours. This is normal and depends on the terminal colour scheme and directory permissions. It does not indicate an error.

The eodata repository is now mounted using goofys.
This manual mount is not persistent. After each reboot, you need to run the mounting command again unless you configure automatic mounting in the next step.
Step 4: Mount EODATA automatically on startup
You can configure the VM to mount the EODATA repository automatically during system startup.
This step uses /etc/fstab. Be careful when editing this file. An incorrect mount entry can delay or block normal boot. For that reason, always test the configuration with sudo mount -av before rebooting the VM.
First, make sure the manual mount from Step 3 is not currently active:
mount | grep /home/eouser/eo
If the command shows that /home/eouser/eo is already mounted, unmount it before continuing:
sudo umount /home/eouser/eo
Run the check again:
mount | grep /home/eouser/eo
If the mount still appears, unmount it once more:
sudo umount /home/eouser/eo
Create a directory in /root for the credentials used during system startup:
sudo mkdir -p /root/.aws
Copy the credentials from the eouser home directory to the /root/.aws directory:
sudo cp ~/.aws/credentials /root/.aws/
Verify that the credentials file exists:
sudo ls -l /root/.aws/credentials
Also verify that the goofys binary and the mount point exist:
ls -l /home/eouser/goofys
ls -ld /home/eouser/eo
Now open /etc/fstab with elevated privileges:
sudo nano /etc/fstab
Add the appropriate line for your cloud region.
Important
Do not add nofail to this Goofys fstab entry. On Ubuntu 24.04 with this Goofys/FUSE setup, nofail may be passed to FUSE as an unknown parameter and cause the mount to fail.
/home/eouser/goofys#eodata /home/eouser/eo fuse _netdev,allow_other,--dir-mode=0777,--file-mode=0666,--region=RegionOne,--profile=s3,--endpoint=http://data.cloudferro.com 0 0
/home/eouser/goofys#eodata /home/eouser/eo fuse _netdev,allow_other,--dir-mode=0777,--file-mode=0666,--region=RegionOne,--profile=s3,--endpoint=https://eodata.cloudferro.com 0 0
In the above entry:
/home/eouser/goofys is the full path to the goofys binary,
/home/eouser/eo is the directory where EODATA will be mounted,
–profile=s3 tells goofys to use the [s3] profile from the credentials file,
–endpoint defines the EODATA S3 endpoint for your cloud region.
Save the file and exit the text editor.
Reload systemd so that it reads the updated /etc/fstab:
sudo systemctl daemon-reload
Test the /etc/fstab entry before rebooting:
sudo mount -av
The output should show that /home/eouser/eo was successfully mounted, for example:
/                         : ignored
/boot/efi                 : already mounted
/home/eouser/eo           : successfully mounted
Now verify that the mount is active:
mount | grep /home/eouser/eo
ls /home/eouser/eo
You should see EODATA directories listed under /home/eouser/eo.
Important
Reboot the VM only after sudo mount -av succeeds and you have verified that /home/eouser/eo contains EODATA directories.
If sudo mount -av fails, comment out the Goofys line in /etc/fstab before rebooting. To comment it out, add # at the beginning of the line.
If the test succeeds, reboot the VM:
sudo reboot
Note
You can also reboot the instance using Horizon commands, as shown in Prerequisite No. 5.
Your SSH session will close during the reboot. Wait one or two minutes before reconnecting, because SSH may refuse connections while the VM is still starting.
Reconnect to the VM:
ssh -i /path/to/your/private/key eouser@VM_PUBLIC_IP_ADDRESS
After login, verify that EODATA was mounted automatically:
mount | grep /home/eouser/eo
ls /home/eouser/eo
If the directory listing works, automatic mounting is configured correctly.
Troubleshooting automatic mounting
If the VM does not accept SSH connections immediately after reboot, wait one or two minutes and try again. During startup, SSH may temporarily return:
ssh: connect to host VM_PUBLIC_IP_ADDRESS port 22: Connection refused
This usually means that the VM is reachable but the SSH service has not started yet.
Note
On Ubuntu cloud images, the web console may show a local login prompt. In many cases, the default cloud user does not have a password set because access is configured through SSH keys. If you cannot log in through the console, use SSH or rescue mode instead.
If the VM still does not become reachable after several minutes, use the rescue option in Horizon to edit /etc/fstab and comment out the Goofys line.
After entering rescue mode, identify the original VM disk:
lsblk
Use lsblk to identify the original root partition. In many rescue sessions it appears as /dev/sdb3, but the name may be different.
Replace /dev/sdb3 in the command below with the partition shown by lsblk on your VM:
sudo mkdir -p /mnt/recover
sudo mount /dev/sdb3 /mnt/recover
Open the original VM’s fstab file:
sudo nano /mnt/recover/etc/fstab
Comment out the Goofys line by adding # at the beginning:
#/home/eouser/goofys#eodata /home/eouser/eo fuse _netdev,allow_other,--dir-mode=0777,--file-mode=0666,--region=RegionOne,--profile=s3,--endpoint=http://data.cloudferro.com 0 0
Save the file, unmount the recovered filesystem, and exit rescue mode:
sudo umount /mnt/recover
Then use Unrescue Instance in Horizon and boot the VM normally.
Stopping the automatic mounting of EODATA repository using goofys
To stop automatic mounting of the EODATA repository, edit /etc/fstab:
sudo nano /etc/fstab
Remove the Goofys line or comment it out by adding # at the beginning.
For example:
#/home/eouser/goofys#eodata /home/eouser/eo fuse _netdev,allow_other,--dir-mode=0777,--file-mode=0666,--region=RegionOne,--profile=s3,--endpoint=http://data.cloudferro.com 0 0
Reload systemd:
sudo systemctl daemon-reload
If the filesystem is currently mounted, unmount it:
sudo umount /home/eouser/eo
Verify that it is no longer mounted:
mount | grep /home/eouser/eo
If the command returns no output, the Goofys mount is no longer active.
You can now reboot the VM safely:
sudo reboot
Optionally, remove the goofys binary and the credentials if you no longer want to use goofys.
How to update goofys in the future
To update goofys to the latest version:
make sure that the data in the EODATA repository is not actively used by any software on your virtual machine,
unmount the Goofys mount if it is active,
remove the old goofys binary from your home directory,
download the new version of goofys,
make the new binary executable,
test the mount again before rebooting.
Unmount the current Goofys mount:
sudo umount /home/eouser/eo
Remove the old binary:
rm ~/goofys
Download the current goofys binary:
wget https://github.com/kahing/goofys/releases/latest/download/goofys
Make it executable:
chmod +x goofys
Test the /etc/fstab entry again:
sudo systemctl daemon-reload
sudo mount -av
mount | grep /home/eouser/eo
ls /home/eouser/eo
If the test succeeds, the updated goofys binary is working.
What To Do Next
You can also try other methods of accessing EODATA, such as:
If you want to access EODATA on a Windows VM, follow this article:
If the amount of disk space on your VM is insufficient for your EODATA processing, you can create and attach a volume to it. Follow one of these articles: