How to attach a volume to VM more than 2TB on Linux on Creodias
In this tutorial, you will create a volume which is larger than 2 TB. Then, you will attach it to a VM and format it in the appropriate way.
Note
If you want to create and attach a volume that has less than 2 TB of storage, you will need to use different software for its formatting. If this is the case, please visit the following article instead: How to attach a volume to VM less than 2TB on Linux on Creodias.
What We Are Going To Cover
Creating a new volume
Attaching the new volume to a VM
Formatting and mounting of the new volume
Prerequisites
No. 1 Hosting
You need a Creodias hosting account with Horizon interface https://horizon.cloudferro.com/auth/login/?next=/.
No. 2 Linux VM running on Creodias cloud
Instructions for creating and accessing a Linux VM using default images can be found here:
How to create a Linux VM and access it from Linux command line on Creodias or here:
How to create a Linux VM and access it from Windows desktop on Creodias.
The instructions included in this article are designed for Ubuntu 20.04 LTS.
No. 3 Basic knowledge of the Linux terminal
You will need basic knowledge of the Linux command line.
No. 4 SSH access to the VM
How to connect to your virtual machine via SSH in Linux on Creodias.
Step 1: Create a Volume
Login to the Horizon panel available at https://horizon.cloudferro.com/auth/login/?next=/.
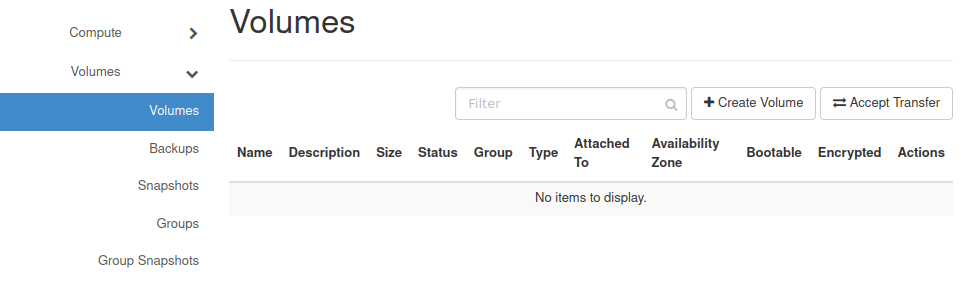
Go to the section Volumes -> Volumes:
Click Create Volume.
The following window should appear:
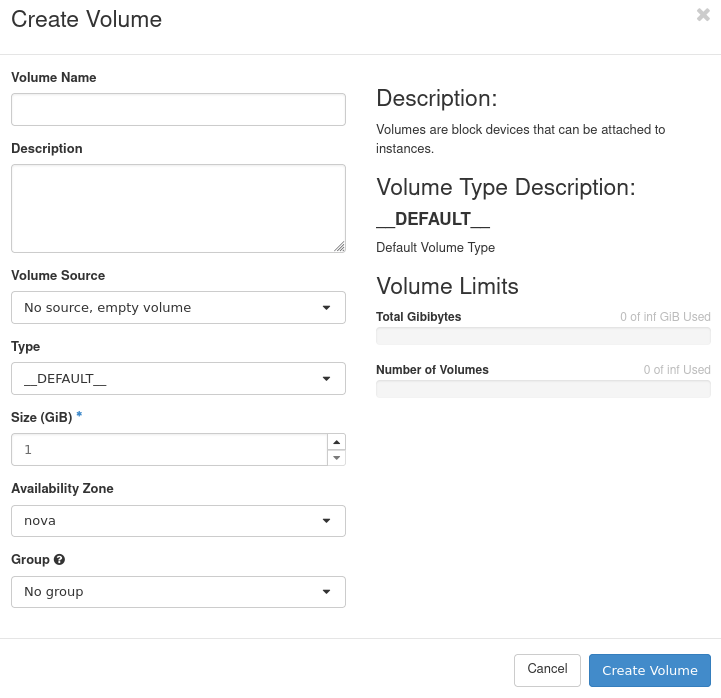
In it provide the Volume Name of your choice.
Choose the Type of your volume - SSD or HDD.
Enter the size of your volume in gigabytes.
When you’re done, click Create Volume.
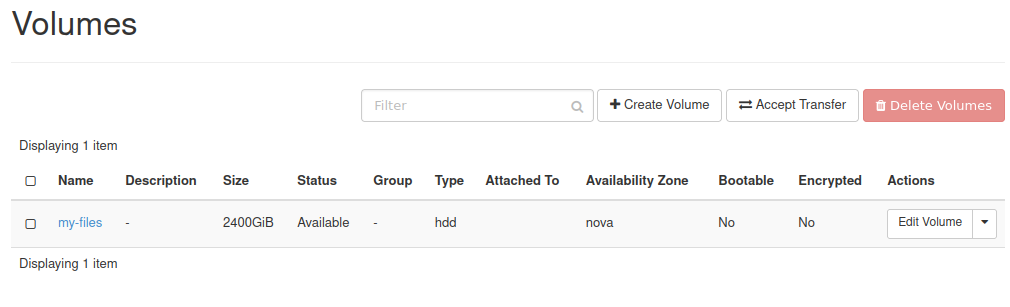
You should now see the volume you just created. In our case it is called my-files:
Step 2: Attach the Volume to VM
Now that you have created your volume, you can use it as storage for one of your VMs. To do that, attach the volume to a VM.
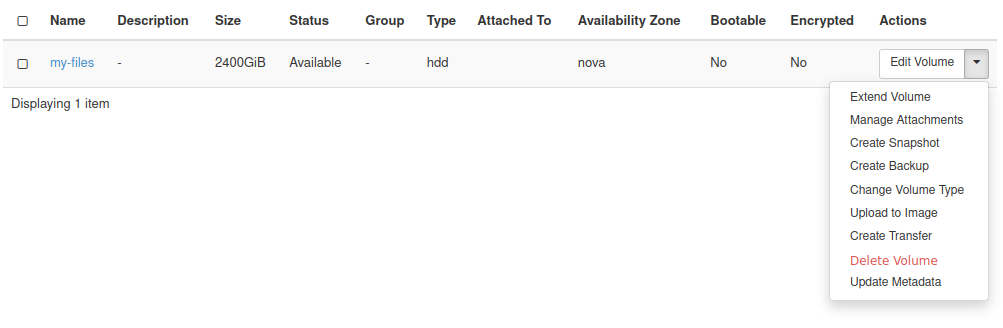
In the Actions menu for that volume select the option Manage Attachments:
You should now see the following window:
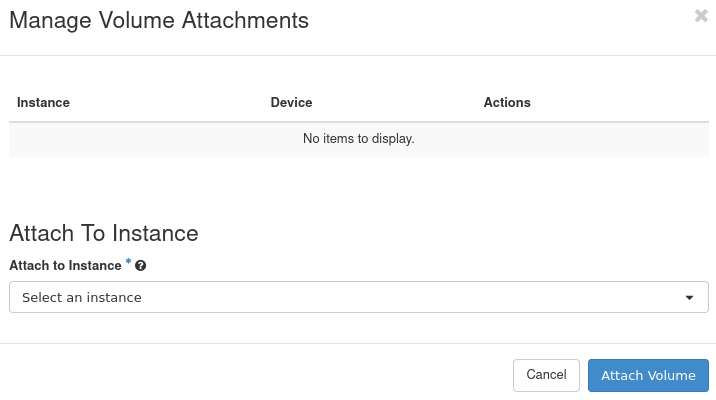
Select the virtual machine to which the volume should be attached:
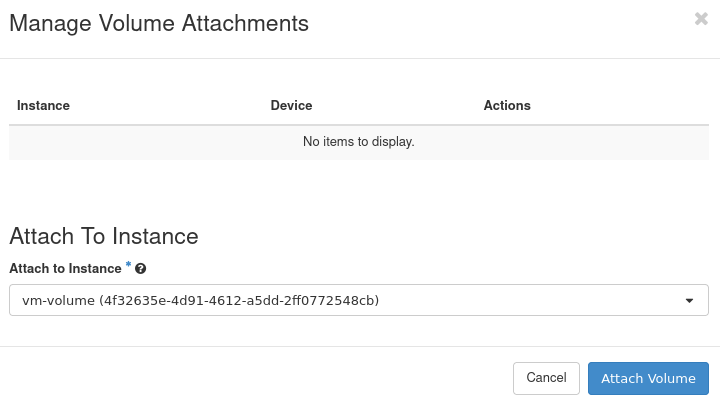
Click Attach Volume.
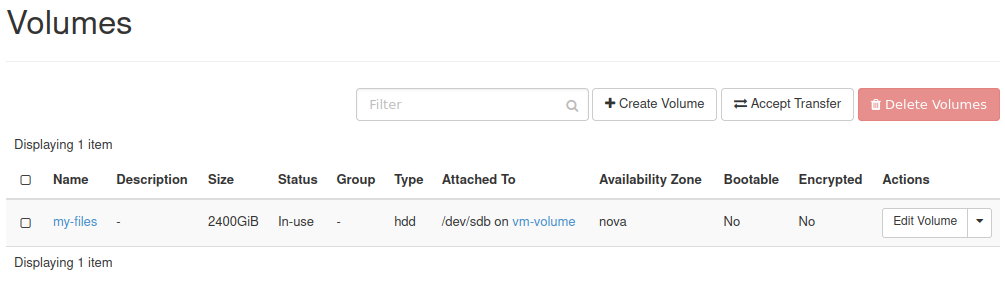
Your volume should now be attached to the VM:
Step 3: Create the Partition Table
It is time to access your virtual machine to prepare the volume for data storage.
Connect to your virtual machine using SSH or the web console.
Execute the following command to make sure that the volume has been attached:
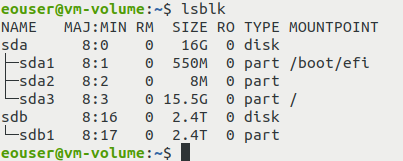
lsblk
You should see the output similar to this:
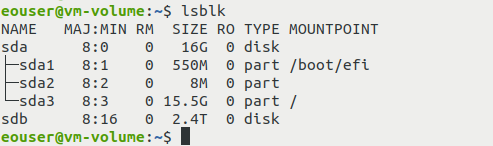
In this example, the attached volume that was previously called my-files is represented by the device file sdb. Its size is 2.4 TB. Memorize the name of the device file or write it somewhere down; it will be needed in the next step, which involves starting gdisk.
In order to be able to use the volume as storage, you will need to use gdisk to create a partition table. If you do not have this program, you can install it using the following command:
sudo apt update && sudo apt upgrade && sudo apt install gdisk
Start gdisk (replace sdb with the name of the device file provided to you previously by the lsblk command):
sudo gdisk /dev/sdb
You should see the output similar to this:
GPT fdisk (gdisk) version 1.0.8

Partition table scan:
  MBR: not present
  BSD: not present
  APM: not present
  GPT: not present

Creating new GPT entries in memory.

Command (? for help):
Answer with n and press Enter. A series of prompts similar to the ones below will appear on screen - keep pressing Enter on your keyboard to accept the default values.
Command (? for help): n
Partition number (1-128, default 1):
First sector (34-5033164766, default = 2048) or {+-}size{KMGTP}:
Last sector (2048-5033164766, default = 5033164766) or {+-}size{KMGTP}:
Current type is 8300 (Linux filesystem)
Hex code or GUID (L to show codes, Enter = 8300):
Changed type of partition to 'Linux filesystem'
You will see the prompt Command (? for help): again. Answer it with w. You will now see the following question:
Final checks complete. About to write GPT data. THIS WILL OVERWRITE EXISTING
PARTITIONS!!

Do you want to proceed? (Y/N):
Answer with Y to confirm. You should get the following confirmation:
OK; writing new GUID partition table (GPT) to /dev/sdb.
In the end, you should receive this message:
The operation has completed successfully.
Execute the following command again to confirm that the partition was created successfully:
lsblk
The device file of the new partition should have the same name as the device file of the drive followed by the 1 digit. In this case, it will be sdb1. Memorize or write it somewhere down - it will be needed later during creation of the file system.
Step 5: Create the File System
In order to save data on this volume, create ext4 filesystem on it. ext4 is arguably the most popular filesystem on Linux distributions.
It can be created by executing the following command:
sudo mkfs.ext4 /dev/sdb1
Replace sdb1 with the name of the device file of the partition provided to you previously by the lsblk command.
This process took less than a minute for a 2,4 terabyte volume.
Step 6: Create the mount point
You need to specify the location in the directory structure from which you will access the data stored on that volume. In Linux it is typically done in the /etc/fstab config file.
Below are the instructions for the nano text editor. If you prefer to use different software, please modify them accordingly.
Before using nano, create the directory in which you wish to mount your volume - your mount point - (if it doesn’t exist yet). In this example, we will use the /my_volume directory which can be created using the following command:
sudo mkdir /my_volume
Install nano if you haven’t already:
sudo apt install nano
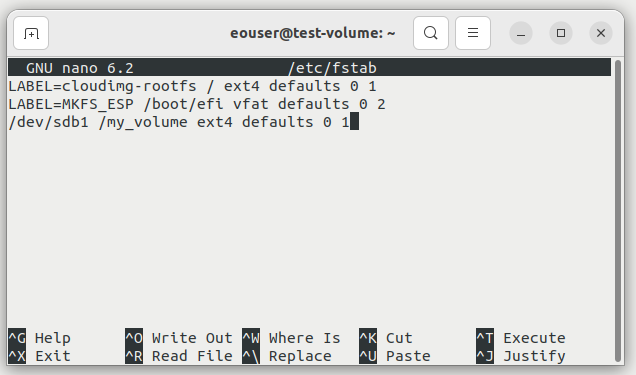
Open the /etc/fstab file using nano:
sudo nano /etc/fstab
Add the below line to the end of that file. Remember to replace sdb1 with the name of the device file of your partition (it was provided to you previously be the lsblk command) and /my_volume with the directory in which you want to mount it - the mounting point.
/dev/sdb1 /my_volume ext4 defaults 0 1
To save that file in nano, use the following combination of keys: CTRL+X, Y, Enter.
Warning
Unless you know what you’re doing, you should not modify the lines which you already found in the /etc/fstab file. This file contains important information. Some or all of it might be required for the startup of the operating system.
Mount the volume to your system (replace /my_volume with the mount point you previously created):
sudo mount /my_volume
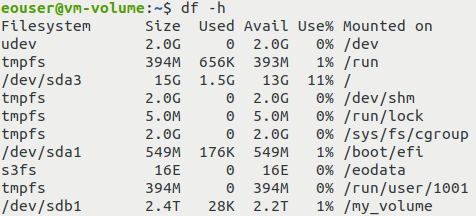
To check whether it was successfully mounted, execute:
df -h
The output should contain the line with the device file representing your volume and its mount point. It can look like this:
The volume is owned by root, so eouser does not have access without sudo. To make it accessible to eouser, execute this command:
sudo chown eouser:eouser /my_volume
If you want everybody to have access to that directory (and you don’t care about security at all), use the following command:
sudo chmod 777 /my_volume
During the next boot of your virtual machine, the volume should be mounted automatically.
What To Do Next
You have successfully created a volume larger than 2 TB and prepared it for use on a Linux virtual machine.
You can now copy files to your new volume. If you want to move the data, attach the volume to a different machine.
Volumes larger than 2 TB are good candidates for downloading Earth Observation data from eodata repository and using them in your projects.
To learn more about accessing eodata on Creodias virtual machines, please have a look at articles such as:
How to mount eodata using s3fs in Linux on Creodias
How to mount EODATA as a filesystem using Goofys in Linux on Creodias