How to move data volume between two VMs using OpenStack Horizon on Creodias
Volumes are used to store data and those data can be accessed from a virtual machine to which the volume is attached. To access data stored on a volume from another virtual machine, you need to disconnect that volume from virtual machine to which it is currently connected, and connect it to another instance.
This article uses the Horizon dashboard to transfer volumes between virtual machines which are in the same project.
Prerequisites
No. 1 Hosting
You need a Creodias hosting account with Horizon interface https://horizon.cloudferro.com/auth/login/?next=/.
No. 2 Source virtual machine and volume
We assume that you have a virtual machine (which we will call source virtual machine) to which a volume is attached.
No. 3 Destination virtual machine
We also assume that you want to access the data stored on volume mentioned in Prerequisite No. 2 from another instance which is in the same project - we will call that instance destination virtual machine.
What We Are Going To Cover
Ensure that the transfer is possible
Projects must be on the same cloud
Volume cannot be used for booting an operating system
File system compatibility
Making sure that the source virtual machine does not try to access the volume
Other volume and instance conditions for successful transfer
Shutting down the source virtual machine
Shutting down the source virtual machine using Horizon dashboard
Disconnecting volume
Attaching volume to destination virtual machine
Some parts of some screenshots in this article are greyed out for privacy reasons.
Ensure that the transfer is possible
Before the actual transfer, you have to examine the state of the volume and of the instances and conclude whether the transfer is possible right away or should you perform other operations first:
Projects must be on the same cloud
If the projects are not on the same cloud, do not use this article but see one of these articles instead:
Volume cannot be used for booting an operating system
If a volume is not being used to boot an operating system on a virtual machine, this requirement is fulfilled.
If, however, a volume is being used for booting an operating system, you can convert it to a regular volume.
Converting boot volume to a regular volume will save the day if the operating system on the volume starts malfunctioning and it is imperative to at least save the data; just attach the regular version of that volume to another virtual machine and copy the data.
If you have converted this volume and all other conditions listed in section Ensure that the transfer is possible are met, you don’t have to disconnect the volume from the virtual machine and can ignore parts of the article involving this process.
File system compatibility
To be able to access the data, the file system on the volume must be compatible with the file system in the destination virtual machine.
The easiest case is when NTFS file system is used because both Windows and Linux can access data in that format. This is not guaranteed, so you may be required to install additional drivers for compatibility.
Also note that Windows does not support format ext4, which is a file system commonly used on Linux, by default.
Making sure that the source virtual machine does not try to access the volume
You need to make sure that the source virtual machine does not try to access the volume again.
The exact steps will vary between operating systems and are outside of scope of this article. They might include:
removing the volume from /etc/fstab file
removing the systemd .mount file
and so on.
Other volume and instance conditions for successful transfer
The volume must:
be connected to a virtual machine,
have status in-use and not, say, error or another and
not be used by any instance to boot an operating system from it.
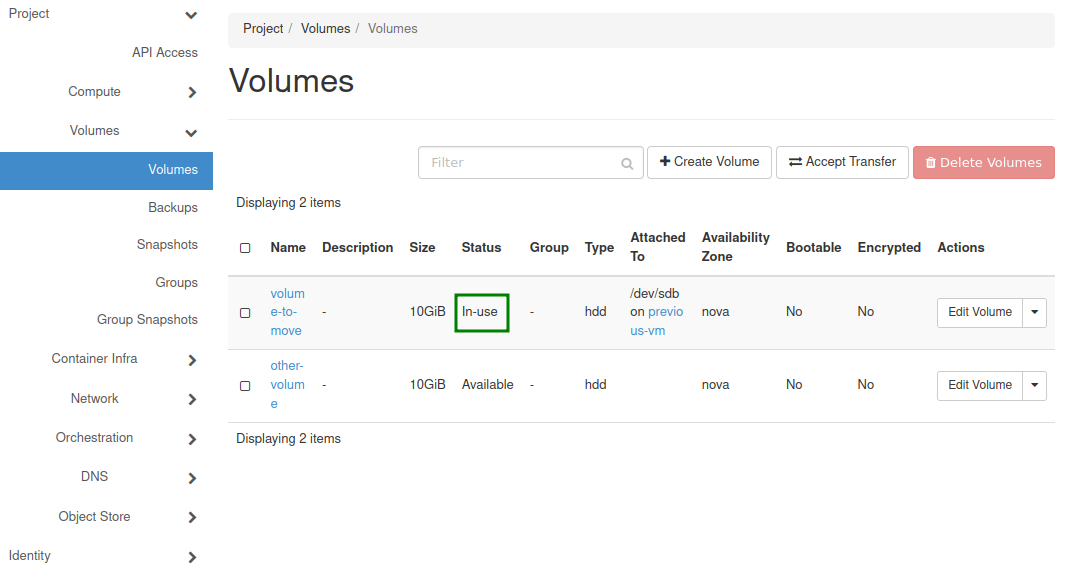
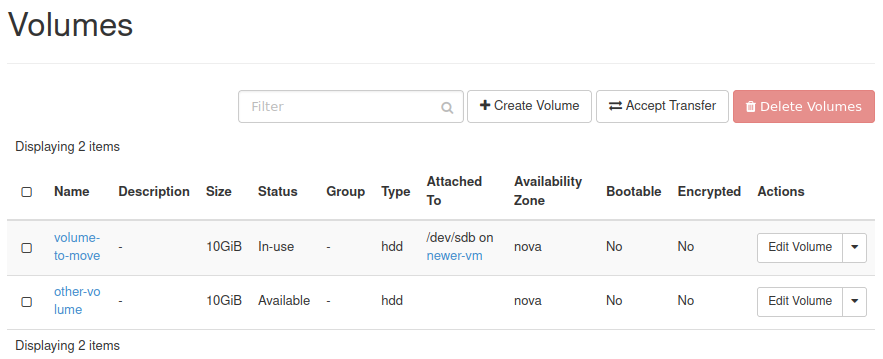
You can check the Status of the volume in section Volumes -> Volumes of the Horizon dashboard. On screenshot below, the status is marked using a green rectangle.
The instance must be:
either turned on or off and
not be in another status such as error, shelved or paused.
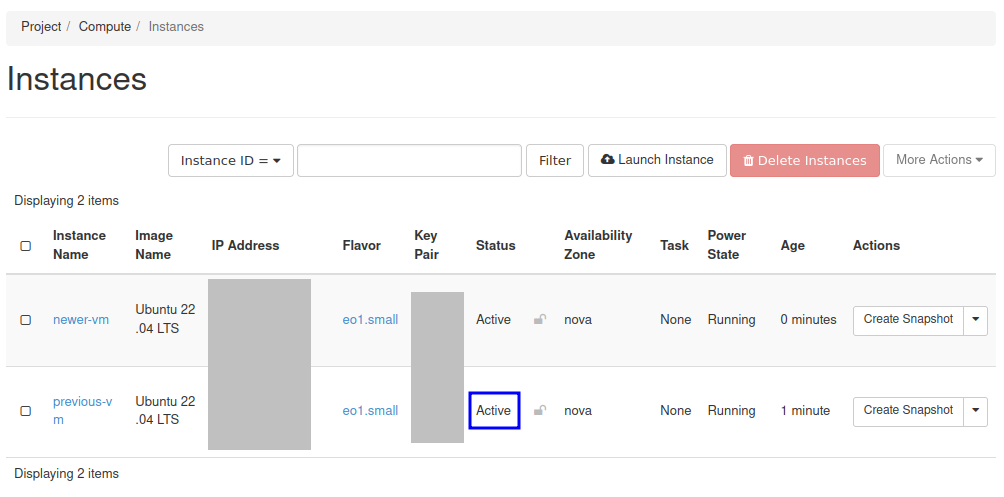
You can check the status of the instance in section Compute -> Instances of the Horizon dashboard. On screenshot below, the status is marked using a blue rectangle.
To learn more about different states in which a virtual machine can be, see Status Power State and dependencies in billing of instance VMs on Creodias
If all these conditions are met, here is how to transfer volume from source instance to the destination instance in the same project.
Shutting down the source virtual machine
The volume and its virtual machine are connected so if you abruptly cut out it out, some data on the volume may be lost. To be on the safe side, the virtual machine should be shut down while disconnecting.
Navigate to Compute -> Instances. You should see the table containing your virtual machines:
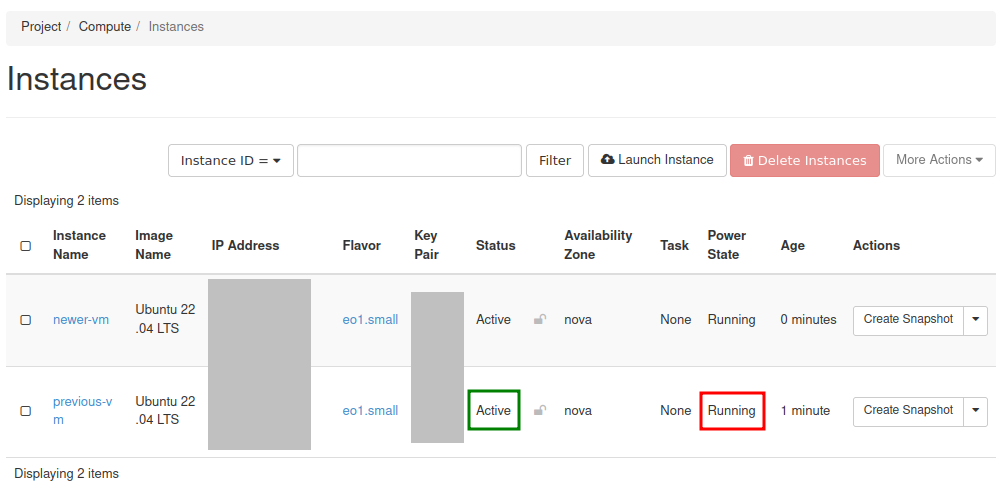
Check the Status and Power State of the source virtual machine. On this screenshot, these values are marked with a green rectangle and a red rectangle, respectively.
If the Status of your source virtual machine is Shutoff and its Power State is Shut Down, ignore the rest of this section (and also section Shutting down your virtual machine using Horizon dashboard and proceed directly to section Disconnecting volume.
If, however, the Status of your virtual machine is Active and its Power State is Running, shut down your virtual machine.
Such a shut down can be performed in two ways:
- Using Horizon dashboard
OpenStack will first request your virtual machine to shut down. If the virtual machine is unsuccessful at doing so, after a grace period, OpenStack will force it to power off.
- Using operating system of the VM
On rare occasions, this forced powering off may lead to data loss so the alternative is using native commands of the operating system. The technical details, however, are out of scope of this article.
Shutting down your virtual machine using Horizon dashboard
Skip this section if the source virtual machine is already turned off or if you decided to use the functions of operating system installed on it to turn it off.
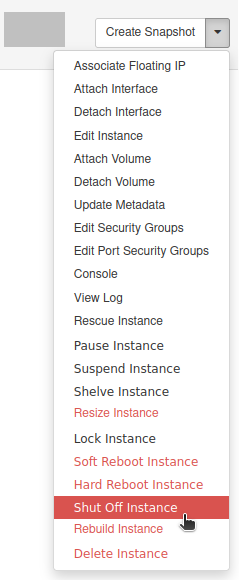
From the drop-down menu in Actions section of the source virtual machine, choose Shut Off Instance:
Wait until the source virtual machine has the following Power State: Shut Down. You might need to refresh the page, possibly multiple times.
Disconnecting volume
Navigate to section Volumes -> Volumes of the Horizon dashboard. You should see the list of your volumes:
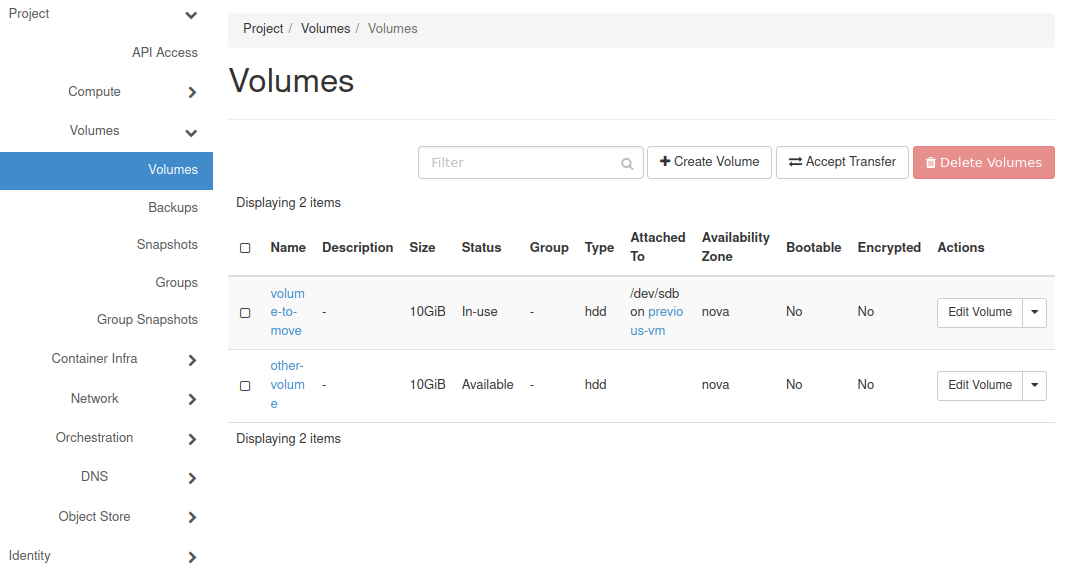
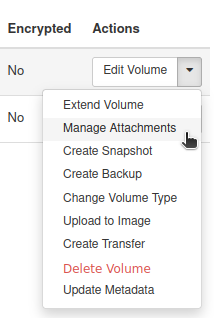
In the Actions column of the row representing the volume you want to move, use the arrow to display the drop-down menu:

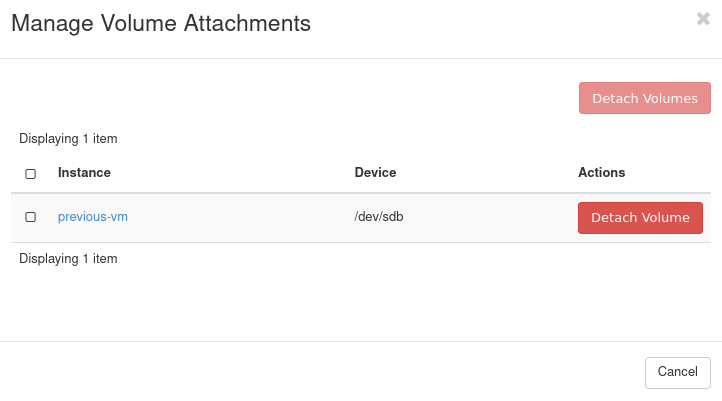
Choose Manage Attachments. The next window should inform you to which virtual machine the volume is attached:
Click Detach Volume. You will be asked for confirmation:
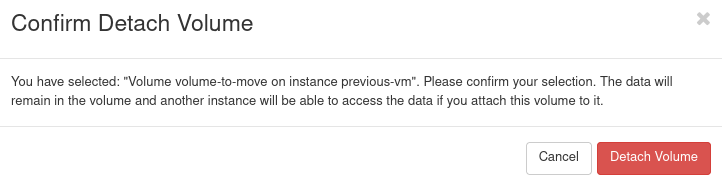
To confirm, click Detach Volume.
Your volume should now not have any value under Attached To:

Attaching volume to destination virtual machine
Make sure that you are still in section Volumes -> Volumes of the Horizon dashboard. For the row representing your volume, from the drop-down menu in the column Actions, once again choose Manage Attachments:
You should get this window:
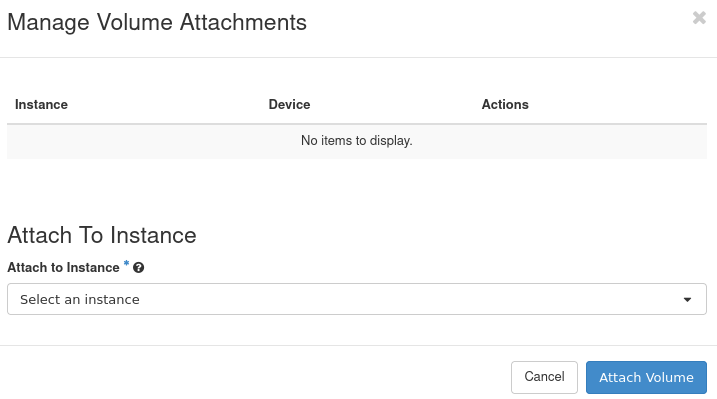
From the drop-down menu Attach to Instance choose the instance to which you want to attach your volume - the destination virtual machine.
Click Attach Volume.
Wait until the attaching is completed. If the process was successful, you should see appropriate information in the Attached To column:
What To Do Next
Now that volume has been connected to the destination virtual machine, you can allow or simplify access to it from that virtual machine. This might include:
assigning a drive letter to the volume (in case of Windows)
creating a mount point and adding the volume to /etc/fstab file (in case of Linux)