Mount EODATA on a Windows virtual machine on Creodias hosting
Creodias cloud provides access to EODATA, a repository of Earth observation data. On supported Windows virtual machines, EODATA can appear automatically as drive Y: in This PC.
This article explains how to:
check whether EODATA is already mounted,
verify the required VM network connections,
fix an automatic mount that points to an outdated path,
configure EODATA manually if automatic mounting is not available,
stop automatic mounting if you no longer need it.
Note
The EODATA repository is mounted as read-only. Do not configure your software to save output files directly to the EODATA drive.
Overview
There are three possible cases:
On newer Windows virtual machines, EODATA may already be mounted automatically as drive Y:.
On some preconfigured Windows images, Y: may exist but appear empty because the automatic mount uses an older path.
If automatic mounting is not available, you can mount EODATA manually with Rclone, WinFsp, and NSSM, or with Air Live Drive.
For most users, the first case is enough. Manual configuration is needed only if drive Y: does not appear, appears empty, or is not configured correctly.
Supported Windows virtual machines created from recent images can mount EODATA automatically.
Machines created on or after the dates shown below should have automatic mounting available.
Cloud |
Image date |
|---|---|
WAW3-1 |
20 December 2022 or later |
WAW3-2 |
12 October 2023 or later |
FRA1-2 |
12 October 2023 or later |
Prerequisites
Before starting, make sure that the following requirements are met.
No. 1 Account
You need a Creodias hosting account with access to the Horizon interface: https://horizon.cloudferro.com/auth/login/?next=/
No. 2 Windows virtual machine
You need a virtual machine running Windows.
If you do not already have a Windows virtual machine, use this article as a basic blueprint: How to create Windows VM on OpenStack Horizon and access it via web console on Creodias
No. 3 Network connection
The Windows virtual machine must be connected to:
your project network,
the eodata_ network.
The eodata_ network provides access to the EODATA repository from inside the cloud environment.
No. 4 Windows Administrator access
You need access to the Administrator account inside the Windows virtual machine.
This is not an account on your local computer. It is the built-in Windows account inside the Windows Server VM.
Open Project > Compute > Instances in Horizon. Find the Windows VM, open its actions menu, and choose Console.
On the Windows lock screen, send Ctrl+Alt+Delete from the console toolbar. Then log in with the Windows credentials provided for this VM or configured during VM creation.
No. 5 EODATA credentials for manual mounting
Manual mounting requires an access key and a secret key for EODATA.
Use this article to obtain the credentials: How to get credentials used for accessing EODATA on a cloud VM on Creodias
No. 6 Rclone for Windows
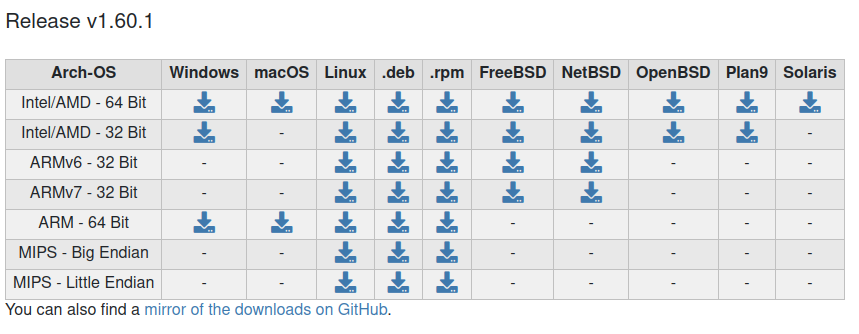
If you need manual command-line mounting and Rclone is not already installed on the VM, download Rclone for Windows from:
https://rclone.org/downloads/
No. 7 WinFsp filesystem driver
The Rclone mount command on Windows requires WinFsp. If it is not already installed on the VM, download and install it from:
https://winfsp.dev/rel/
You do not need to configure WinFsp separately. It only has to be installed so that Rclone can create the mounted drive.
No. 8 NSSM service manager
If you want the manually configured Rclone mount to start automatically after reboot and NSSM is not already present on the VM, download NSSM from:
https://nssm.cc/download
No. 9 Air Live Drive installer
If you prefer a graphical method, download Air Live Drive from:
https://www.airlivedrive.com/en/download/
Check automatic EODATA mounting
Newer Windows virtual machines may already have EODATA mounting configured.
Log in to the VM as Administrator and open This PC. Wait up to one minute after the first successful login.
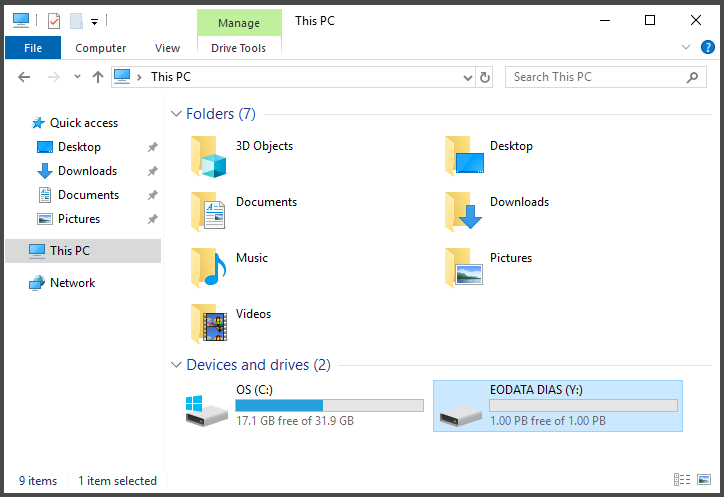
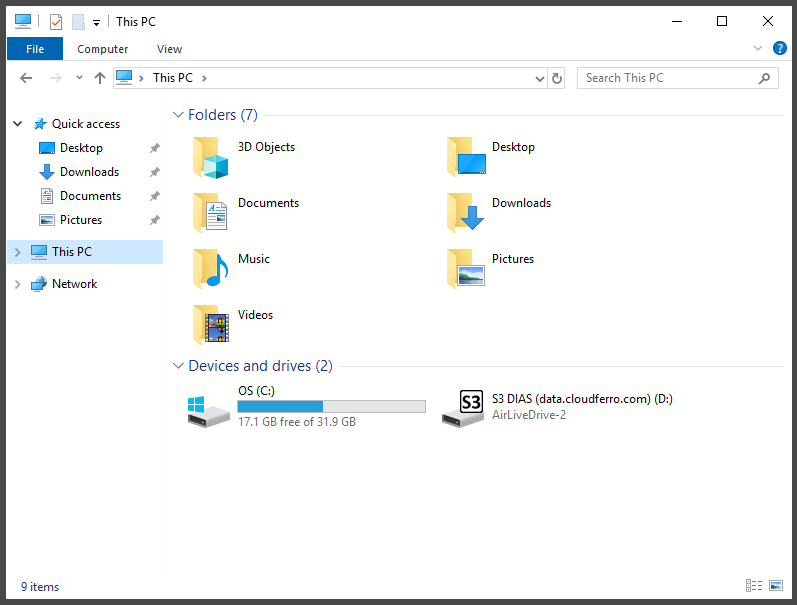
If automatic mounting is working, EODATA appears as drive Y: in the Devices and drives section.
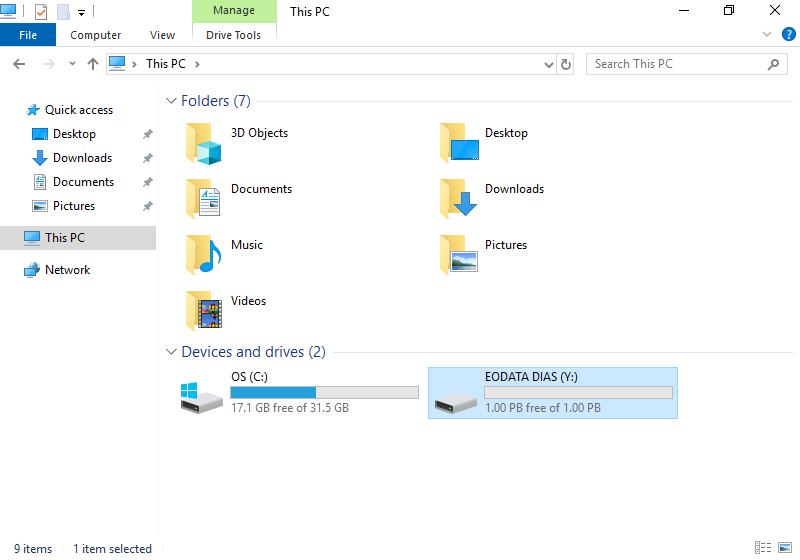
Double-click drive Y: to browse the contents of the EODATA repository.
You can copy selected data from EODATA to the local disk of your VM, or open the data with your processing software.
Check whether the VM is already preconfigured
Some Windows VM images already contain a prepared EODATA mounting setup. Before installing or configuring anything manually, check whether the required files already exist.
Open PowerShell as Administrator and run:
dir C:\rclone
If the folder exists and contains files such as rclone.exe, mount_eodata.ps1, nssm.exe, or git-log.txt, the VM already includes a prepared Rclone-based setup.
Check whether drive Y: exists:
Get-PSDrive Y
Then check whether EODATA folders are visible:
dir Y:\
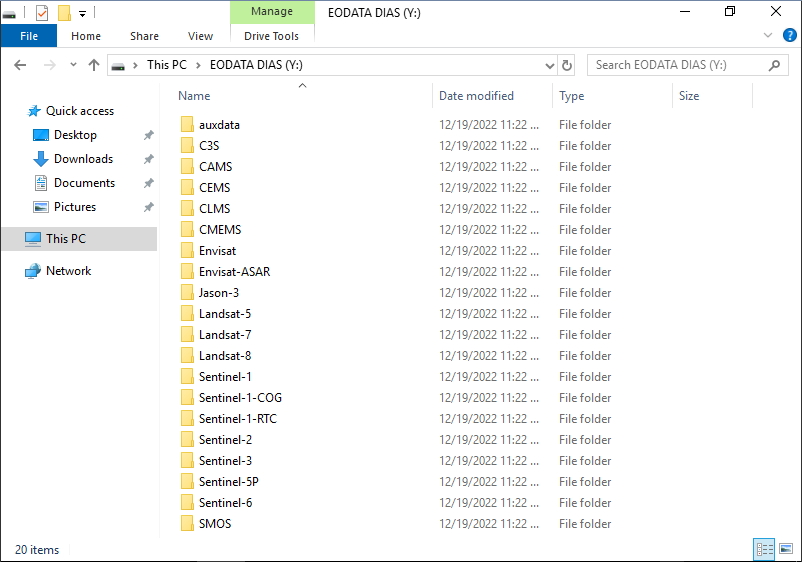
If you see folders such as Aqua, C3S, CAMS, CLMS, Landsat-8, Sentinel-1, or Sentinel-2, the repository is already mounted. No manual configuration is required.
You can also test the existing Rclone configuration:
cd C:\rclone
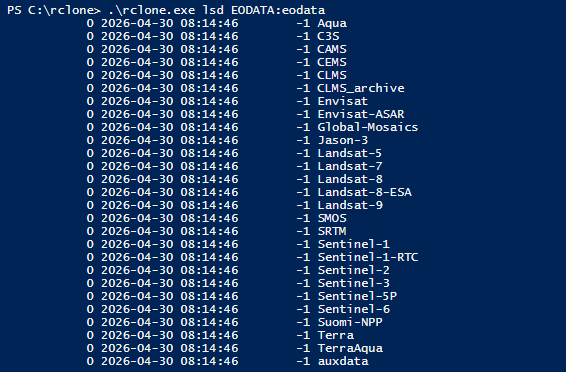
.\rclone.exe lsd EODATA:eodata
If this command lists EODATA collections, the Rclone configuration is working.
If drive Y: does not appear
If drive Y: does not appear automatically, check the following:
The VM is connected to your project network.
The VM is connected to the eodata_ network.
You are logged in as Administrator.
At least one minute has passed after the first successful login.
Drive Y: is not already used by another disk, network drive, or mounted file system.
If the drive still does not appear, the VM may have been created from an older image, or the automatic configuration may not have completed correctly.
In that case, use one of the manual methods below.
If drive Y: exists but appears empty
In some Windows images, the automatic EODATA mount may already be configured, but it may still use an older bucket path.
If drive Y: exists but appears empty, check whether Rclone is already running:
Get-Process rclone -ErrorAction SilentlyContinue
Then check what the running Rclone process is mounting:
Get-CimInstance Win32_Process -Filter "name = 'rclone.exe'" |
Select-Object ProcessId, CommandLine |
Format-List
If the command line contains:
EODATA:\DIAS
or:
EODATA:DIAS
the VM is using an older mount path.
Test the current EODATA path:
cd C:\rclone
.\rclone.exe lsd EODATA:eodata
If this command lists folders such as Aqua, C3S, CAMS, Sentinel-1, and Sentinel-2, use EODATA:eodata instead of EODATA:DIAS in the mount command or startup script.
For a temporary test, stop the current Rclone process:
Stop-Process -Name rclone -Force
Then mount the working path manually:
.\rclone.exe mount --read-only EODATA:eodata Y:
Rclone may print the following message in red in PowerShell:
The service rclone has been started.
This message means that the mount has started. Keep this PowerShell window open while testing the mount.
Open another PowerShell window and run:
dir Y:\
If the EODATA folders are visible, the mount is working. The automatic mount configuration should then be updated from EODATA:DIAS to EODATA:eodata.
Mount EODATA manually with Rclone
Use this method if you want an open-source command-line setup and the VM is not already configured correctly. This method uses:
Rclone to mount EODATA,
WinFsp to provide filesystem support on Windows,
NSSM to run the mount automatically as a Windows service.
Install and prepare Rclone
Log in to the Windows VM as Administrator.
Open PowerShell and go to the Rclone folder if it already exists:
cd C:\rclone
If the folder does not exist, create it and enter it:
mkdir C:\rclone
cd C:\rclone
Note
If PowerShell says that C:\rclone already exists, this is not an error.
It usually means that the VM image already contains a prepared Rclone setup.
Continue with cd C:\rclone and check the existing files with dir.
Download Rclone from the location listed in the prerequisites only if rclone.exe is not already present in C:\rclone. Choose the Windows 64-bit version for Intel/AMD systems.
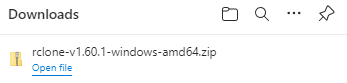
Extract the downloaded archive and copy the Rclone files to:
C:\rclone
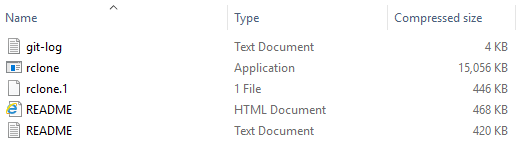
The C:\rclone folder may also contain files prepared by the image, such as mount_eodata.ps1, nssm.exe, or documentation files.
Install WinFsp
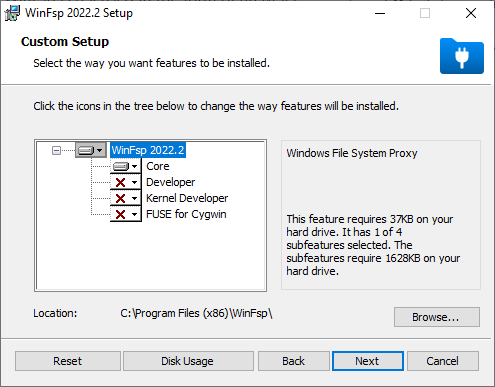
Download WinFsp from the location listed in the prerequisites and run the installer only if WinFsp is not already installed.

During installation, leave the default values selected. The Core component is sufficient for this workflow.
Prepare NSSM
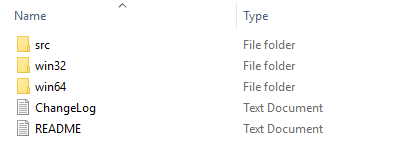
Download NSSM from the location listed in the prerequisites only if nssm.exe is not already present in C:\rclone.

Extract the downloaded archive, open the win64 folder, and copy nssm.exe to:
C:\rclone
Create the Rclone configuration file
Create the following folder:
C:\Users\Administrator\.config\rclone
Note
If this folder already exists, continue with the next step.
Inside that folder, create or open the file named:
rclone.conf
Make sure the file extension is .conf, not .txt.
Open rclone.conf in Notepad or another plain-text editor.
Add or update the following configuration. Replace CLOUDFERRO with your access key and PUBLIC with your secret key.
[EODATA]
type = s3
provider = Other
access_key_id = CLOUDFERRO
secret_access_key = PUBLIC
endpoint = https://eodata.cloudferro.com
[EODATA]
type = s3
provider = Other
access_key_id = CLOUDFERRO
secret_access_key = PUBLIC
endpoint = http://data.cloudferro.com
[EODATA]
type = s3
provider = Other
access_key_id = CLOUDFERRO
secret_access_key = PUBLIC
endpoint = http://eodata.cloudferro.com
[EODATA]
type = s3
provider = Other
access_key_id = CLOUDFERRO
secret_access_key = PUBLIC
endpoint = http://eodata.cloudferro.com
Use the endpoint exactly as shown for your cloud or region, including the http:// or https:// prefix.
Test access to EODATA
Return to PowerShell and go to the Rclone folder:
cd C:\rclone
Test access to EODATA:
.\rclone.exe lsd EODATA:eodata
You should see output similar to this:
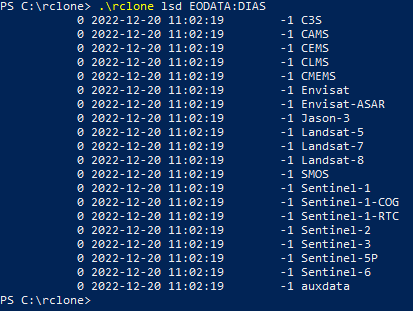
If this command works, the Rclone configuration is correct.
Test the mount
Before mounting EODATA, check whether drive Y: is already in use:
Get-PSDrive Y
If Y: already exists, check its contents:
dir Y:\
If EODATA folders are already visible, no additional mount command is needed.
If Y: exists but appears empty, stop the old Rclone process before testing a new mount:
Stop-Process -Name rclone -Force
Mount EODATA as drive Y::
.\rclone.exe mount --read-only EODATA:eodata Y:
Rclone may print the following message in red in PowerShell:
The service rclone has been started.
This message means that the mount has started. Keep this PowerShell window open while testing.
Open This PC or another PowerShell window. The EODATA repository should be visible as drive Y:.
Its content should look similar to this:
You can also verify the mount with:
dir Y:\
To stop this test mount, focus the PowerShell window where the mount command is running and press Ctrl+C.
You should get the following message:
The service rclone has been stopped.
Configure automatic mounting
The test mount works only while the PowerShell session is running. To mount EODATA automatically after reboot, create a Windows service with NSSM.
In PowerShell, run:
cd C:\rclone
.\nssm.exe install
The NSSM service installer appears.
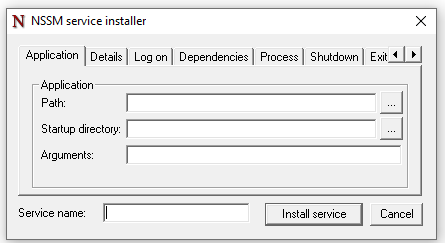
In Path, choose:
C:\rclone\rclone.exe
In Arguments, enter:
mount --read-only EODATA:eodata Y:
In Service name, enter:
EODATA
Open the Log on tab and select This account. Enter:
Administrator
Then enter and confirm the Administrator password.
Click Install service.
Start the service from PowerShell:
.\nssm.exe start EODATA
You should get the following message:
EODATA: START: The operation completed successfully.
The EODATA repository should now mount automatically as drive Y: after the VM starts.
Mount EODATA manually with Air Live Drive
Use this method if you prefer a graphical interface.
Air Live Drive is proprietary software. Its free version is usually sufficient for mounting one EODATA drive.
Install and start Air Live Drive
Log in to the Windows VM as Administrator.
Download Air Live Drive from the location listed in the prerequisites and install it.
Start Air Live Drive.
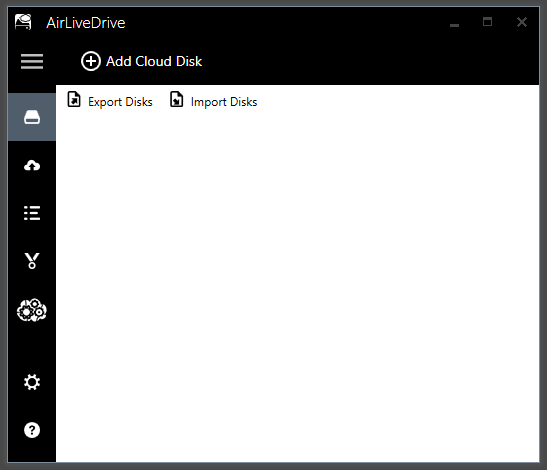
Add an S3 cloud disk
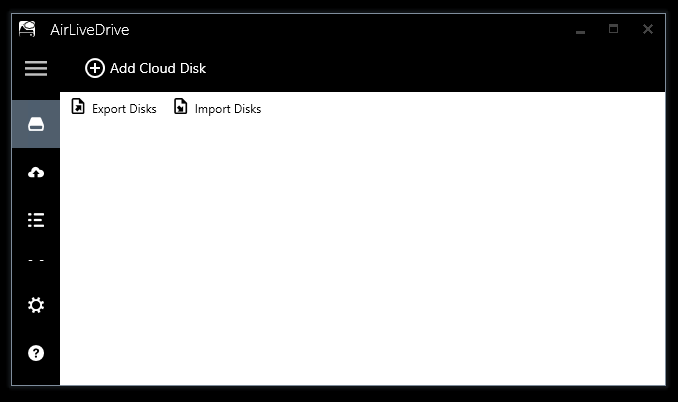
Click Add Cloud Disk.
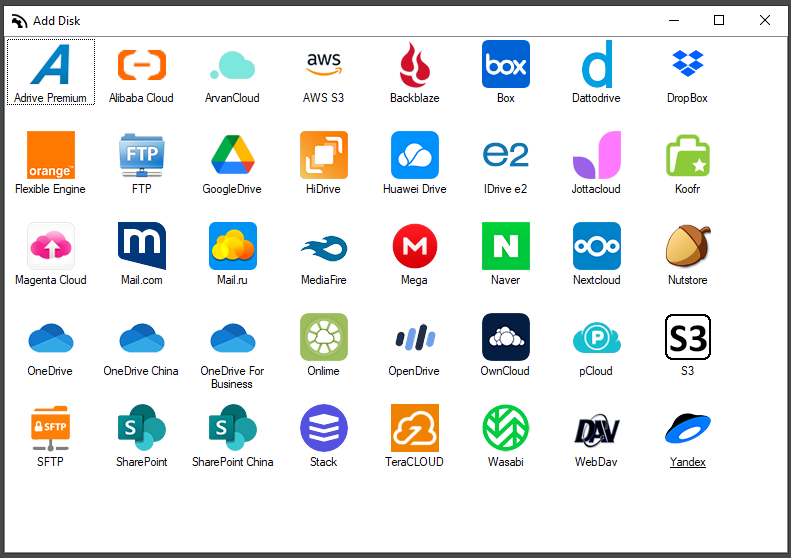
Choose S3.
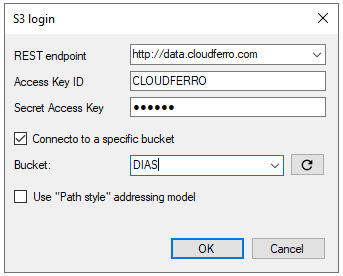
The S3 configuration form appears.
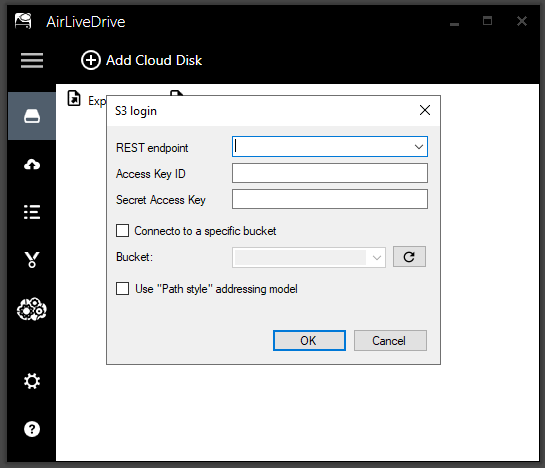
Configure the connection
In the REST endpoint field, enter the endpoint for your cloud or region.
https://eodata.cloudferro.com
http://data.cloudferro.com
http://eodata.cloudferro.com
http://eodata.cloudferro.com
Enter your access key and secret key in the Access Key ID and Secret Key ID fields.
Select the option for connecting to a specific bucket.
Note
In some Air Live Drive versions, this option may appear with a typographical error, for example Connecto to a specific bucket.
In the Bucket field, enter:
eodata
Your form should look similar to this:
Click OK.
Set the drive to read-only
The EODATA connection appears in the Air Live Drive window.
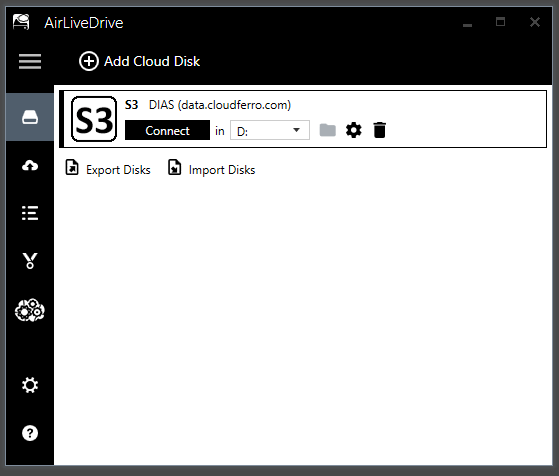
Click the gear icon next to Connect.
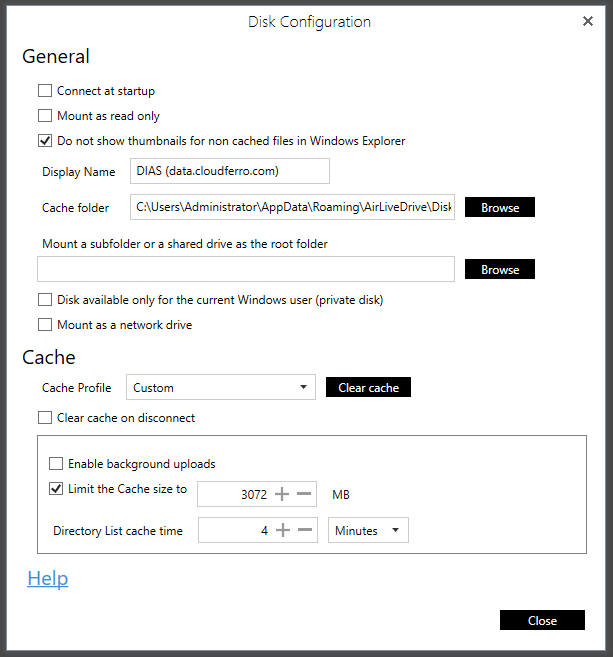
Select Mount as read only.
Optionally, select Connect at startup if you want Air Live Drive to connect the drive automatically.
Click Close.
Connect the drive
Choose the drive letter from the drop-down menu, then click Connect.
The EODATA repository opens in Windows.
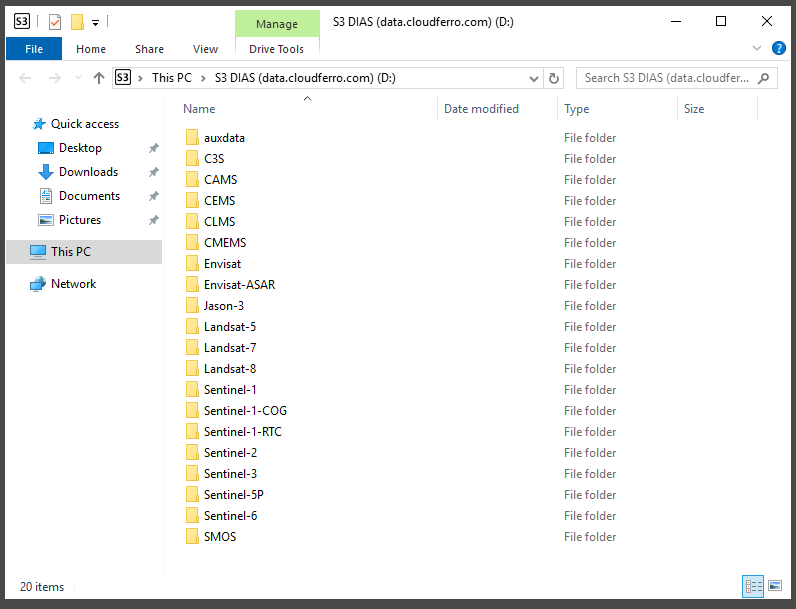
It is also visible in This PC.
To start Air Live Drive automatically after Windows starts, open Options by using the gear icon in the lower-left corner and enable Run Air Live Drive at login.
Stop automatic mounting
Use this section only if you want to stop mounting EODATA automatically.
The procedure depends on how EODATA was configured.
Stop automatic mounting in Air Live Drive
Open Air Live Drive.
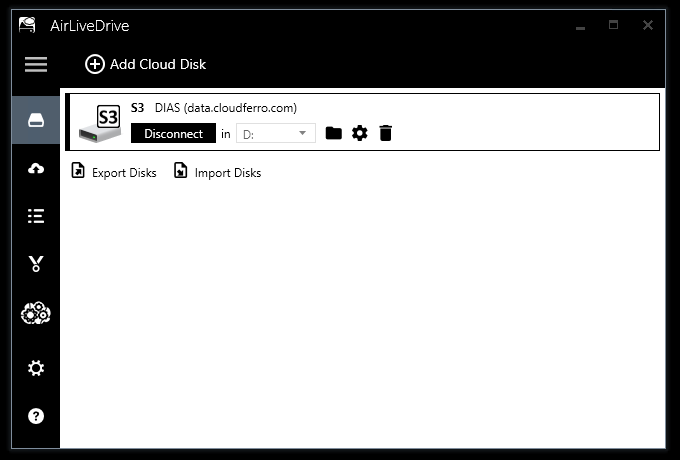
To disconnect the drive but keep the connection configuration, click Disconnect.
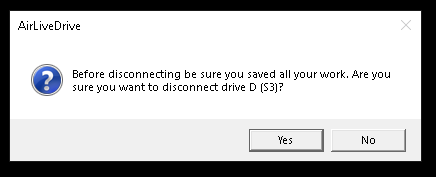
Confirm the operation.
After the drive is disconnected, click the gear icon for the EODATA connection.
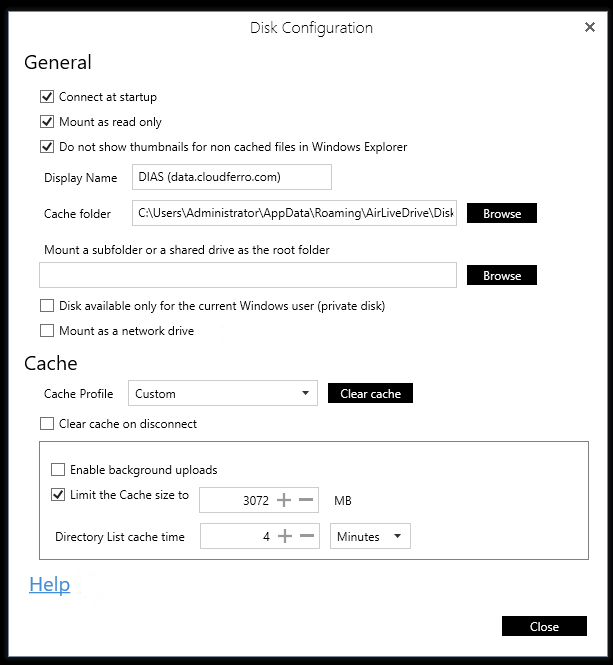
Clear Connect at startup and click Close.
To remove the connection completely, click the trash icon for the EODATA connection and confirm the removal.

After removal, the connection disappears from Air Live Drive.
Stop automatic mounting on a preconfigured Windows VM
On VMs with preconfigured automatic mounting, open this folder in Windows File Explorer:
C:\ProgramData\Microsoft\Windows\Start Menu\Programs\Startup
Note
You may need to enable viewing of hidden files and folders in Windows.
Find the batch file:
mount_eodata.bat
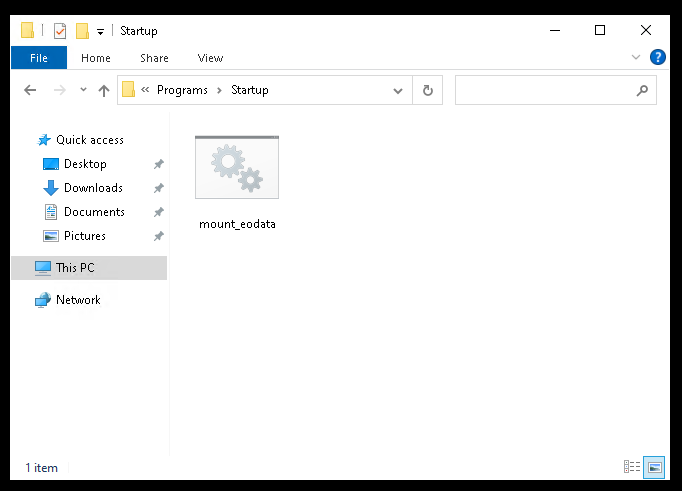
Delete mount_eodata.bat from the Startup folder.
The file starts the PowerShell script mount_eodata.ps1 from C:\rclone. If you later need to restore the automatic mount, check the mount_eodata folder on the Desktop. It may contain backup copies of both files.
Reboot the VM. EODATA should no longer be mounted automatically.
To remove the saved Rclone connection data as well, open the following file:
C:\Users\Administrator\.config\rclone\rclone.conf
Remove the [EODATA] section from that file.
Stop automatic mounting configured with NSSM
Open PowerShell and go to the Rclone folder:
cd C:\rclone
Check the status of the EODATA service:
.\nssm.exe status EODATA
If the service is running, stop it:
.\nssm.exe stop EODATA
Remove the service:
.\nssm.exe remove EODATA confirm
You should get output similar to this:
Service "EODATA" removed successfully!
To remove the saved Rclone connection data, open:
C:\Users\Administrator\.config\rclone\rclone.conf
Remove the [EODATA] section from that file.
What to do next
After EODATA is mounted, you can browse it from This PC and copy selected products to the local disk of your Windows VM.
For large datasets, avoid copying whole top-level directories. Browse to the specific collection, product type, date, and product folder that you need, and copy only the required files.
To access EODATA from a Linux virtual machine, use this article:
You can also access EODATA programmatically or with command-line tools:
If you used the Rclone method in this article, you can use a similar approach to mount private object storage containers: