Install TensorFlow on vGPU enabled VM on Creodias
TensorFlow is one of the most popular libraries for Machine Learning but its main practical problem is slow operation speed. Using it on VMs with vGPU support will significantly speed up the machine learning workflow so this article will show how to install TensorFlow on cloud with enabled vGPU support.
What Are We Going To Do
Verify availability of the toolkit for installation
Install Deep Neural Network library (cuDNN) which is a GPU-accelerated library of primitives for deep neural networks.
Install TensorFlow from NVIDIA site.
Note
You can also install TensorFlow using Docker: Install TensorFlow on Docker Running on Creodias vGPU Virtual Machine.
Prerequisites
You must have a virtual machine with an NVIDIA graphics card activated on the Creodias cloud. The instructions for creating such machine can be found here: How To Create a New Linux VM With NVIDIA Virtual GPU in the OpenStack Dashboard Horizon on Creodias. This machine must
have an assigned floating IP (see How to Add or Remove Floating IP’s to your VM on Creodias)
and you must be able to login to it using an SSH key stored on your local computer.
To use SSH from Linux computer see How to connect to your virtual machine via SSH in Linux on Creodias and to access it from Windows see How to access a VM from Windows PuTTY on Creodias.
These instructions were tested on an Ubuntu 20.04 virtual machine with the default configuration for Creodias hosting. In particular, it means using the eouser account for CLI commands, as described in articles from above.
You must also be registered to the NVIDIA developer program. If you haven’t already, you will have the opportunity to do so while following this article.
In order to run TensorFlow you will also need to install CuDNN, which is a library used to interact with Neural Networks and TensorFlow. In this article you will follow instructions based on the cuDNN install instructions (for Debian/Ubuntu) from the official Nvidia website.
Step 1 Verify the availability of the toolkit
Login to your virtual machine using SSH (replace 64.225.129.70 with the floating IP of your machine):
ssh eouser@64.225.129.70
Verify availability of the preinstalled GPU-enablement toolkit running the following command:
nvidia-smi
The terminal output shows the preinstalled tooling versions:
NVIDIA-SMI (nvidia-smi) - CLI utility intended to aid in the management and monitoring of NVIDIA GPU devices
NVIDIA driver - drivers list can be verified on this link
CUDA Version - the set of libraries to develop GPU-enabled applications - Cuda Toolkit
NVIDIA-SMI 470.82.01 Driver Version: 470.82.01 CUDA Version: 11.4
Memorise or write somewhere down the CUDA version - you will need it later. You may now log out from your remote machine using the following command:
exit
Step 2 Install cuDNN
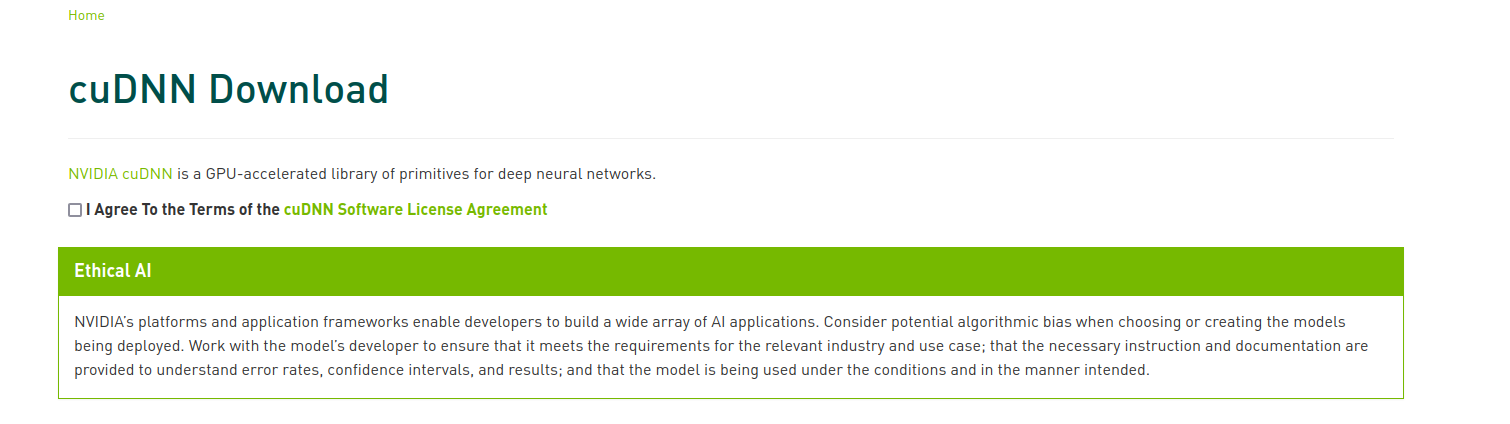
Navigate to the following website to download cuDNN: https://developer.nvidia.com/rdp/cudnn-download. If you are not logged in to your NVIDIA Developer account or you do not have one yet, you will see the following screen:

Depending on whether you have an account or not, click Login or Join now. To register, you will need to fill in a short form and accept the appropriate legal agreements. If your password is too long, you might not be able to register despite not receiving any error output from the website.
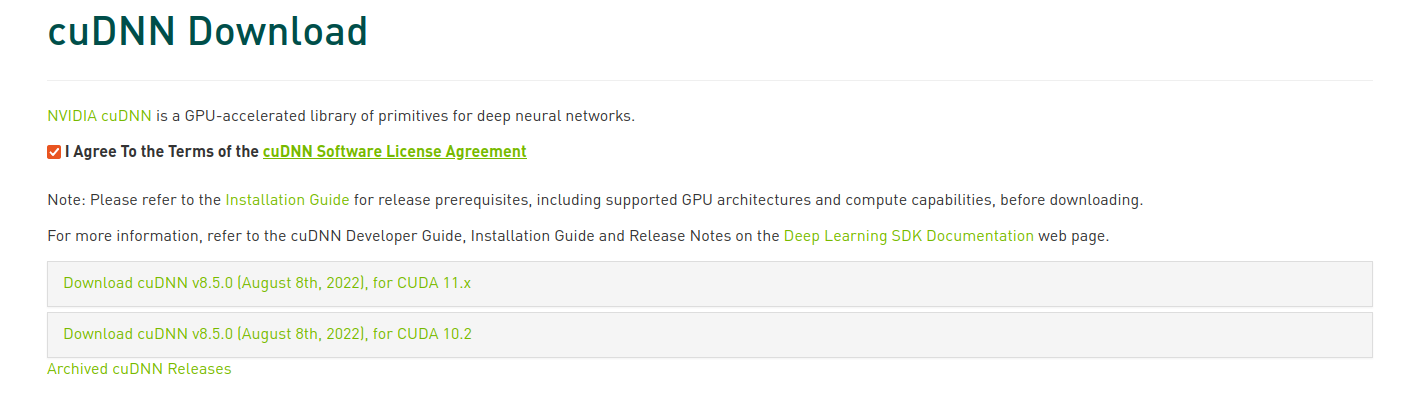
Once you are logged in, you will see the following screen:
Agree to the license agreement by clicking the checkbox. You will now see the download links:
Click the link containing the appropriate CUDA version (it was printed on your screen when you invoked the nvidia-smi command on your virtual machine). The list of available versions for different platforms will appear.
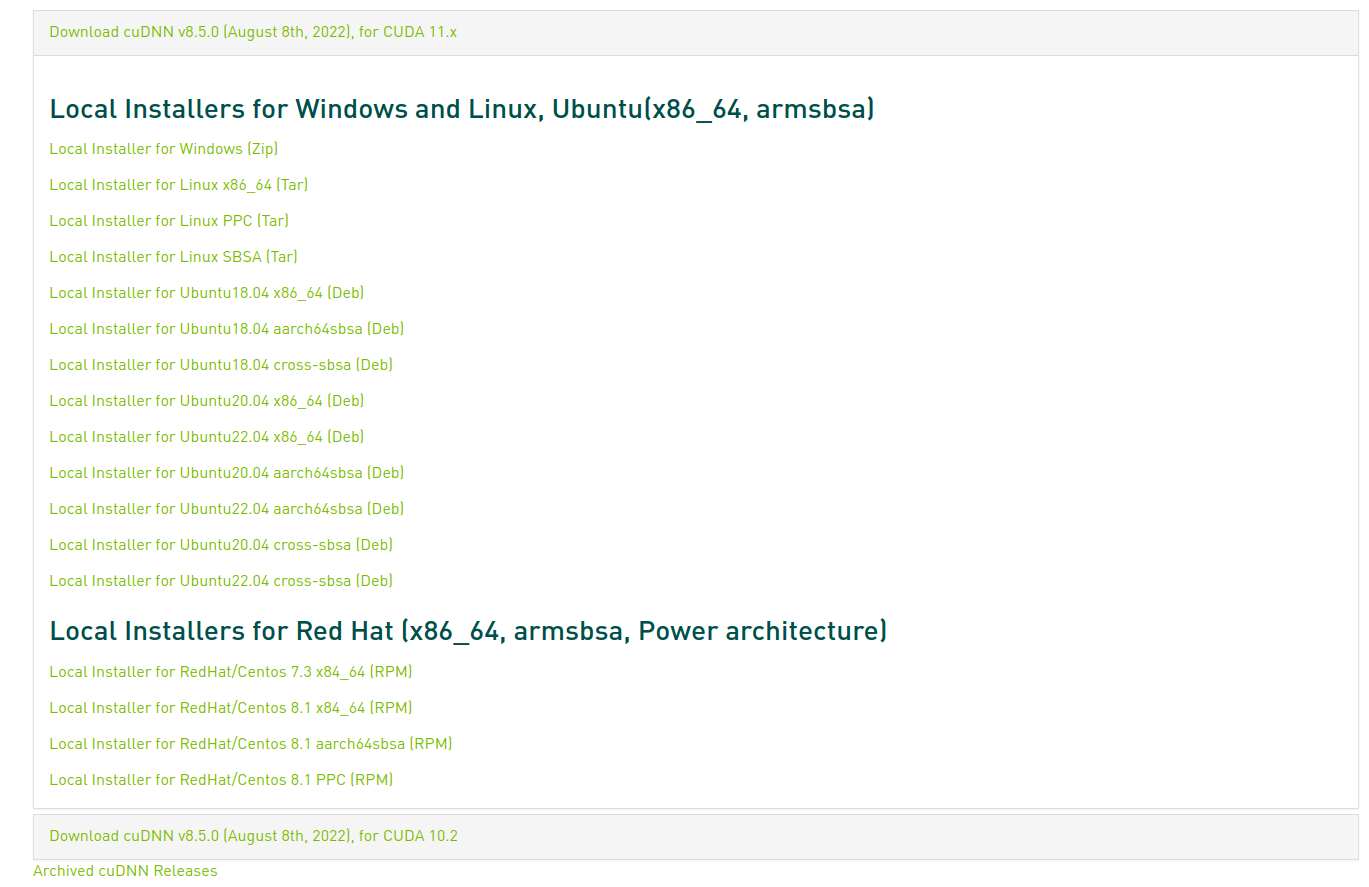
Choose the version compatible with the platform you are using on your virtual machine - this article describes installation on Ubuntu 20.04 LTS. The download will start. Your file should have the .deb extension.
Use the terminal to navigate to the location of the downloaded installer with the .deb extension. Browsers often place it in the Downloads folder in your home directory. Copy it to your remote machine (replace installer.deb with the name of your installer and 64.225.129.70 with the floating IP address of your virtual machine):
scp installer.deb eouser@64.225.129.70:/home/eouser/
Once the installer is copied, login to your virtual machine via SSH (replace the 64.225.129.70 with the IP address of your virtual machine):
ssh eosuer@64.225.129.70
Once your are logged in, use the ls command to make sure that you have your installer file there:

Now, execute the installer (replace installer.deb with the name of your installer):
sudo dpkg -i installer.deb
Import your CUDA GPG key.
sudo cp /var/cudnn-local-repo-*/cudnn-local-*-keyring.gpg /usr/share/keyrings
Once you have setup your key, install the adiitional required packages:
sudo apt update && sudo apt install apt-utils zlib1g libfreeimage3 libfreeimage-dev libcudnn8 libcudnn8-dev libcudnn8-samples
Run a test to ensure that the cuDNN installation was completed without errors (if so, after the last command you will see a message “Test passed!”):
cp -r /usr/src/cudnn_samples_v8/ $HOME
cd  $HOME/cudnn_samples_v8/mnistCUDNN
make clean && make
./mnistCUDNN
If the test is passed, you may proceed. If not, verify that you did everything correctly. If you are sure that you did everything according to the instructions, repeat those steps on a fresh virtual machine. Contact support team as described in Helpdesk and Support if this does not help.
Step 3 Install TensorFlow
TensorFlow runs on Python. We will create a python3-venv isolated virtual environment called tensorflowenv and install TensorFlow inside it. More information about python3-venv can be found in the following article: How to install Python virtualenv or virtualenvwrapper on Creodias.
First, come back to your home directory if you haven’t already:
cd
Then, update the software on your virtual machine:
sudo apt update && sudo apt upgrade
After that, install the python3-venv package:
sudo apt install python3-venv
Now, create the virtual environment called tensorflowenv:
python3 -m venv tensorflowenv
Enter that virtual environment:
source tensorflowenv/bin/activate
Install pip:
sudo apt install python3-pip
Upgrade pip:
pip install -\-upgrade pip
Install TensorFlow:
pip install tensorflow
Run the following command to verify that tensorflow is enabled for GPU (it will list 1 GPU device):
python3 -c "import tensorflow as tf; print(tf.config.list_physical_devices('GPU'))"
If a GPU device is available to TensorFlow, it will be by default used for its operation.
The listing of a GPU will look like this:

During the test you may receive the following output:
successful NUMA node read from SysFS had negative value (-1), but there must be at least one NUMA node, so returning NUMA node zero
This is just a warning and can be ignored.
What To Do Next
You have successfully installed TensorFlow on Creodias server with an enabled vGPU. In article Sample Deep Learning workflow using vGPU and EO DATA on Creodias you will see first hand that the presence of vGPU will bring results in minutes rather than the hours as was the case before vGPUs were introduced.