Create a Managed Kubernetes Cluster with Terraform on Creodias
You can provision and manage Creodias Managed Kubernetes clusters declaratively using Terraform with .tf configuration files. This approach enables consistent, repeatable cluster deployments aligned with Infrastructure as Code approach.
What we are going to cover
Prerequisites
1. Hosting account
You need:
your Creodias account
https://managed-kubernetes.creodias.eu to access the dashboard.
2. Regional endpoints
The following article provides Programmatic Endpoints for Creodias Managed Kubernetes
3. Managed Kubernetes API token
Terraform needs a Managed Kubernetes API token.
Generate it as described in Obtain Creodias Managed Kubernetes API token and keep it safe.
4. Terraform installed
Install Terraform from the official documentation: Terraform.
Create a cluster using a single Terraform file
Create a working directory:
mkdir mk8s-tf
cd mk8s-tf
Create a single file named sample.tf:
terraform {
  required_providers {
    cloudferro = {
      source  = "cloudferro/cloudferro"
      # At the time of writing, the following version was used successfully:
      version = "0.1.1"
    }
  }
}

variable "api_token" {
  description = "CloudFerro WAW4-1 API token"
  type        = string
  sensitive   = true
}

provider "cloudferro" {
  host  = "managed-kubernetes.waw4-1.cloudferro.com:443"
  token = var.api_token
}

resource "cloudferro_kubernetes_cluster_v1" "cluster" {
  name    = "tf-created-waw4-1"
  version = "1.32.6"

  control_plane = {
    flavor = "eo2a.large"
    size   = 1
  }
}
Provide the token as an environment variable:
export TF_VAR_api_token="paste-your-managed-kubernetes-token-here"
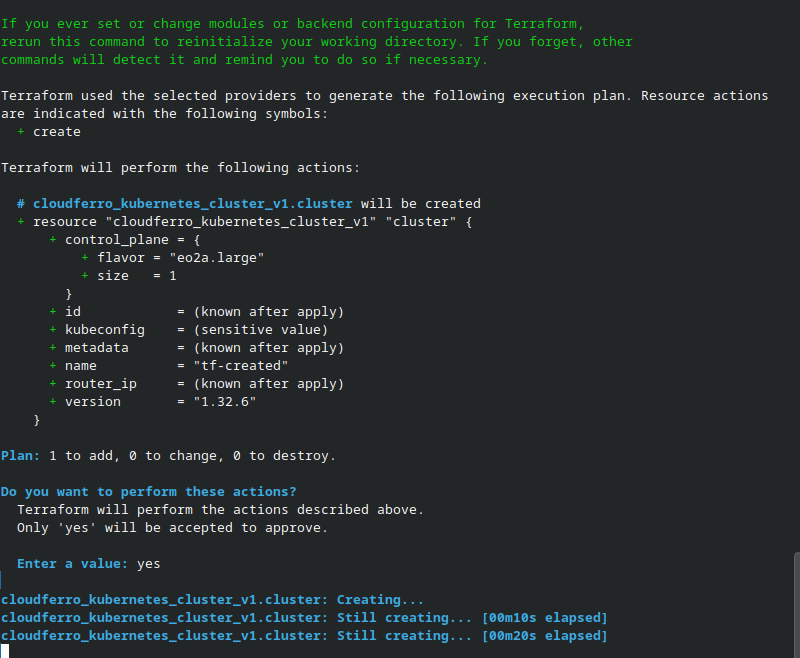
Initialize and create the cluster:
terraform init
terraform apply
When prompted, type yes and press Enter.
You can also see it in the status of Creating in the browser:
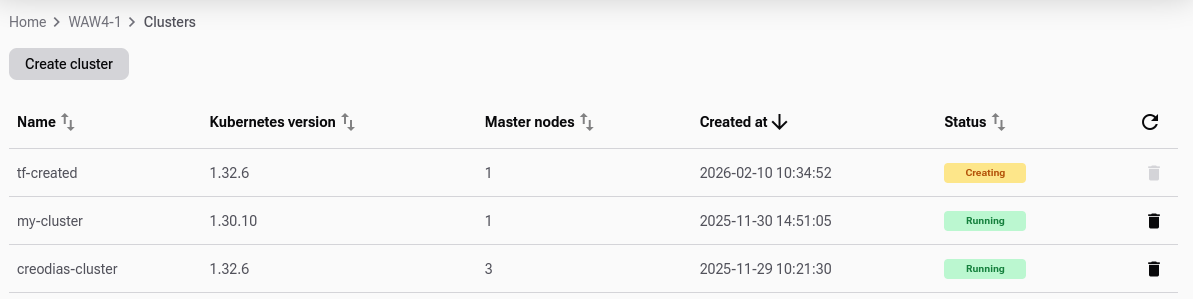
Verify in the MK8s dashboard
Open the MK8s dashboard you selected in the first part of the article.
Select the region in which you created the cluster.
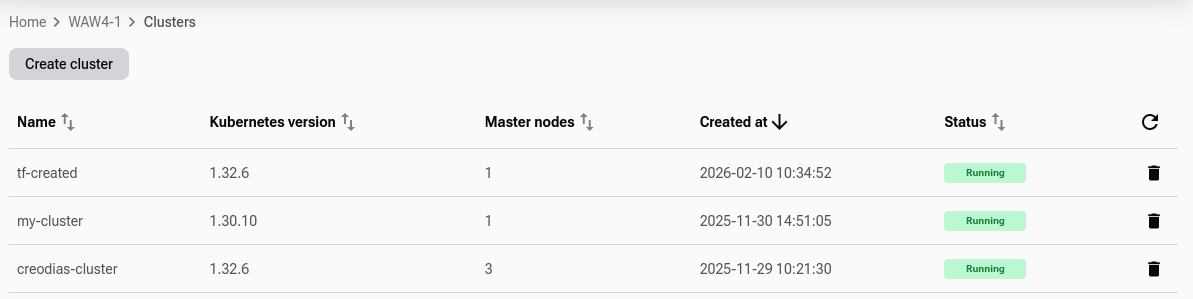
Confirm that tf-created-waw4-1 appears and reaches Running state.
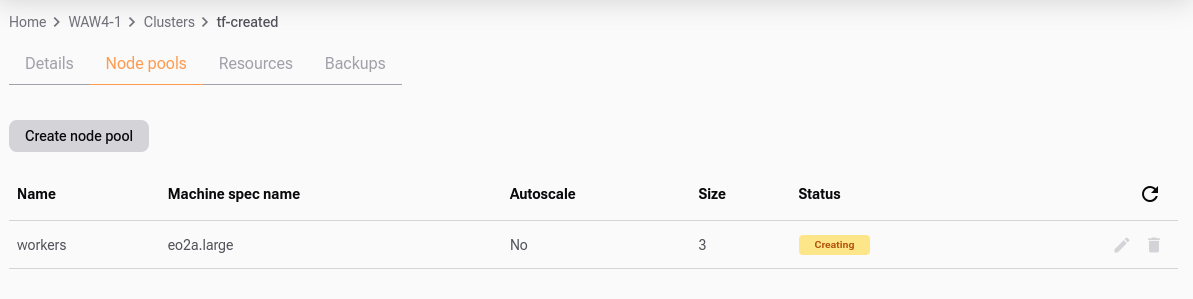
Add worker nodes
You can add the worker nodes by creating another .tf file in the same directory:
# add_workers.tf
# (NO cluster resource here)

resource "cloudferro_kubernetes_node_pool_v1" "workers" {
  name       = "workers"
  cluster_id = cloudferro_kubernetes_cluster_v1.cluster.id

  flavor          = "eo2a.large"
  shared_networks = []

  labels = []
  taints = []

  autoscale = false
  size      = 3
}
Terraform will execute both .tf files as one, taking the definition of the previously created cluster from file sample.tf.
Execute
terraform apply
The process of adding three worker nodes will start out:
Destroy the cluster
To remove the test cluster:
terraform destroy
What to do next
Export kubeconfig and connect with kubectl.
Store sample.tf and add_workers.tf in Git for repeatable cluster creation.
You can also create Kubernetes clusters using GUI, see articles
If you already have a cluster, you can back it up with Managed Kubernetes Backups on Creodias