Add node pools to Creodias Managed Kubernetes cluster using the launcher GUI
In this tutorial, you will learn how to add worker nodes to an Creodias Managed Kubernetes cluster by creating one or more node pools in the launcher GUI.
What we are going to cover
Prerequisites
No. 1 Existing cluster
You can add a node pool to a  cluster created according to article How to create a Kubernetes cluster using the Creodias Managed Kubernetes launcher GUI.
Or, you can also apply the steps from this article when adding a node pool already during the cluster creation.
No. 2 Quotas and resources
Make sure you have enough quota to create worker nodes. If you need more resources for your cluster, contact Support and request quota extension before creating node pools.
No. 3 Sharing networks
It is possible to share networks between cluster pods and a VM outside of the cluster. See Accessing OpenStack Resources from Creodias Managed Kubernetes Using Shared Networks
Single Cluster View – Node Pools
How to add a node pool
Open your cluster and click on option Node Pools. In the following image, we see a list of existing node pools (there is only one at the moment), as well as button Create node pool to create a new pool.
To start, click on that button and get this window on the screen:
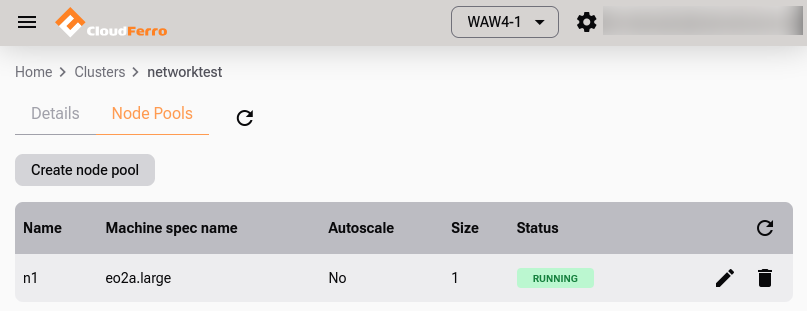
Example node pool list.
The node pool creation form looks like this:

Node pool creation form.
- Node Pool Name
If left empty, the name will be generated automatically.
- Flavor
Choose a flavor based on your needs. For minimal usage, eo2a.large consumes fewer resources compared to larger flavors.
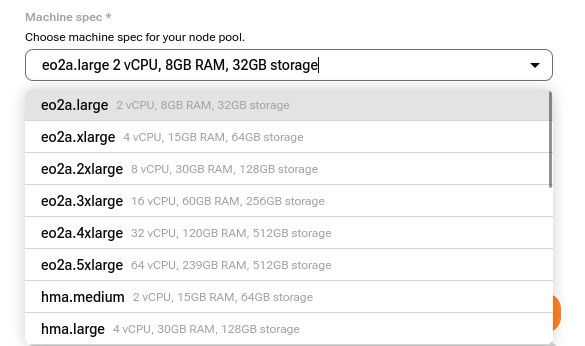
Select flavor for node pool.
Tip
When creating node pool with one of the vGPU machine specs (flavor), the NVIDIA GPU Operator gets installed on the cluster. To use GPU acceleration by a workload e.g. pod, apply this setting in the pod’s spec.containers definition:
resources:
  limits:
    nvidia.com/gpu: 1
By default, the first pod scheduled on a given node in such created node pool will utilize the full (v)GPU unit assigned to this node. To enable splitting the (v)GPU between more pods, see the NVIDIA GPU Operator - Time Slicing documentation.
- Autoscale
Enable to allow the cluster to automatically increase or decrease nodes based on demand.
The cluster autoscaler adds or removes nodes based on pending pods. This complements the Horizontal Pod Autoscaler (HPA), which adjusts the number of pods inside existing nodes.
Tip
The cluster autoscaler is most effective when combined with pod resource limits and requests. Make sure your workloads define them correctly.
- Size of Node Pool
Start with 1 node if unsure; you can resize later.
- Advanced Settings
In Advanced Settings, you can:
Specify OpenStack shared network IDs
Assign initial Kubernetes labels and taints; they are, however, out of scope of this article.
Finish creating the node pool and click on Add node pool. The new pool will appear in the node pool list and worker nodes will be created in the background.
How to edit a node pool
It is also possible to change the parameters of the existing node pool, by clicking on pen icon, ![]() , at the right side of n1 row.
, at the right side of n1 row.
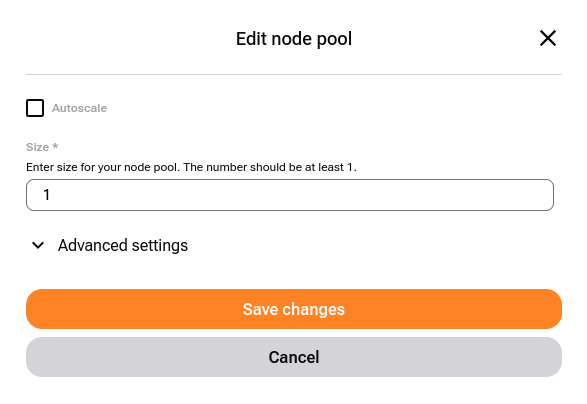
Node pool creation screen.
You cannot change the name or the flavor of the node pool but you can adjust worker capacity in two ways:
- Define a range
Turn Autoscale option on and two new options appear in the form:
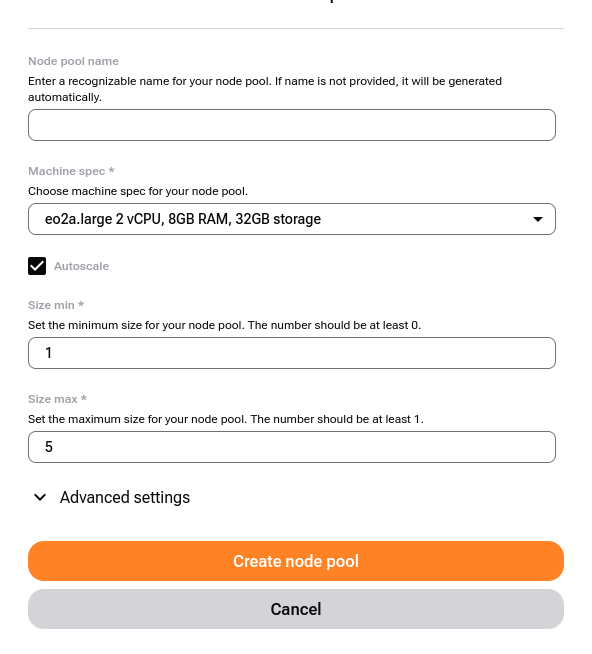
Autoscaling enabled with min/max limits.
- Redefine fixed size of node pool
Just enter the required number in that field and Save changes.

Scale worker nodes manually. Status temporarily changes to
 .
.
When editing, in Advanced settings you can change the related networks.
Delete a Node Pool
Click the  icon next to the node pool.
What To Do Next
With worker nodes added, you can start deploying pods, creating services and so on.
If you already have a cluster, you can back it up with Managed Kubernetes Backups on Creodias
Learn how to connect a VM to your Kubernetes network: Accessing OpenStack Resources from Creodias Managed Kubernetes Using Shared Networks