Use backup command to create rotating backups of virtual machines on Creodias cloud
Rotating backups in OpenStack refer to a backup strategy where older backups are automatically deleted after a predefined number of backups are created. This ensures that storage does not grow indefinitely while still maintaining a set number of recent backups for disaster recovery.
The rotating backup algorithm
Creating rotating backups of virtual machines is a process comprising of the following steps:
- Define the period of backups
Usually, daily, weekly, monthly or in any other time period.
- Define rotation limit
How many backups to retain (we will refer to this number as maxN throughout this article).
- Delete older backups
Once the limit is reached, start deleting the existing backups, usually the oldest one.
backup create vs. image create
There are two ways of creating backups under OpenStack, using one of these two commands:
openstack server backup create and openstack server image create
Here is how they compare:
Feature |
openstack server backup create |
openstack server image create |
|---|---|---|
Association with VM |
Associated using backup image property |
Associated using backup name |
Rotation support |
Rotation with |
No built-in rotation support |
Classification in Horizon |
Marked as image |
Marked as snapshot |
Horizon Select Boot Source |
Choose Instance Snapshot |
Choose Image |
Purpose |
Primarily used for backups, can be rotated and managed |
Creates a single VM snapshot without rotation |
Incremental backup support |
Yes, supports incremental backups |
No, always creates a full snapshot |
Multiple rotating schedules |
No, only one |
Yes (daily, weekly, monthly etc.) |
Best usage scenario |
Automated backup strategies with rotation |
Capturing the current state of a VM for cloning or rollback |
Can be scripted? |
Yes |
Yes |
In this article we are going to use a openstack server backup create command under OpenStack to create rotating backups of virtual machines.
Prerequisites
No. 1 Account
You need a Creodias hosting account with access to the Horizon interface: https://horizon.cloudferro.com/auth/login/?next=/
No. 2 VM which will be backed up
You need a virtual machine which will be backed up. If you don’t have one, you can create it by following one of these articles:
How to create a Linux VM and access it from Windows desktop on Creodias
How to create a Linux VM and access it from Linux command line on Creodias
To learn how to create a Windows virtual machine, see this article: How to create Windows VM on OpenStack Horizon and access it via web console on Creodias
The name of the virtual machine we are going to back up in this article will be vm-to-backup. Be sure to supply your own name throughout the article.
No. 3 Server on which the backup process will be performed
You need a server which will be executing commands for making backups of VM from Prerequisite No. 2. That server may be on the same region and cloud as the instance which is backed up, but may be in a totally different cloud, hosting arrangement and so on.
For the sake of brevity, let that server be called backing-server. Use Prerequisite No. 2 to create it as an Ubuntu 24.04 LTS machine, with a floating IP address of its own and accessible through SSH.
No. 4 OpenStackClient installed on backing-server
You need to have OpenStackClient installed on backing-server. See How to install OpenStackClient for Linux on Creodias
So, you enter backing-server via SSH, install and then use openstack command to relay commands to vm-to-backup.
No. 5 Install application credentials
You might be using a two-factor authentication scheme to log in as a user to Creodias. Here we are creating automated operations, so authentication should be automated as well. Therefore, for automation, we will be using application credentials.
Use article How to generate or use Application Credentials via CLI on Creodias to learn how to create a pair of application credentials and put them to a clouds.yml file.
Copy that file to appropriate directory on backing-server.
This file might store multiple pairs of credentials. To choose the appropriate credentials, we will be using --os-cloud parameter. This article will use placeholder value backup_test for the name of your pair of credentials. Make sure to use your own each time you see it.
On Creodias, application credentials work on multiple regions, so we will specify the region which we will use using --os-region parameter. Value of this parameter is the name of cloud which you are using, for example WAW3-2 or WAW4-1.
To test the waters, the following command should list virtual machines in your project:
openstack server list --os-cloud backup_test --os-region WAW3-2
Replace the actual values used here, backup_test and WAW3-2, with the concrete values from your environment.
No. 6 Knowledge of cron under Linux
cron is a standard Linux command for executing tasks according to a predefined schedule. In some parts of this article we will be using this tool, but only its most basic features.
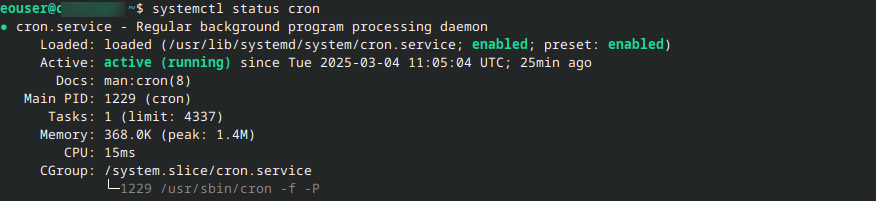
If cron is installed, the following command
systemctl status cron
will produce output like this:
If not, here is how to install cron:
sudo apt update
sudo apt install cron -y
sudo systemctl enable --now cron
systemctl status cron
The result should be similar to the image above.
The basic command to enter or alter cron jobs is
crontab -e
By default, you will be taken into a preinstalled vim editor, however, if you want to use nano, install it first:
sudo apt install nano
To start crontab with nano, use the following command:
EDITOR=nano crontab -e
No. 7 Command openstack server backup create
See article How to Backup an Instance and Download it to the Desktop on Creodias OpenStack Hosting for the basic syntax of CLI command to create a server backup.
Create the first backup
This command manually creates rotating backups. Its syntax is:
openstack server backup create \
--name my-backup1 \
--rotate 3 vm-to-backup \
--os-cloud backup_test \
--os-region WAW3-2
In the following example, my-backup1 is the name of the backup while vm-to-backup is the VM which will be backed up. The other two parameters, --os-cloud and --os-region are for the cloud and a particular region in the cloud.
How to see the backups created
The backups that this command creates are images and, in Horizon, can be seen with Compute -> Images. With CLI, execute the command below to list images:
openstack image list \
--os-cloud backup_test \
--os-region WAW3-2
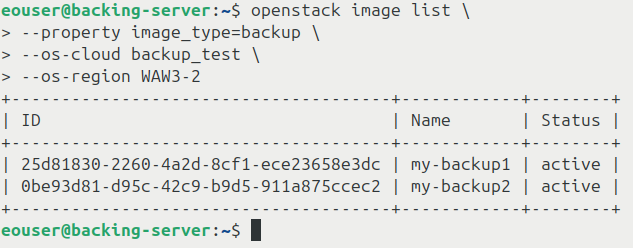
By default, this command should display all images found in your project. However, you can filter the list so that only backups created using method above are displayed (assuming that you did not change properties of images).
openstack image list \
--property image_type=backup \
--os-cloud backup_test \
--os-region WAW3-2
Add another backup to the series
The first backup in a rotating series of backups has just been created. To add another backup to the series, execute the same command but change the name; in this example we had the first name to be my-backup1 and now change it to my-backup2:
openstack server backup create \
--name my-backup2 \
--rotate 3 vm-to-backup \
--os-cloud backup_test \
--os-region WAW3-2
Note that the value of --rotate parameter here is 3, as was for the first command. It is of vital importance to keep the value of --rotate parameter always the same, otherwise, results might be unpredictable.
You will now have two backups of the same VM, named my-backup1 and my-backup2.
Execute once more, with name my-backup3; the number in --rotate parameter has been reached so the next backup will cause one of the older files to be deleted. To verify, execute the command with name my-backup4:
Again, list with
openstack image list \
--property image_type=backup \
--os-cloud backup_test \
--os-region WAW3-2
There are only three files left, numbered from 2 to 4.
The problems and shortcomings of backup command
The above procedure is strictly manual – the user has to initiate creation of the new backup.
This command cannot differentiate between daily, weekly and monthly backups. Also, the --rotate parameter (here it is 3) should be one and the same whenever the command is executed.
Use the same name twice?
If you use the same code twice in the backup command, the backup should still be created, with the additional message:
More than one Image exists with the name 'my-backup1'.
Keep this in mind when it comes to restoration of the backup and use backup id for restoration instead of backup file name.
Automating through cron jobs
Linux cron command in Ubuntu is the way to automate creation of rotating backups. For technical details of operating a cron, see Prerequisite No 6.
Open the crontab file by executing
crontab -e
Add a cron job which creates backup of your virtual machine. Such a cron job could look like this:
4 3 * * * openstack server backup create --name "backup_cron_$(date +\%Y-\%m-\%d_\%H-\%M)" --rotate 3 vm-to-backup --os-cloud backup_test --os-region WAW3-2 >> $HOME/log_backup 2>> $HOME/log_backup
This is what your command would look like in nano editor:
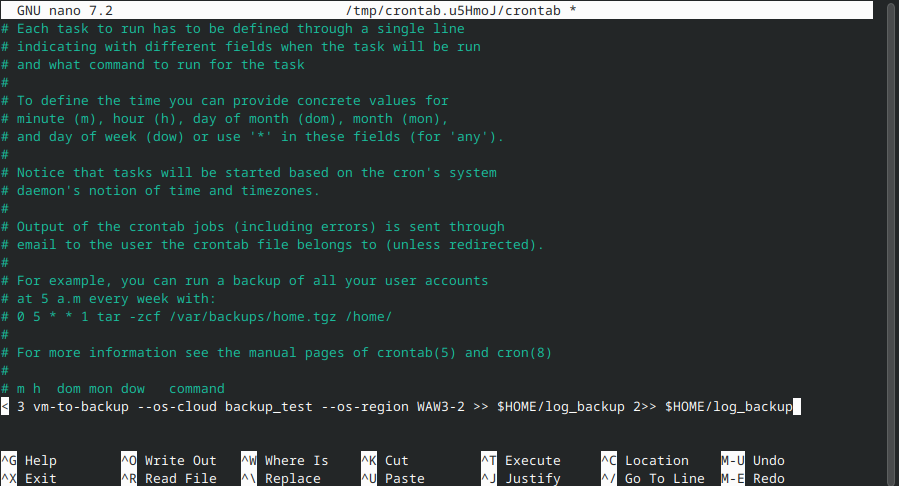
It is a very long row so although you can edit it in nano directly, it is better to edit crontab command locally and only then deliver it remotely.
The preloaded comments in editor define how to use the parameters. In this example, the job specified the following parameters:
- run time
Runs every day at 3:04 AM (timezone set on VM, likely UTC+0 if you use one of the default images)
- backup created
Creates backup of virtual machine named vm-to-backup; the name of the backup consists of:
phrase backup_ followed by
current date in the following format: Year-Month-Day_Hour-Minute, for example: 2025-01-21_3-4 (21st of January 2025)
- number of backups kept
maxN, the number of backups kept, is 3
- key pair
Authenticates with key pair backup_test from clouds.yml
- keep logs
Appends both types of output (standard output and standard error) to file log_backup, which will be placed in user’s home directory
Restoring backups
This section covers ways of restoring your virtual machine to the previous state from backup.
Rebuilding of an instance
Rebuilding of an instance involves replacing the current contents of your virtual machine hard drive with contents of an image. In this process, metadata such as VM name or ID will be kept. This includes floating IPs.
During this process, virtual machine will be unavailable.
Using OpenStackClient, execute the following command to list images:
openstack image list --os-cloud backup_test --os-region WAW3-2 --private
The result should list only the backup images:
+--------------------------------------+--------------------------------------------+--------+
| ID                                   | Name                                       | Status |
+--------------------------------------+--------------------------------------------+--------+
| 3efb29d5-40bb-44aa-ad4e-3b66bc4fd5a3 | my-backup1                                 | active |
| 37f1510b-ff4f-4dc0-9fea-e310cf987de6 | my-backup2                                 | active |
+--------------------------------------+--------------------------------------------+--------+
The command to restore from a backup is:
openstack server rebuild --image my-backup2 vm-to-backup --os-cloud backup_test --os-region WAW3-2
In that command we used :
my-backup2 – replace with the ID or name of your image
vm-to-backup – replace with the ID (or name) of your instance
You should get the output similar to this:
+-------------------+----------------------------------------------------------+
| Field             | Value                                                    |
+-------------------+----------------------------------------------------------+
| OS-DCF:diskConfig | MANUAL                                                   |
| accessIPv4        |                                                          |
| accessIPv6        |                                                          |
| addresses         | cloud_079093_1=10.0.0.56; eodata=100.66.18.182           |
| adminPass         | zrWv6nfof7Mn                                             |
| created           | 2025-02-13T09:40:23Z                                     |
| flavor            | eo1.xsmall (eo1.xsmall)                                  |
| hostId            | ec76c2707195396916ef9292bb96c081246487c43affec3a7d620315 |
| id                | 3a42cda7-ab72-4c6a-a6f3-11000e6e54ac                     |
| image             | my-backup2 (37f1510b-ff4f-4dc0-9fea-e310cf987de6)        |
| name              | vm-to-backup                                             |
| progress          | 0                                                        |
| project_id        | 216c31ba4adb4c26b0d71dee19169b78                         |
| properties        |                                                          |
| status            | REBUILD                                                  |
| updated           | 2025-02-13T10:13:52Z                                     |
| user_id           | 64265fc37a55407a97d92b8acd9009e8                         |
+-------------------+----------------------------------------------------------+
Wait until the restoration is completed.
What To Do Next
In this article we used command openstack server backup create. If you need multiple rotating schedules, command openstack server image create might be a better choice. See Use script to create daily weekly and monthly rotating backups of virtual machines on Creodias.