How to create a Kubernetes cluster using the Creodias Managed Kubernetes launcher GUI
In this tutorial, you will learn how to create a new Kubernetes cluster using the Creodias Managed Kubernetes launcher graphical user interface (GUI). It allows you to create and manage Kubernetes clusters directly from your browser, without installing or configuring any CLI tools. It’s especially useful when you want to
quickly deploy a cluster with control plane and worker nodes,
enable autoscaling, and
download a ready-to-use kubeconfig file
all through a visual, guided process.
This article walks you through each step using real examples from the Creodias cloud platform.
Note
This tutorial results in a fully functional Kubernetes cluster with optional worker node pools and kubectl access configured on your local machine.
What we are going to cover
Prerequisites
No. 1 Hosting account on Creodias
To use Creodias Managed Kubernetes, you need your
general Creodias account as well as the link to
https://managed-kubernetes.creodias.eu to access the dashboard.
No. 2 Accessing the Service and Billing
To run clusters and node pools, please contact our Helpdesk and Support team. Request Managed Kubernetes access and, if needed, a top-up for your Pay-per-Use wallet.
Warning
You must ensure that your usage stays within the top-up limit. The service will not be automatically stopped if the limit is exceeded, and you will be billed for the full amount of usage.
No. 3 Quotas and Resources
Be aware of the available resources in your cloud. Refer to the article on Dashboard Overview – Project Quotas and Flavor Limits on CREODIAS.
If the available resources are insufficient for the cluster you want to create, consider this three-step approach:
First, create a control plane.
Then, reach out to Support (see Helpdesk and Support) to extend the quota for this cluster.
Finally, add worker nodes by creating a node pool.
No. 4 Installation of kubectl
You will access the cluster using kubectl. The standard installation methods for kubectl are described on the Install Tools page of the official Kubernetes website.
In this article, you will learn how to point kubectl to the managed Kubernetes cluster you want to work with.
No. 5 Sharing networks
It is possible to share networks between cluster pods and a VM outside of the cluster. See Accessing OpenStack Resources from Creodias Managed Kubernetes Using Shared Networks
Create New Cluster
When you first encounter the Creodias Managed Kubernetes launcher screen, it will look like this:
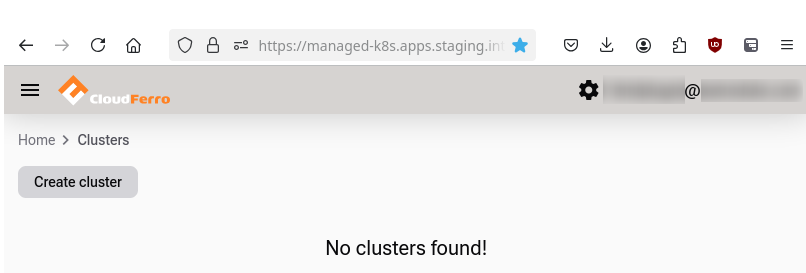
Initial Creodias Managed Kubernetes launcher interface.
Click the 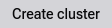 button. A form will appear on the screen, allowing you to enter data for the new cluster.
Define Cluster Name and Kubernetes Version
- Cluster Name
Enter an appropriate name for your cluster. If this field is left empty, the system will automatically generate a cluster name.
- Kubernetes Version
At the time of writing, there are two available versions: 1.29.13 and 1.30.10. It is recommended to always use the latest version; however, you can upgrade an older version by clicking the Upgrade button in the Details cluster view (explained later in the article).
Add Control Plane Nodes
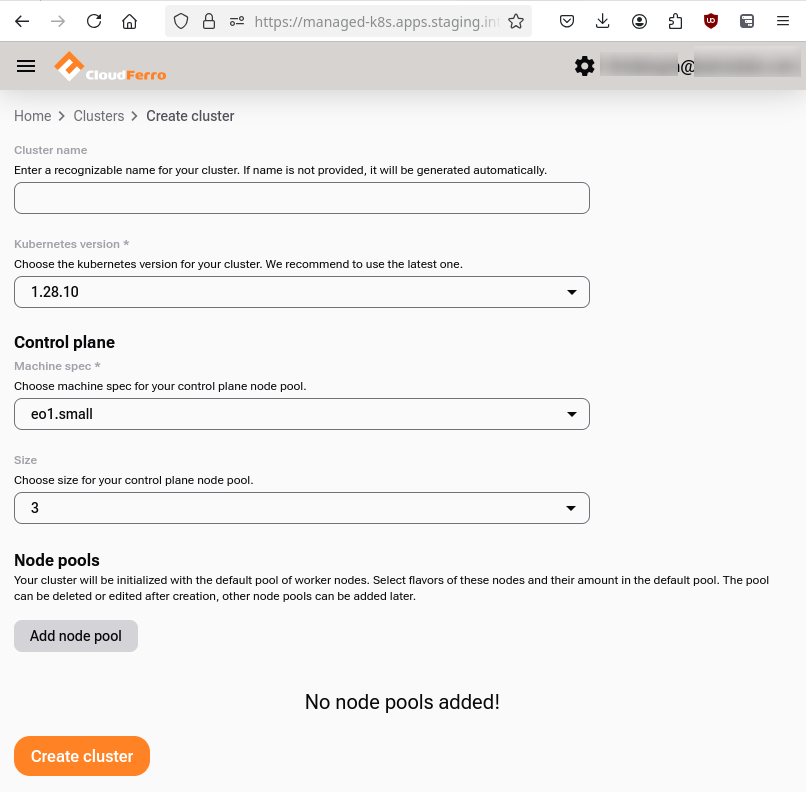
- Flavors
Select the flavor for the virtual machines in the cluster’s control plane. There are 13 available flavors for the control plane:
- Size
Choose 1, 3, or 5 control plane nodes.
Use 1 for testing, and 3 for production-grade High Availability.
Tip
For production-grade reliability, choose 3 control plane nodes to achieve high availability. Use 1 only for development or testing.
Add Node Pools
You may want to define the properties of worker nodes right away (you may change them later, when the cluster is running).
Click the  button to create worker nodes for the cluster. Enter the required information in the form:

Node pool creation form.
- Node Pool Name
If left empty, the name will be generated automatically.
- Flavor
Choose a flavor based on your needs. For minimal usage, eo2a.large consumes fewer resources compared to larger flavors.
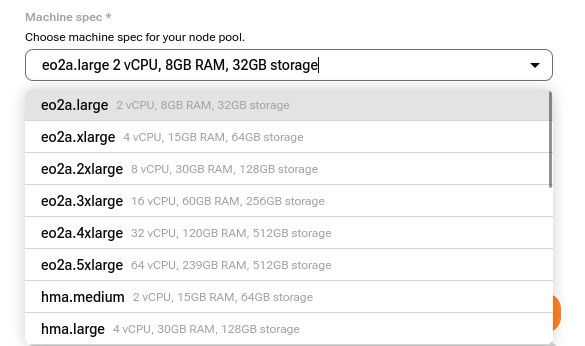
Select flavor for node pool.
Tip
When creating nodepool with one of the GPU machine specs (flavor), the NVIDIA GPU Operator gets installed on the cluster. To use GPU acceleration by a workload e.g. pod, apply this setting in the pod’s spec.containers definition:
resources:
  limits:
    nvidia.com/gpu: 1
By default, the first pod scheduled on a given node in such created nodepool will utilize the full (v)GPU unit assigned to this node. To enable splitting the (v)GPU between more pods, see the NVIDIA GPU Operator - Time Slicing documentation.
- Autoscale
Enable to allow the cluster to automatically increase or decrease nodes based on demand.
The cluster autoscaler adds or removes nodes based on pending pods. This complements the Horizontal Pod Autoscaler (HPA), which adjusts the number of pods inside existing nodes.
Tip
The cluster autoscaler is most effective when combined with pod resource limits and requests. Make sure your workloads define them correctly.
- Size of Node Pool
Start with 1 node if unsure; you can resize later.
- Advanced Settings
In Advanced Settings, you can:
Assign Kubernetes labels
Apply taints
Specify OpenStack shared network IDs
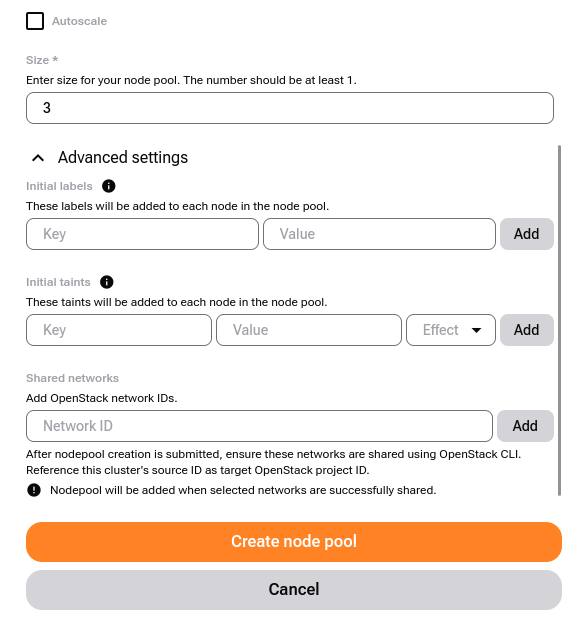
Define labels, taints and/or add OpenStack shared networks.
Warning
It is only possible to define labels and taints while creating a node group.
Taints and labels are out of scope of this article. For sharing networks, see Prerequisite No. 4.
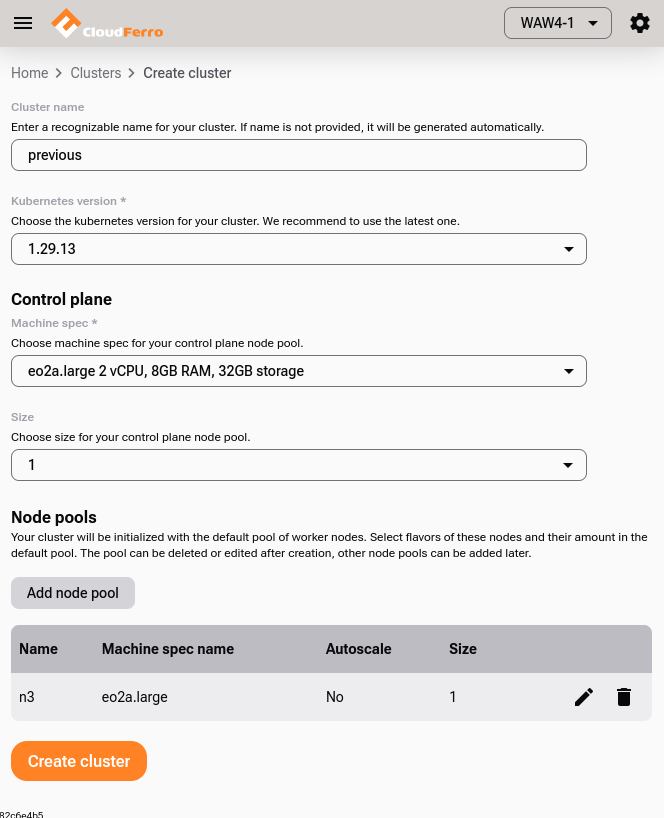
Now finish creating the node pool and click on Add node pool. That brings you back to the “create cluster form”:
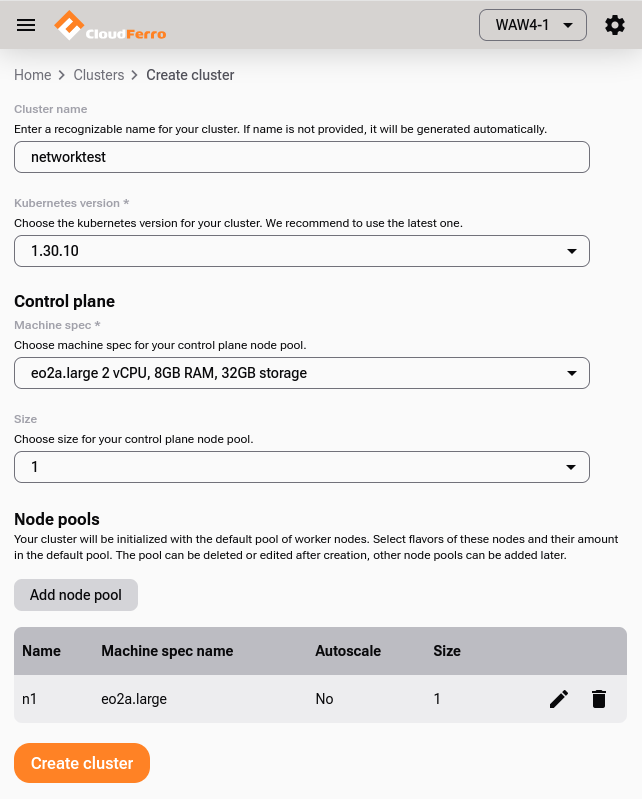
Example setup with 1 control plane and 1 worker node.
Click Create cluster to start creating the cluster.
Creating the Cluster
The status will change to  .
.
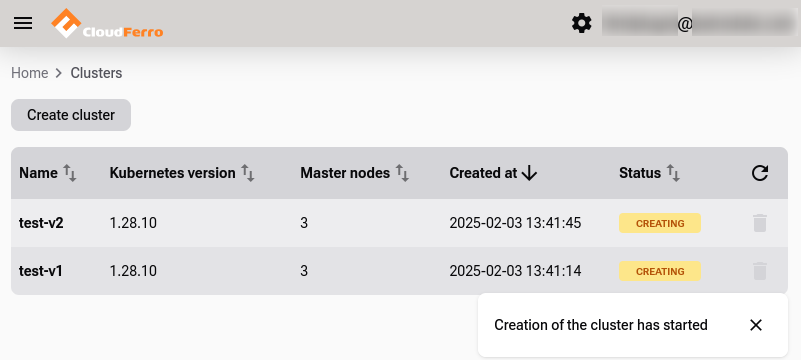
Cluster creation in progress. Status shows .
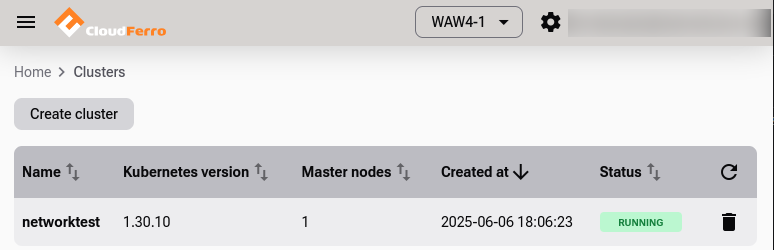
Once the creation starts, you see a list of existing Kubernetes clusters.
Cluster List View
Cluster List View will show up if there is at least one cluster present.
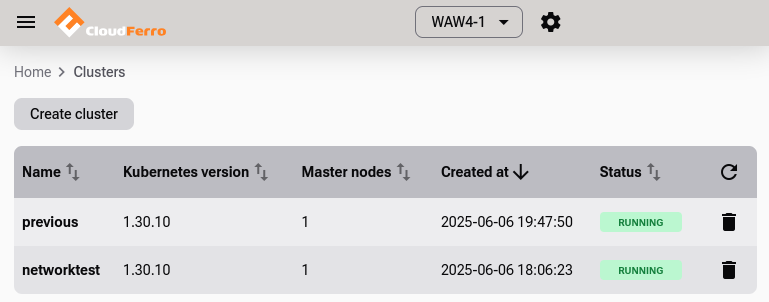
After the cluster has been created, its status will become  .
.
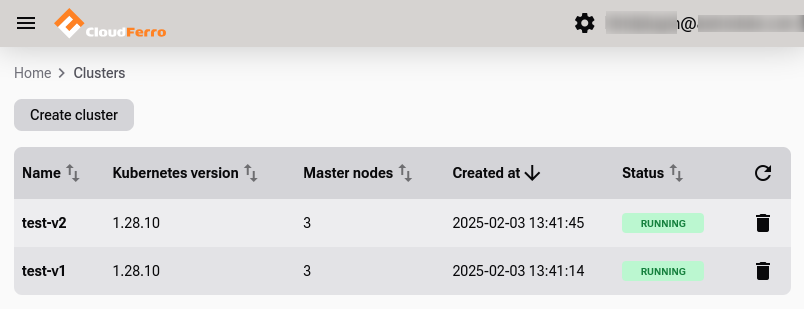
Cluster status changes to when ready.
Single Cluster View – Cluster Details
Click on cluster name in the list to open its Details view:
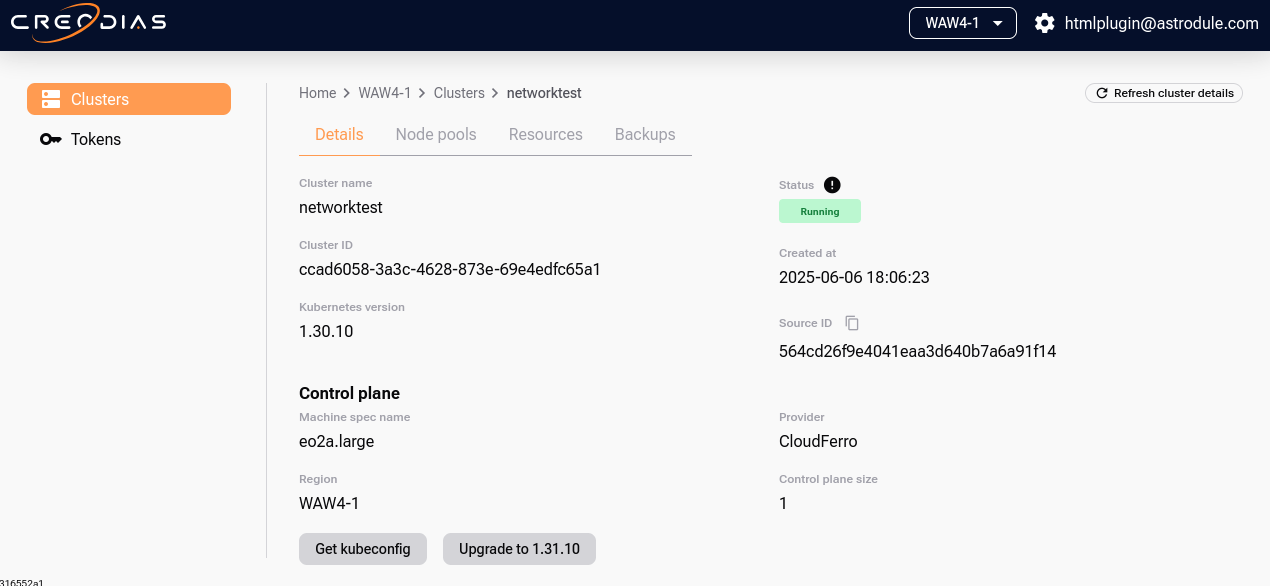
Cluster details view.
Access the Cluster Using kubectl
To connect kubectl command to the cluster, download its config file. Click on button Get kubeconfig. A file named <clustername>_config.yaml will download, in this case, it will be called networktest_config.yaml.
To configure kubectl:
export KUBECONFIG=networktest_config.yaml
Assuming that the folder already exists, you can also place the config file in a “centralized” folder:
export KUBECONFIG=$HOME/kubeconfigs/networktest_config.yaml


If you get an error like “Unable to connect to the server,” verify the config path, your network access, and that the cluster is |RUNNING|.
To verify access:
kubectl get nodes -o wide
This is the output of one such cluster:

One-node control plane cluster using kubectl.
The cluster is running and kubectl is working.
Single Cluster View – Node Pools
How to add a node pool
Click on option Node Pools to edit the existing node pool or add a new one. In the following image, we see a list of existing node pools (there is only one at the moment), as well as button Create node pool to create a new pool.
To start, click on that button and get this window on the screen:
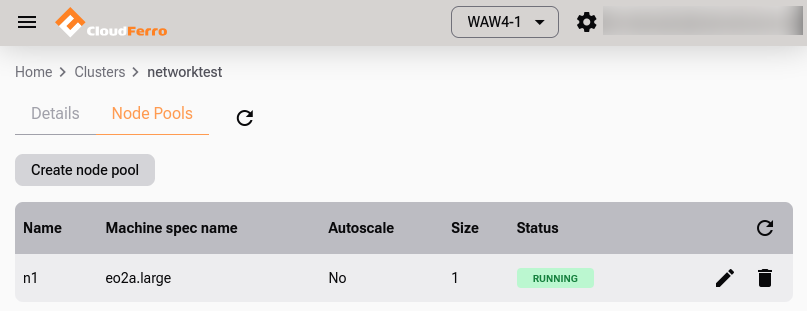
Example node pool list.
You can create another node pool by clicking on Create node pool. The process is identical to the one we already saw in the first part of the article.
How to edit a node pool
It is also possible to change the parameters of the existing node pool, by clicking on pen icon, ![]() , at the right side of n1 row.
, at the right side of n1 row.
Node pool creation screen.
You now cannot change the name or the flavor of the node pool, but it is possible to define the number of nodes in the pool in two ways:
- Define a range
Turn Autoscale option on and two new options appear in the form:
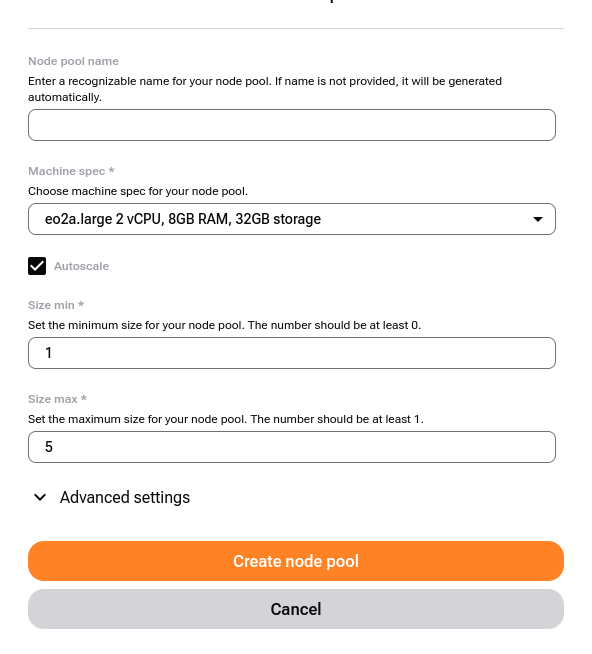
Autoscaling enabled with min/max limits.
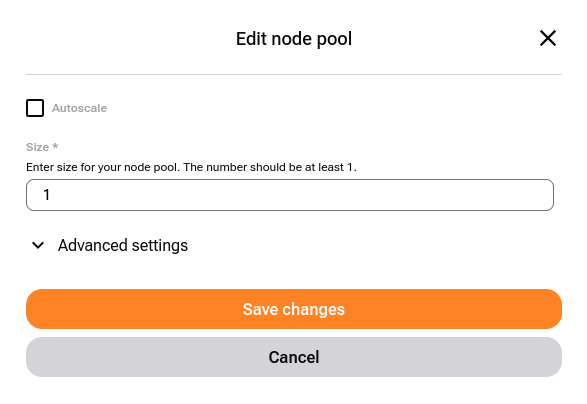
- Redefine fixed size of node pool
Just enter the required number in that field and Save changes.

Scale worker nodes manually. Status temporarily changes to
 .
.
When editing, in Advanced settings you can only change the related networks while it is not possible to change node labels and taints.
Delete a Node Pool
Click the  icon next to the node pool.
Upgrading to a Newer Version of Kubernetes
You can upgrade your cluster to a newer Kubernetes version while it is live, as long as it is not already on the latest available version.
During the upgrade process, nodes are updated gradually to minimize disruption. Workloads are also rescheduled across available nodes to ensure the continuous operation of your applications.
Our current system supports two versions of Kubernetes, 1.29.13 and 1.30.10. To illustrate the process, let us first create a cluster with the lower version mark.
Click on button Create cluster and enter the following information on screen:
The second cluster, previous, is now in status of . Eventually, that phase will turn to ; click then on cluster name row and see its config page.
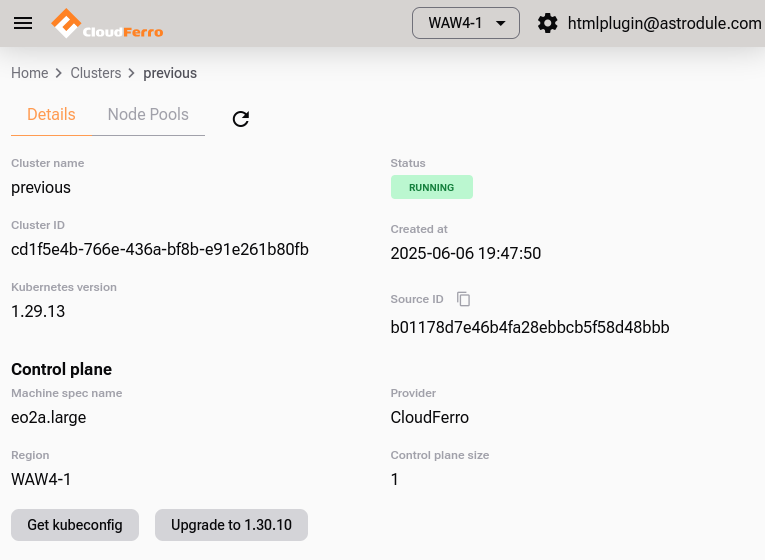
Notice that button Upgrade to 1.30.10 is active and click on it. The explanation now appears on screen:
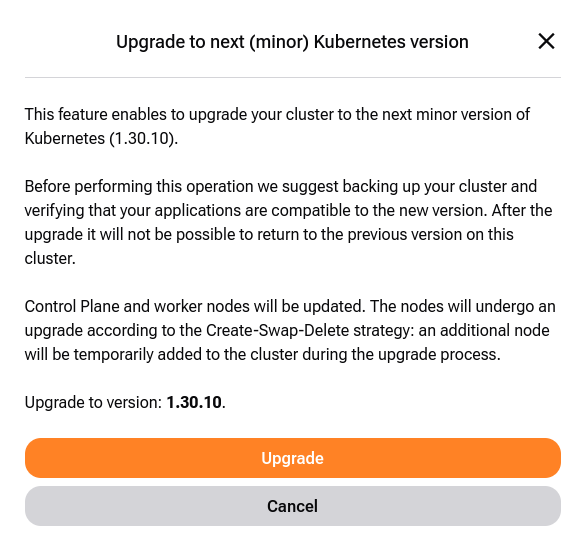
Click on Upgrade and the process will start:
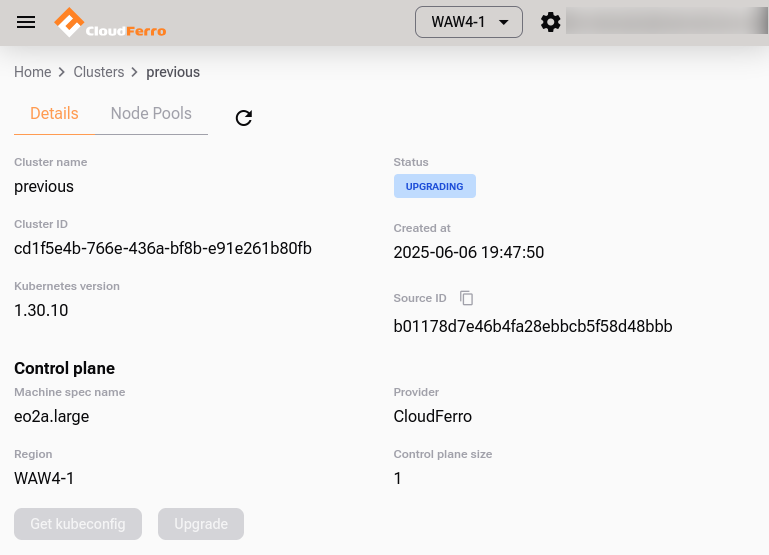
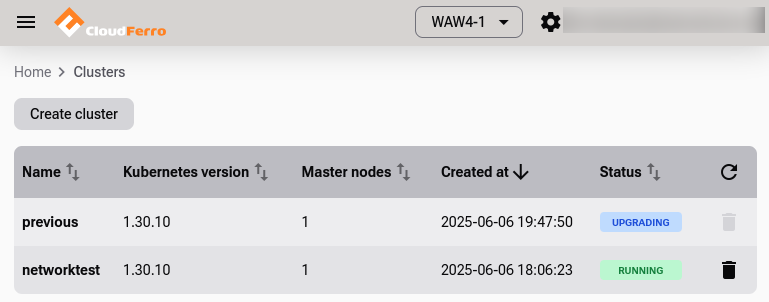
The status in cluster view will also change to  :
:
Finally, the cluster has been upgraded to 1.30.10 and is normally.
After upgrade, the Upgrade button will become inactive.
Note
New Kubernetes versions are released frequently. Always check which version is the current.
The downloaded kubeconfig remains valid across upgrades.
Cluster resources
The Resources section is a central place not only to browse what is running, but also to validate, debug, and audit the state of your Kubernetes cluster.
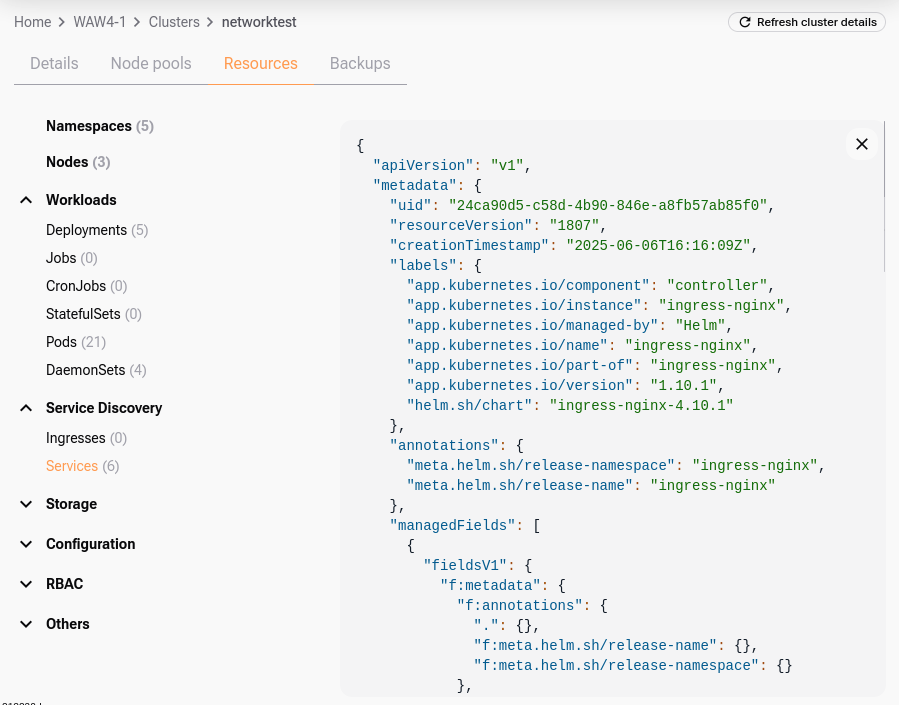
Click on Resources and see the main resource categories e.g. Namespaces, Nodes, Workloads, Storage etc:

Each category can be expanded to display applicable resources; in the image above, it is showing available Namespaces.
When clicking on a specific instance of a resource in the right-hand table, you can access the JSON representation of this resource. Here is what a typical JSON screen might look like:
Cluster backup
The single cluster view also provided button to initiate the backup of the cluster. Please see an article dedicated to the topic: /kubernetes/Managed-Kubernetes-Backups-on-Creodias.
Deleting a Cluster
To delete the cluster click on icon in its row. Then confirm that you want to delete it:
Confirm deletion using the icon.
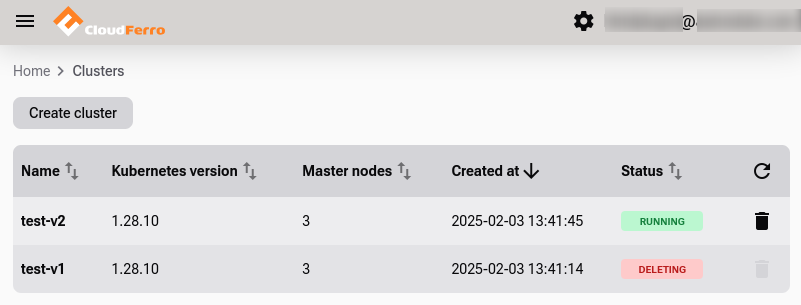
Cluster enters  state until removal completes.
Deleting a cluster will also take a couple of minutes.
Now there is one cluster less:
One cluster deleted, one .
Cluster Development Checklist
Before proceeding with deployments, make sure:
The cluster is in
You can run kubectl get nodes successfully.
At least one node pool with worker nodes is defined.
What To Do Next
With your cluster created and kubectl configured, you can start deploying pods, creating services and so on.
You can also create the Managed Kubernetes cluster using CLI:
https://github.com/CloudFerro/cf-mkcli
or with a dedicated Terraform provider:
https://registry.terraform.io/providers/CloudFerro/cloudferro/latest