How to upload custom image to Creodias cloud using OpenStack Horizon dashboard
In this tutorial, you will upload custom image stored on your local computer to Creodias cloud, using the Horizon Dashboard. The uploaded image will be available within your project alongside default images from Creodias cloud and you will be able to create virtual machines using it.
What We Are Going To Cover
How to check for the presence of image in Creodias cloud
How different images might behave
How to upload an image using Horizon dashboard
Example: how to upload image for Debian 11
What happens if you lose Internet connection during upload
Prerequisites
No. 1 Account
You need a Creodias hosting account with access to the Horizon interface: https://horizon.cloudferro.com/auth/login/?next=/.
No. 2 Custom image you wish to upload
You need to have the image you wish to upload. It can be one of the following image formats:
aki
ami
ari
iso
qcow2
raw
vdi
vhd
vhdx
vmdk
The following container formats are supported:
aki
ami
ari
bare
docker
ova
ovf
For the explanation of these formats, see article What Image Formats are Available in OpenStack Creodias cloud.
No. 3 Uploaded public SSH key
If the image you wish to upload requires you to attach an SSH public key while creating the virtual machine, the key will need to be uploaded to Creodias cloud. One of these articles should help:
Step 1: Check for the presence of image in your OpenStack cloud
Login to the Horizon dashboard: https://horizon.cloudferro.com/auth/login/?next=/.
Use main menu command Compute -> Images to see a list of images available in your project:
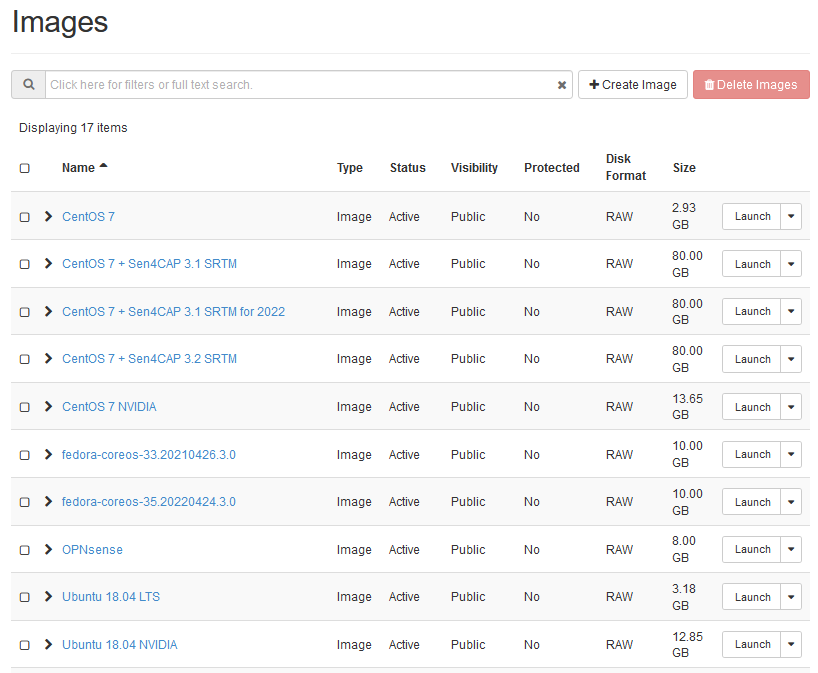
To see whether an image for the operating system you wish to upload is already present in the cloud, you can
manually scroll through the list,
if present, use buttons Back and Next to go to the next and previous page of images or
type part of your image name into the search field to filter the images
Step 2: Know the rules for the image before uploading it
Different images will behave differently on Creodias cloud, depending on how they are built.
- SSH access
If your image has SSH access enabled, you need to know what username to provide to access virtual machines created using that image. Most images will expect you to use SSH for access and will both
let you supply your own key-pair during the installation and
use it for access.
And yet, there are images which mandate the key pair to use and expect you to both
enter it during the installation and then
exclusively use it for access.
There also are images which work under completely different rules - they are outside of scope of this article.
- Web console access
Your image might have a default account which can be used to login to the web console. It might or might not have a password.
- Privileges
User accounts in the image might or might not have sudo privileges.
Here are the typical rules for default images from Creodias cloud:
- Account called eoconsole
You can login to this account via web console. First login will not require you to provide any password, but you will need to set a new password in order to access this account. It has sudo privileges.
- Account called eouser
This account can be accessed via SSH. You can authenticate to it using SSH key you provided during creation of your virtual machine. It also has sudo privileges. You will use this account in almost all applications within Creodias cloud.
This article How to access the VM from OpenStack console on Creodias explains how to enter the web console as eoconsole user and then continue using it as the eouser user. If custom image you uploaded supports web console access, you can use the web console mentioned in this article for that purpose. Please note, however, that the way of interacting with web console might be different.
By way of contrast, the rules to access the Debian image uploaded in this article (see below) are:
web console access is not allowed, so you have to use an SSH client from another machine
you can access the account called debian using SSH key you provided while creating your virtual machine
Step 3: Upload the image
Assuming you still want to upload the image, click on the Create Image button. You should see the following window:
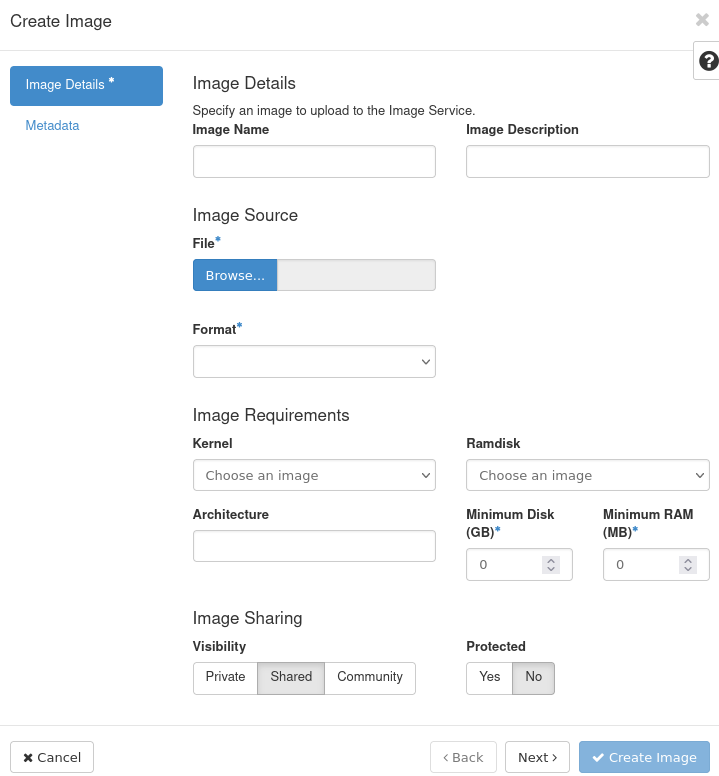
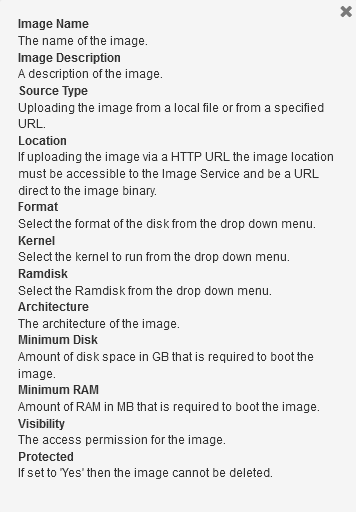
Click on the question mark in the right upper corner will supply the basic information about the options:
Enter the chosen name of the image to the text field Image Name.
Optionally, provide description of the image in the text field Image Description for your convenience.
Click the Browse button to start file selector and select the file on your computer you wish to upload.
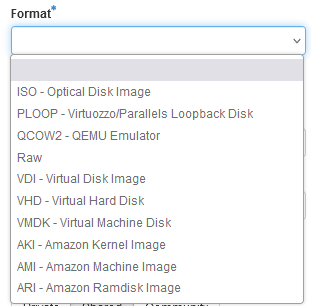
From the drop-down menu Format choose the format of your image.
If you don’t want your image to run on flavors which have RAM and storage lower than a certain value, you can specify those values using the fields Minimum Disk (GB) and Minimum RAM (MB).
In Visibility section, you can choose the following options:
Private the image will be visible within your project
Shared, you will be able to share that image with other projects
Once you have performed the above steps, click Create Image.
Wait until your image is uploaded and created. After some time, the Create Image window should disappear and you should see that your image has Saving status. Wait until it has Active status.
If your image is in the Saving status for too long, it could mean that something went wrong. Please contact Creodias customer support in this case: Help-Desk-And-Support
Your image should now be ready. Let us now download a real image and upload it to Creodias cloud.
Example: How to upload image for Debian 11
This example covers uploading of the official QCOW2 cloud image for Debian 11, which is not available on Creodias cloud by default.
On virtual machines created using that image, the default user name is debian. You can login to that account using SSH key provided during creation of virtual machine. You cannot use the web console to login there since password login is locked.
First, navigate to https://cloud.debian.org/images/cloud/bullseye/latest/ and download the image debian-11-generic-amd64.qcow2 to your computer.

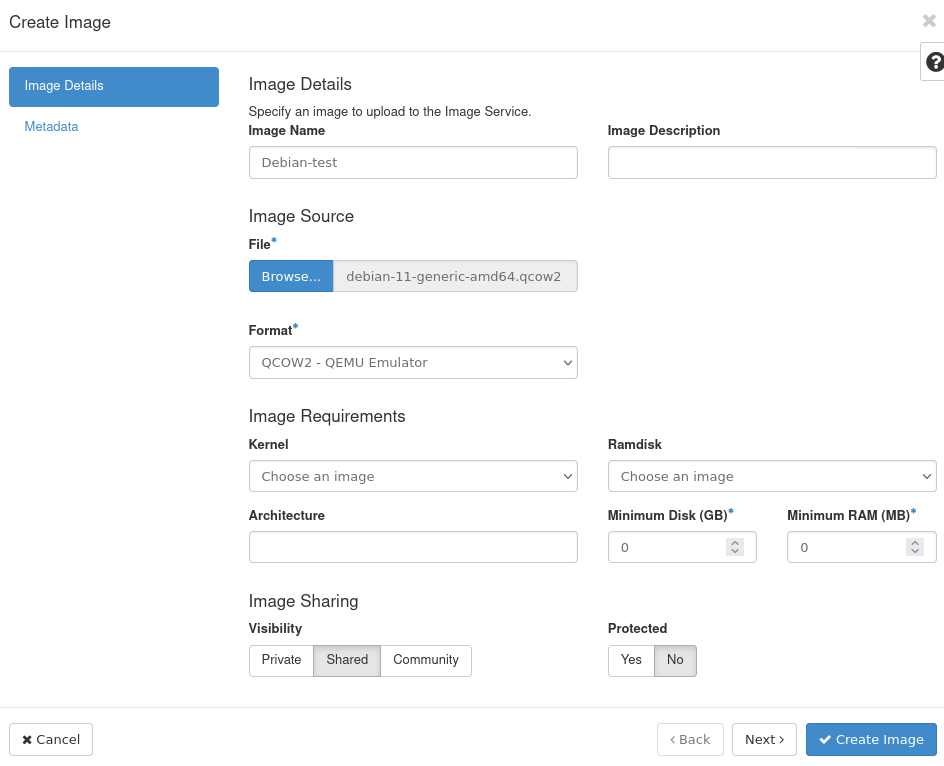
Back in Horizon, use command Compute -> Images –> Create Image to define parameters for the upload.
Enter Debian-test into the text field Image Name.
Click Browse button to choose the file downloaded from Debian website.
Select QCOW2 - QEMU Emulator for drop-down menu Format.
The window should now look like this:
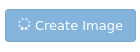
Click Create Image.
At first, the Create Image button should show an indicator that work is being performed:
After some time, the Create Image window should disappear and you should see that your image has Saving status.
The image should be ready when it has Active status:
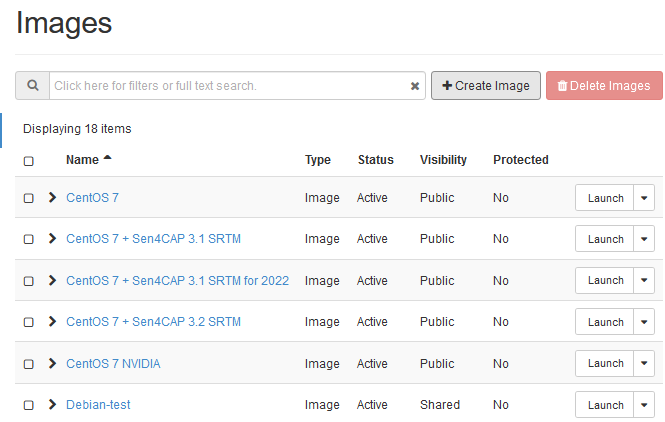
In the future, when you want to create a new virtual machine, you will have the image called Debian-test you just uploaded available to you.
Troubleshooting - Internet connection lost
Internet connection lost during upload
If you lost Internet connection while uploading an image, the process will be stopped. If you were on the Create Image window during such loss, the window will still be visible and appear as if the upload was still ongoing.
Refresh the page and login again if necessary. On the Compute -> Images section of the Horizon dashboard the image which failed to upload this way will not have the name you chose. The column Name will contain its ID. The row with such an image will look similar to this:

Use the Delete Image option do delete the image. You will get the following prompt:
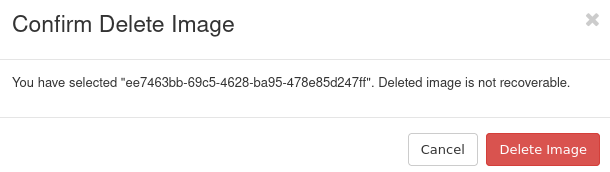
Click Delete Image.
Try uploading the image again as described in this article.
Internet connection lost during saving
If you lost your connection while the window Create Image has already disappeared and the image has the Saving status, the upload should still be successful. To verify:
refresh the page,
login again if needed,
navigate to Compute -> Images and
make sure that the image you uploaded has Active status.
If it does not have Saving or Active status, delete the image as explained above and try again. If it has Saving status, wait until it is Active.
Note
If the upload fails, the name of the image might be replaced with its ID, like in the case mentioned above.
What To Do Next
The following articles explain basics of creating a virtual machine using default images on Creodias cloud:
How to create a Linux VM and access it from Linux command line on Creodias and
How to create a Linux VM and access it from Windows desktop on Creodias
In Step 2 of these articles, you can choose the image that you uploaded.
Also, note that the rules of accessing your virtual machine might be different from the ones explained in these articles.
If you want to upload image using the OpenStack CLI client, check the following article: How to upload your custom image using OpenStack CLI on Creodias. Using CLI has the advantage of giving you a chance to resume the upload process should the Internet connection fail.
After having created a virtual machine using your custom image, you might want to configure access to EODATA, repository which contains Earth observation data. The following article contains information on how to do that if your image is based on Ubuntu, Debian or CentOS: How to mount eodata using s3fs in Linux on Creodias