How to create a Kubernetes cluster using the Creodias Managed Kubernetes launcher GUI
In this tutorial, you will learn how to create a new Kubernetes cluster using the Creodias Managed Kubernetes launcher graphical user interface (GUI). The launcher lets you create and manage Kubernetes clusters directly from your browser. To access the created cluster from your workstation, you will later use kubectl and a downloaded kubeconfig file.
Kubernetes clusters contain two groups of nodes:
- Control plane
One or more nodes that manage and coordinate the cluster.
- Node pools
Worker nodes, that is, the virtual machines that run your applications and workloads.
You can create a cluster in two valid ways:
Control plane first, node pools later – create the control plane (master nodes) and add one or more node pools afterwards.
Control plane + node pools in one flow – add one or more node pools during cluster creation.
This article shows the control plane first flow (to keep the setup steps clear). If you already know your worker requirements, you can add node pools during cluster creation instead. See: /kubernetes/Add-node-pools-to-Managed-Creodias-cluster-using-the-launcher-GUI.
What You Will Do
In this article, you will:
open the Managed Kubernetes launcher from the cloud dashboard,
define the cluster basics,
configure the control plane,
optionally add worker node pools,
create the cluster,
download the access configuration,
connect to the cluster using kubectl,
verify that the cluster is ready for use.
Prerequisites
Hosting account on Creodias
To use Creodias Managed Kubernetes, you need:
your general Creodias account,
access to the Creodias Managed Kubernetes dashboard at https://managed-kubernetes.creodias.eu.
Access to Managed Kubernetes
If you do not yet have access to the Managed Kubernetes service, contact Support and request that it be enabled for your account.
See: Helpdesk and Support
Billing and available funds
Managed Kubernetes resources on this brand are billed. Before creating a cluster, make sure that billing is enabled for your account and that sufficient funds are available for the resources you plan to use.
Warning
You must ensure that your usage stays within your intended spending level. The service will not be stopped automatically when that level is exceeded, and the full usage amount will still be billed.
Quotas and resources
On Creodias, available resources are governed through your standard cloud project quotas. Check the quotas and flavor limits available to your project before creating the cluster.
See: /cloud/Dashboard-Overview-Project-Quotas-And-Flavors-Limits-on-Creodias
If the currently available resources are not sufficient for the cluster you want to create, you can proceed in two stages:
First, create only the control plane.
Then, contact Support (see Helpdesk and Support) to request additional resources before adding worker nodes.
Installation of kubectl
You will access the cluster using kubectl. Standard installation methods for kubectl are described on the official Kubernetes page: Install Tools.
In this article, you will also learn how to point kubectl to the managed Kubernetes cluster you create.
Create a new cluster
When you first encounter the Creodias Managed Kubernetes launcher screen, it will look like this:
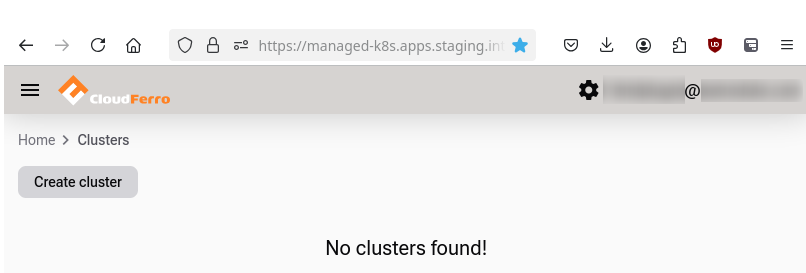
Initial Creodias Managed Kubernetes launcher interface.
Click the  button. A form will appear on the screen, allowing you to enter data for the new cluster.
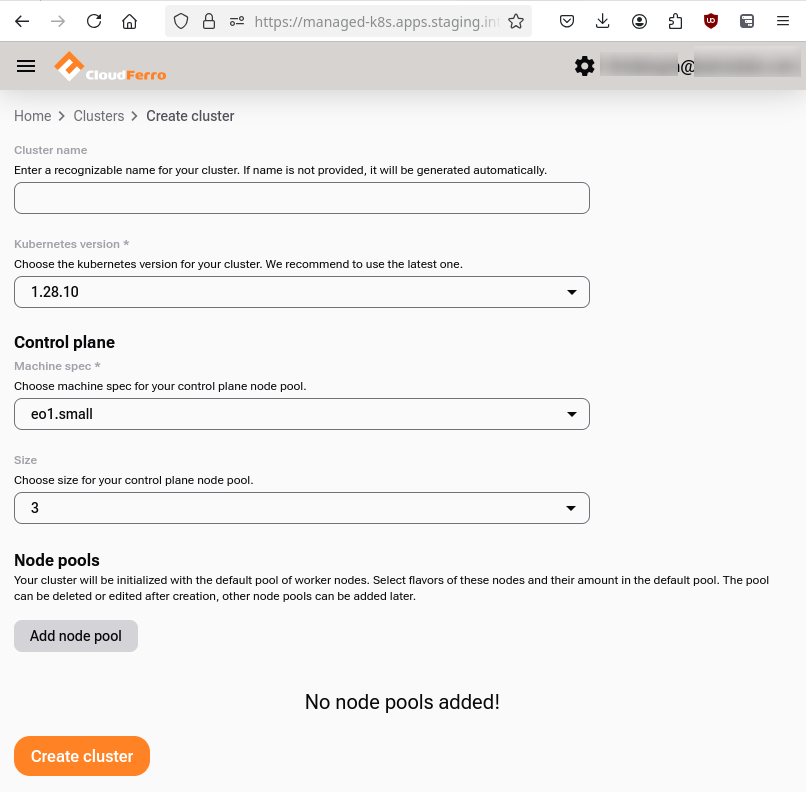
Define Cluster Name and Kubernetes Version
- Cluster Name
Enter an appropriate name for your cluster. If this field is left empty, the system will automatically generate a cluster name.
- Kubernetes Version
For new clusters, it is recommended to use the latest version. To upgrade to a newer version of Kubernetes, see /kubernetes/Upgrade-Managed-Kubernetes-on-Creodias
Add Control Plane Nodes
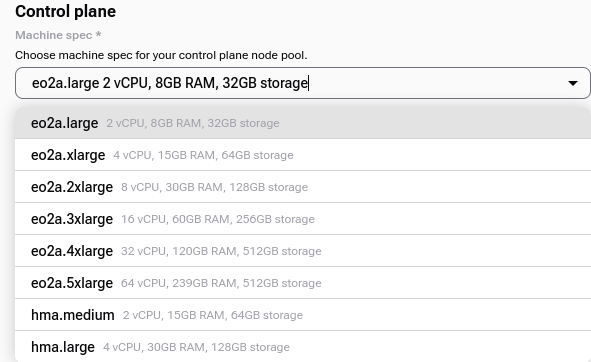
- Flavors
Select the flavor for the virtual machines in the cluster’s control plane. Here is what available flavors for the control plane typically look like:
- Size
Choose 1, 3, or 5 control plane nodes.
Use 1 for testing, and 3 for production-grade High Availability.
Tip
For production-grade reliability, choose 3 control plane nodes to achieve high availability. Use 1 only for development or testing.
Adding node pools (optional)
You can add node pools now (during cluster creation) or later (after the control plane is created). See: /kubernetes/Add-node-pools-to-Managed-Creodias-cluster-using-the-launcher-GUI
Click Create cluster to start creating the cluster.
Creating the Cluster
The status will change to  .
.
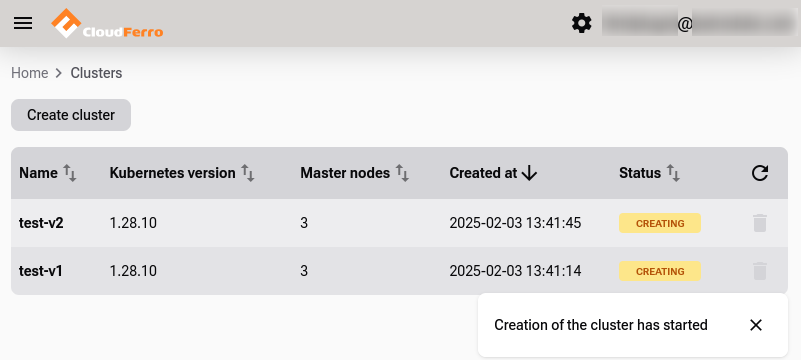
Cluster creation in progress. Status shows .
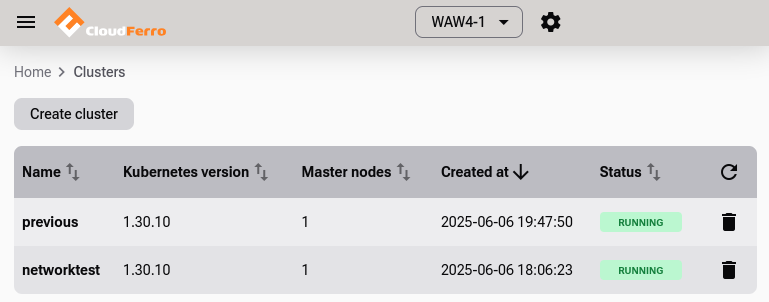
Once the creation starts, you see a list of existing Kubernetes clusters.
Cluster List View
Cluster List View will show up if there is at least one cluster present.
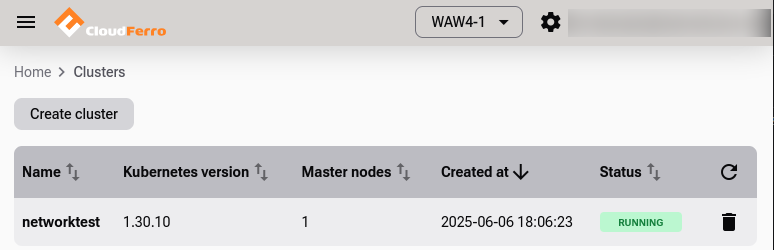
After the cluster has been created, its status will become  .
.
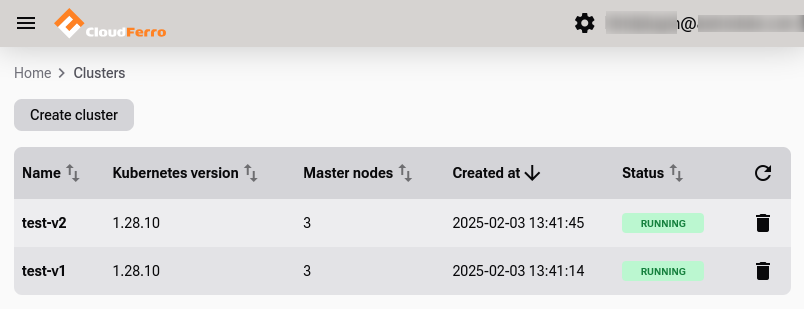
Cluster status changes to when ready.
Single Cluster View: Cluster Details
Click the cluster name in the list to open its Details view.
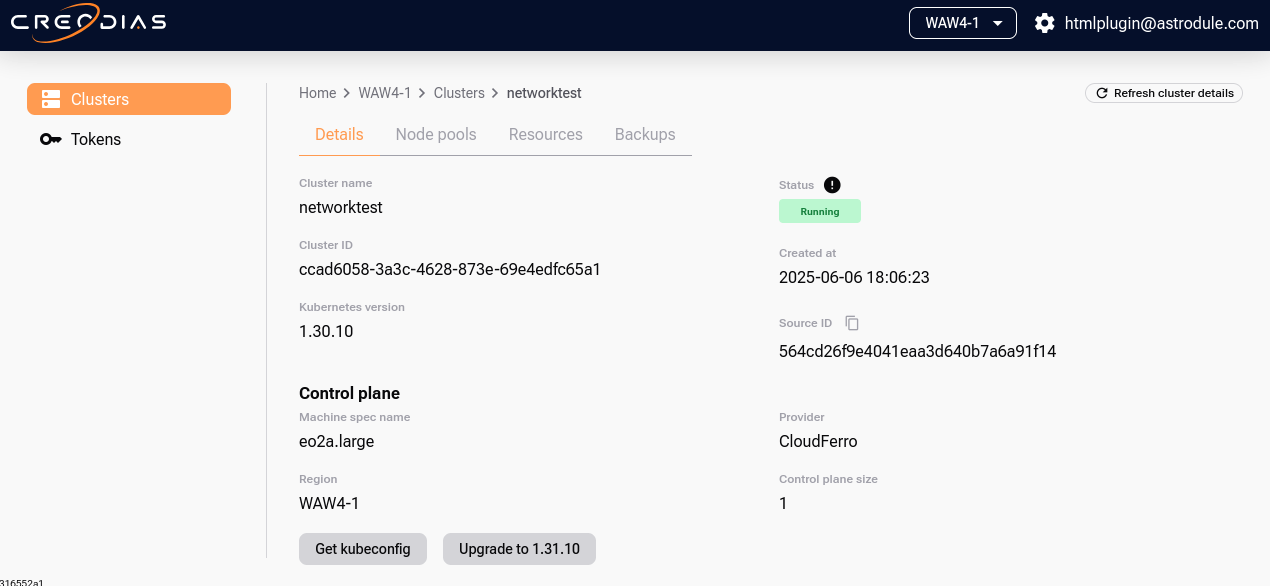
Cluster details view.
Access the Cluster Using kubectl
To connect kubectl command to the cluster, download its config file. Click on button Get kubeconfig. A file named <clustername>_config.yaml will download (in this case, it will be called networktest_config.yaml).
To configure kubectl:
export KUBECONFIG=networktest_config.yaml
Assuming that the folder already exists, you can also place the config file in a “centralized” folder:
export KUBECONFIG=$HOME/kubeconfigs/networktest_config.yaml
If you get an error like “Unable to connect to the server,” verify the config path, your network access, and that the cluster is .
To verify access:
kubectl get nodes -o wide
The following example shows the output for such a cluster:

The output of the kubectl command, showing one control and one worker node.
The cluster is running and kubectl is working.
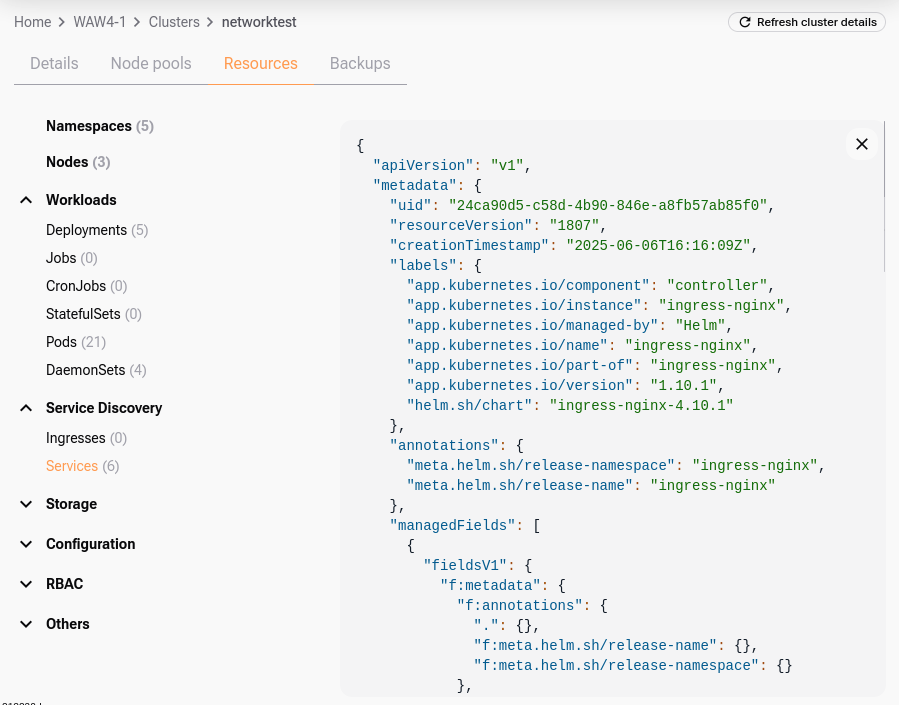
Cluster resources
The Resources section is a central place not only to browse what is running, but also to validate, debug, and audit the state of your Kubernetes cluster.
Click on Resources and see the main resource categories e.g. Namespaces, Nodes, Workloads, Storage etc:

Each category can be expanded to display applicable resources; in the image above, it is showing available Namespaces.
When clicking on a specific instance of a resource in the right-hand table, you can access the JSON representation of this resource. Here is what a typical JSON screen might look like:
Cluster backup
The single cluster view also provides a button for starting a cluster backup. Please see an article dedicated to the topic: /kubernetes/Managed-Kubernetes-Backups-on-Creodias.
Deleting a Cluster
To delete the cluster click on  icon in its row. Then confirm that you want to delete it:
Confirm deletion using the icon.
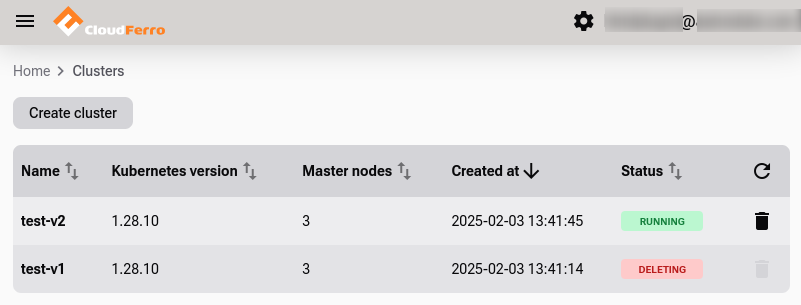
Cluster enters  state until removal completes.
Deleting a cluster will also take a couple of minutes.
Now there is one cluster less:
One cluster deleted, one .
Deploying an application on your cluster
Before proceeding with deployments, make sure:
The cluster is in
You can run kubectl get nodes successfully.
What To Do Next
With your cluster created and kubectl configured, you can start deploying pods, creating services and so on.
To run workloads, you typically add worker nodes by creating a node pool. See article /kubernetes/Add-node-pools-to-Managed-Creodias-cluster-using-the-launcher-GUI.
To upgrade to a newer version of Kubernetes, see /kubernetes/Upgrade-Managed-Kubernetes-on-Creodias
You can also create Kubernetes clusters with Terraform: /kubernetes/Create-a-Managed-Kubernetes-Cluster-with-Terraform-on-Creodias.